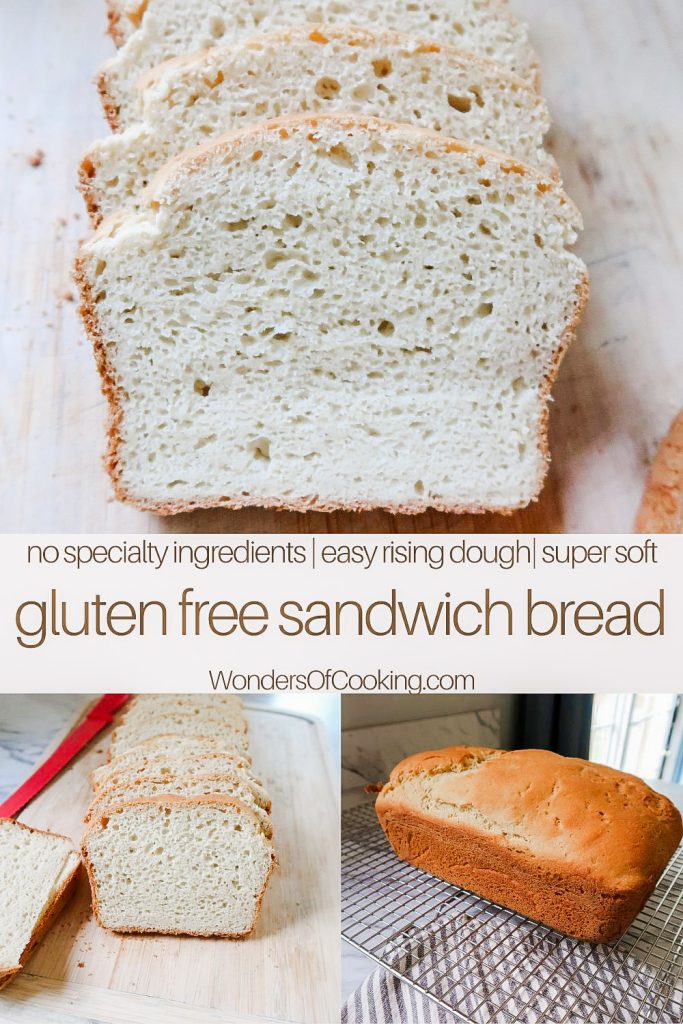
This is the best Gluten Free Bread Recipe. It makes the perfect soft, tall gluten-free sandwiches you can actually enjoy.
This gluten free sandwich bread recipe is simple, reliable, and made without any unusual ingredients or complicated flour blends. The result is a tender, sliceable gluten free sandwich bread that works for everything from toast to lunch sandwiches. Instead of spending $6–$7 or more on dry store-bought loaves, you can make this at home for around $1.50 per loaf or less. That's a significant savings over time, especially if multiple people in your household are gluten-free.
Plus, there's just something fulfilling about homemade bread.
As an Amazon Associate, I earn from qualifying purchases. This post contains affiliate links for products I use and love. You can read my full disclosure here. All thoughts and opinions expressed are my own. Thank you for supporting Wonders of Cooking so that I can continue to provide you with free gluten-free recipes.
Looking For More Gluten Free Baking Recipes?
If you love this recipe, you'll love my easy gluten-free dinner rolls. They make a really nice batter that is scooped into a cake pan, without any working of dough. I also have some sourdough discard versions: gluten-free sourdough dinner rolls and gluten-free sourdough sandwich bread.
If you love all things gluten-free and bready, you'll want to try these gluten-free breadsticks, gluten-free bread bowls, buckwheat bread, cheddar bay biscuits, honey oat bread, or maybe even my gluten free sourdough boule.
What Can I Make With Homemade Gluten-Free Sandwich Bread?
- Sandwiches: The obvious choice. Use it for classic lunchmeat sandwiches, PB&Js, breakfast sandwiches, or any favorite sandwich recipe.
- Toast: Enjoy toasted with butter and cinnamon sugar, cream cheese, or your favorite jams and jellies. It also works well in a panini press or for hot, toasted sandwiches (especially after the bread has been frozen and thawed).
- French Toast: Perfect for French toast or French toast sticks. For best results, use fresh bread that’s been left at room temperature for 1–2 days rather than frozen and thawed.
- Grilled Cheese: Soft on the inside, golden and crisp on the outside.

- Homemade Croutons. I haven't tried this bread in my Gluten Free Croutons recipe yet, but I will update as soon as I have.
What Kind of Loaf Pan Should I Use to Bake Gluten Free Bread?
Gluten-free bread loaves tend to be smaller and don’t rise as tall as traditional wheat bread. For the best height and shape, use a 9×5-inch or 9×4-inch loaf pan. Larger pans can cause the bread to bake up too short and flat, making it difficult to use for sandwiches.

The Best Gluten Free Bread Recipe:
- Prepare a 9x5 loaf pan by greasing the bottom and halfway up the sides with butter or cooking spray.
- In a stand mixer fitted with the paddle attachment, or in a large bowl, combine the dry ingredients. I use a handheld electric mixer.
- Add the wet ingredients and mix on low until just combined. Increase to medium speed and mix for 5 minutes, occasionally scraping down the bowl. This incorporates air into the dough for a soft crumb. The batter should be slightly thicker than cake batter.
- Pour the batter into the prepared loaf pan and use a silicone spatula to smooth the top evenly.

Rising:
- Cover the loaf pan with plastic wrap. Tip: Spraying the underside of the plastic wrap with cooking spray helps prevent sticking.
- Place the loaf pan in a warm spot and let it rise for 45–60 minutes, or until it's about 1.5 times its original size. To avoid overproofing, don’t let it double. In warm or humid climates or in the summertime, reduce the rise time to 30 minutes.

Baking:
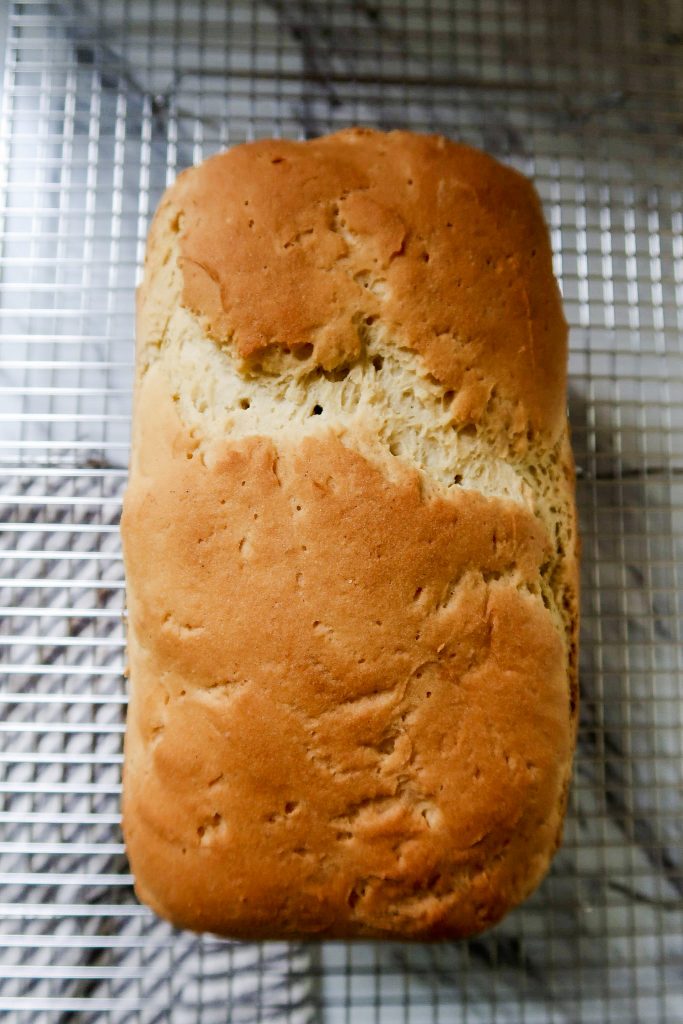
- Around the halfway mark, position a rack in the center of the oven and preheat to 350 F.
- Remove the plastic wrap and bake the bread for 40–45 minutes, until the internal temperature reaches 205°F. About halfway through, once the top is golden, loosely tent it with foil to prevent over-browning.

Cooling & Slicing:
- Remove the bread from the oven and let it cool in the pan for 5 minutes, then transfer it to a wire rack to cool completely.
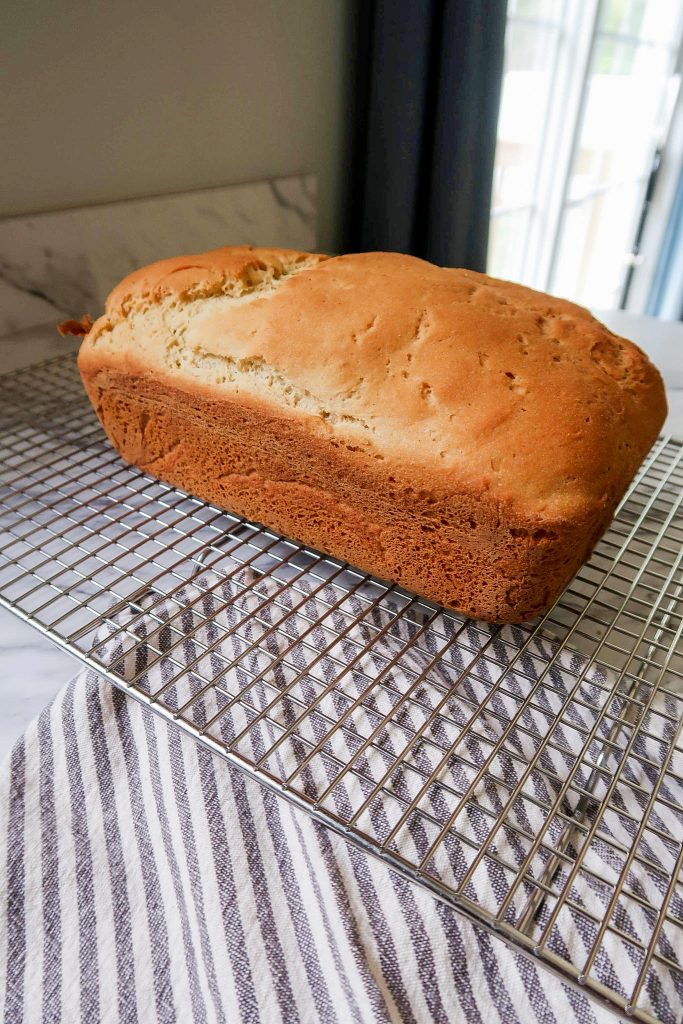
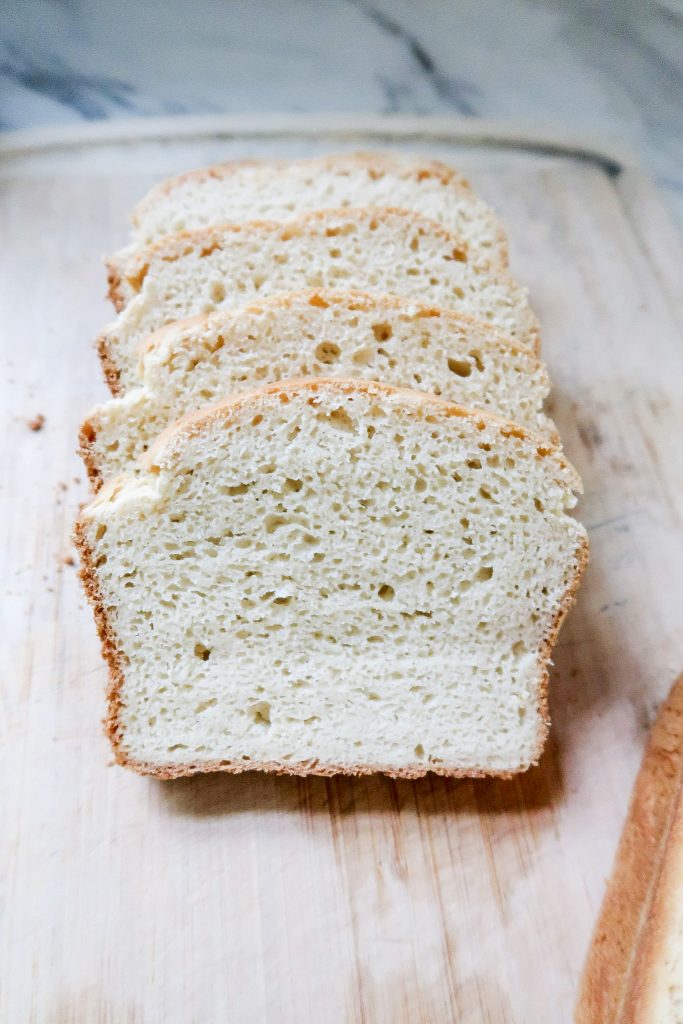
- Let the bread cool completely, about 3 hours, before slicing with a bread knife. Serve as desired.
Slice to your preferred thickness. I like mine about 1-inch thick and usually get 16 slices per loaf.

Gluten Free Bread Recipe Storage Instructions:
Gluten-free bread is best enjoyed fresh, especially on the first day it's baked, which is perfect for cold sandwiches.
I recommend slicing the bread and freezing any you don't plan to eat. To prevent the slices from sticking together, avoid stacking them. Frozen and thawed bread will be slightly drier and more crumbly, so I find it's best toasted in a pan with butter, like for a grilled cheese or French toast.


Did You Make This Gluten Free Sandwich Bread Recipe? Leave a 5-Star Rating Below!

Gluten Free Bread Recipe - Soft Gluten Free Sandwich Bread
Your rating helps support the making of more tested, delicious gluten-free recipes.
Ingredients
Dry Ingredients:
- 3 cups high quality gluten-free all-purpose flour containing xanthan gum *I've only tested this recipe with King Arthur's Measure for Measure
- ½ tbsp. xanthan gum*
- 1 packet of instant yeast I use Fleischmann's RapidRise
- 1 teaspoon baking powder
- 1 teaspoon salt
Wet Ingredients:
- 1 ½ cups water warmed to 110° F.
- 2 large eggs room temperature
- ¼ cup honey
- ¼ cup vegetable oil or other neutral oil
Instructions
- Prepare a 9x5 loaf pan by greasing the bottom and halfway up the sides with butter or cooking spray.
- In a stand mixer fitted with the paddle attachment, or in a large bowl, combine the dry ingredients. I use a handheld electric mixer.3 cups high quality gluten-free all-purpose flour containing xanthan gum, ½ tbsp. xanthan gum*, 1 packet of instant yeast, 1 teaspoon baking powder, 1 teaspoon salt
- Add the wet ingredients and mix on low until just combined. Increase to medium speed and mix for 5 minutes, occasionally scraping down the bowl. This incorporates air into the dough for a soft crumb. The batter should be slightly thicker than cake batter.1 ½ cups water warmed to 110° F. , 2 large eggs, ¼ cup honey, ¼ cup vegetable oil
- Pour the batter into the prepared loaf pan and use a silicone spatula to smooth the top evenly.
- Cover the loaf pan with plastic wrap. Tip: Spraying the underside of the plastic wrap with cooking spray helps prevent sticking.
- Place the loaf pan in a warm spot and let it rise for 45–60 minutes, or until it's about 1.5 times its original size. To avoid overproofing, don’t let it double. In warm or humid climates or in the summertime, reduce the rise time to 30 minutes.
- Around the halfway mark, position a rack in the center of the oven and preheat to 350 F.
- Remove the plastic wrap and bake the bread for 40–45 minutes, until the internal temperature reaches 205°F. About halfway through, once the top is golden, loosely tent it with foil to prevent over-browning.
- Remove the bread from the oven and let it cool in the pan for 5 minutes, then transfer it to a wire rack to cool completely.
- Let the bread cool completely, about 3 hours, before slicing with a bread knife. Serve as desired. Tip: Slice to your preferred thickness—I like mine about 1 inch thick and usually get 16 slices per loaf.


Annette
Not sure if this will help, but make sure your water is 110degF, and not any hotter. For me, this helped my bread not fall. I had also read about this from other gluten free recipes. I do think that the environment, like where you live, has something to do with how well bread cooks. I've made this recipe about 8 times and its only ever come out perfect like 2 times haha
DIANNE
ARE ANY OF YOUR BREAD RECIPES ADAPTABLE FOR A BREAD MACHINE? I HAVE A MACHINE WITH A GLUTEN FREE SETTING I HAVE USED SUCCESSFULLY WITH A PREPACKAGED MIX. IT LOOKS AS THOUGH THIS WOULD MAKE ABOUT A TWO POUND LOAF. THANK YOU!!
Shawn
I love taste of this bread. But I have made it twice and both times it has collapsed in the middle. Am I doing something wrong. I've followed the recipe exactly how it's written. Do you have any suggestions on what I'm doing wrong?
madison
Hi Shawn, I'm so glad you love the flavor of the bread! Let me see if I can help troubleshoot. This bread is a very quick riser, which means it can over-proof in no time. So many factors can go into bread rising, but the main thing to note here is that humidity and warmer air temperatures will make the bread rise faster. It's important to reduce the rise time in those cases - somewhere around 30 minutes may be enough. Additionally, since you are having repeated trouble in your environment, you could reduce the amount of yeast called for to get a slower, more stable rise. I would start with half of a packet (3 1/2 grams). You want this bread to rise about 1.5x its size, not double. Signs of over-proofing include a jiggly and fragile texture as well as air bubbles on the surface. (I will update the recipe with these additional tips.) Please let me know if this works for you!
Kristi Clark
new to sourdough Gluten free and regular, I was reading the recipe you have here as i want to bake this weekend, I don't see where you have added any of the sourdough starter or discard, am I missing something?
madison
Hi Kristi, that sounds exciting! Sourdough is a fun hobby to pick up. You are correct - this sandwich bread is not sourdough, but plain old gluten-free. I have another recipe on my site for sourdough sandwich bread that is inspired by this one. Here is the link to my Sourdough Sandwich Bread: Gluten Free Sourdough Sandwich Bread | Sourdough Discard Recipes