Want to learn how to make a gluten free sourdough starter—without the hassle and with the best chance of success? You’re in the right place!
Gluten-free baking is already a niche, and adding sourdough to the mix makes it even more specialized. With so much misinformation out there, I’ve sifted through it all to bring you the most reliable, comprehensive guide possible.

As an Amazon Associate, I earn from qualifying purchases. This post contains affiliate links for products I use and love. You can read my full disclosure here. All thoughts and opinions expressed are my own. Thank you for supporting Wonders of Cooking so that I can continue to provide you with free gluten-free recipes.
What to expect:
In this post, I'll teach you how to:
- Make a gluten-free sourdough starter that’s active and bubbly within 1-2 weeks
- Maintain and store your starter, whether you're a frequent or occasional baker
- Choose the right tools to get started
- Understand basic sourdough terminology
- Differentiate between active sourdough starter and discard, and when to use each
- Troubleshoot common issues with a gluten-free sourdough starter FAQ
- Join my Facebook group, Gluten Free Sourdough Baking Recipes and Advice, to share photos, recipes, and get live advice.
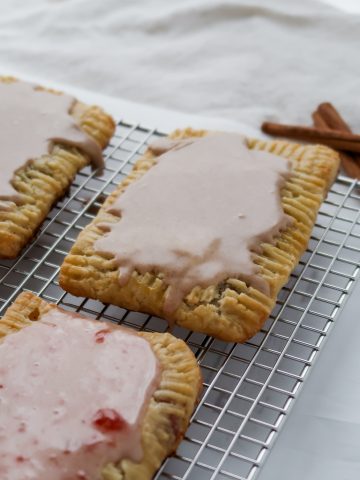
This method for creating a gluten-free starter will give you a delicious foundation for gluten free sourdough bread and plenty of discard to use in recipes, such as gluten free sourdough pancakes, gluten free sourdough crackers, gluten free sourdough banana bread, gluten free sourdough pizza crust, gluten free sourdough pie crust.

What is sourdough? How does it work?
A lot of science is happening to make sourdough possible. Essentially, sourdough involves cultivating an active colony of wild yeast (the beneficial bacteria) that can leaven bread and other baked goods.
When flour and water are mixed, they provide food (sugars and starches) for the microbes—like lacto bacteria and acid-tolerant yeasts—found in the flour and the surrounding environment. These bacteria and yeasts consume the sugars, producing acids and alcohol byproducts that prevent harmful microbes from growing. The lactic acid they produce gives sourdough its signature "sour" flavor. Over time, the yeast and lactic acid bacteria grow stronger, generating enough CO2 to aerate the starter (and make bread rise!).
Note: Since yeast and bacteria from the environment start feeding on the flour and water right away, it’s important to establish a healthy colony of good bacteria before using the starter. In the beginning, bad microbes may be present, and the starter could have odd smells. After about a week, the starter should develop a strong colony of lactic acid bacteria (like those in yogurt and cheese), which makes the starter acidic enough to kill off any unwanted microbes. By this point, it should smell pleasantly yeasty.
What are the benefits of eating sourdough?
Sourdough is well known for its digestive benefits. While it does contain gut-friendly bacteria like lactobacillus, these probiotics are killed during baking, so they don’t provide probiotic absorption. That said, sourdough is still a fermented food. During fermentation, the wild yeast and bacteria help predigest the starches in the flour, which can make baked goods easier to digest and may help keep blood sugar levels more stable. For these reasons, sourdough is often considered gentler on the gut.
For those living with Celiac disease (like myself), we often rely heavily on rice-based products. Sourdough offers an opportunity to incorporate a wider variety of gluten-free grains, such as sorghum, millet, or buckwheat, adding both diversity and nutritional value to a gluten-free diet.

Can you really make a gluten free sourdough starter?
Absolutely! The main difference between a gluten-free starter and a traditional wheat-based starter is simply the use of gluten-free flour. You can even experiment with various types of gluten-free flours, or combine several, to create your starter.
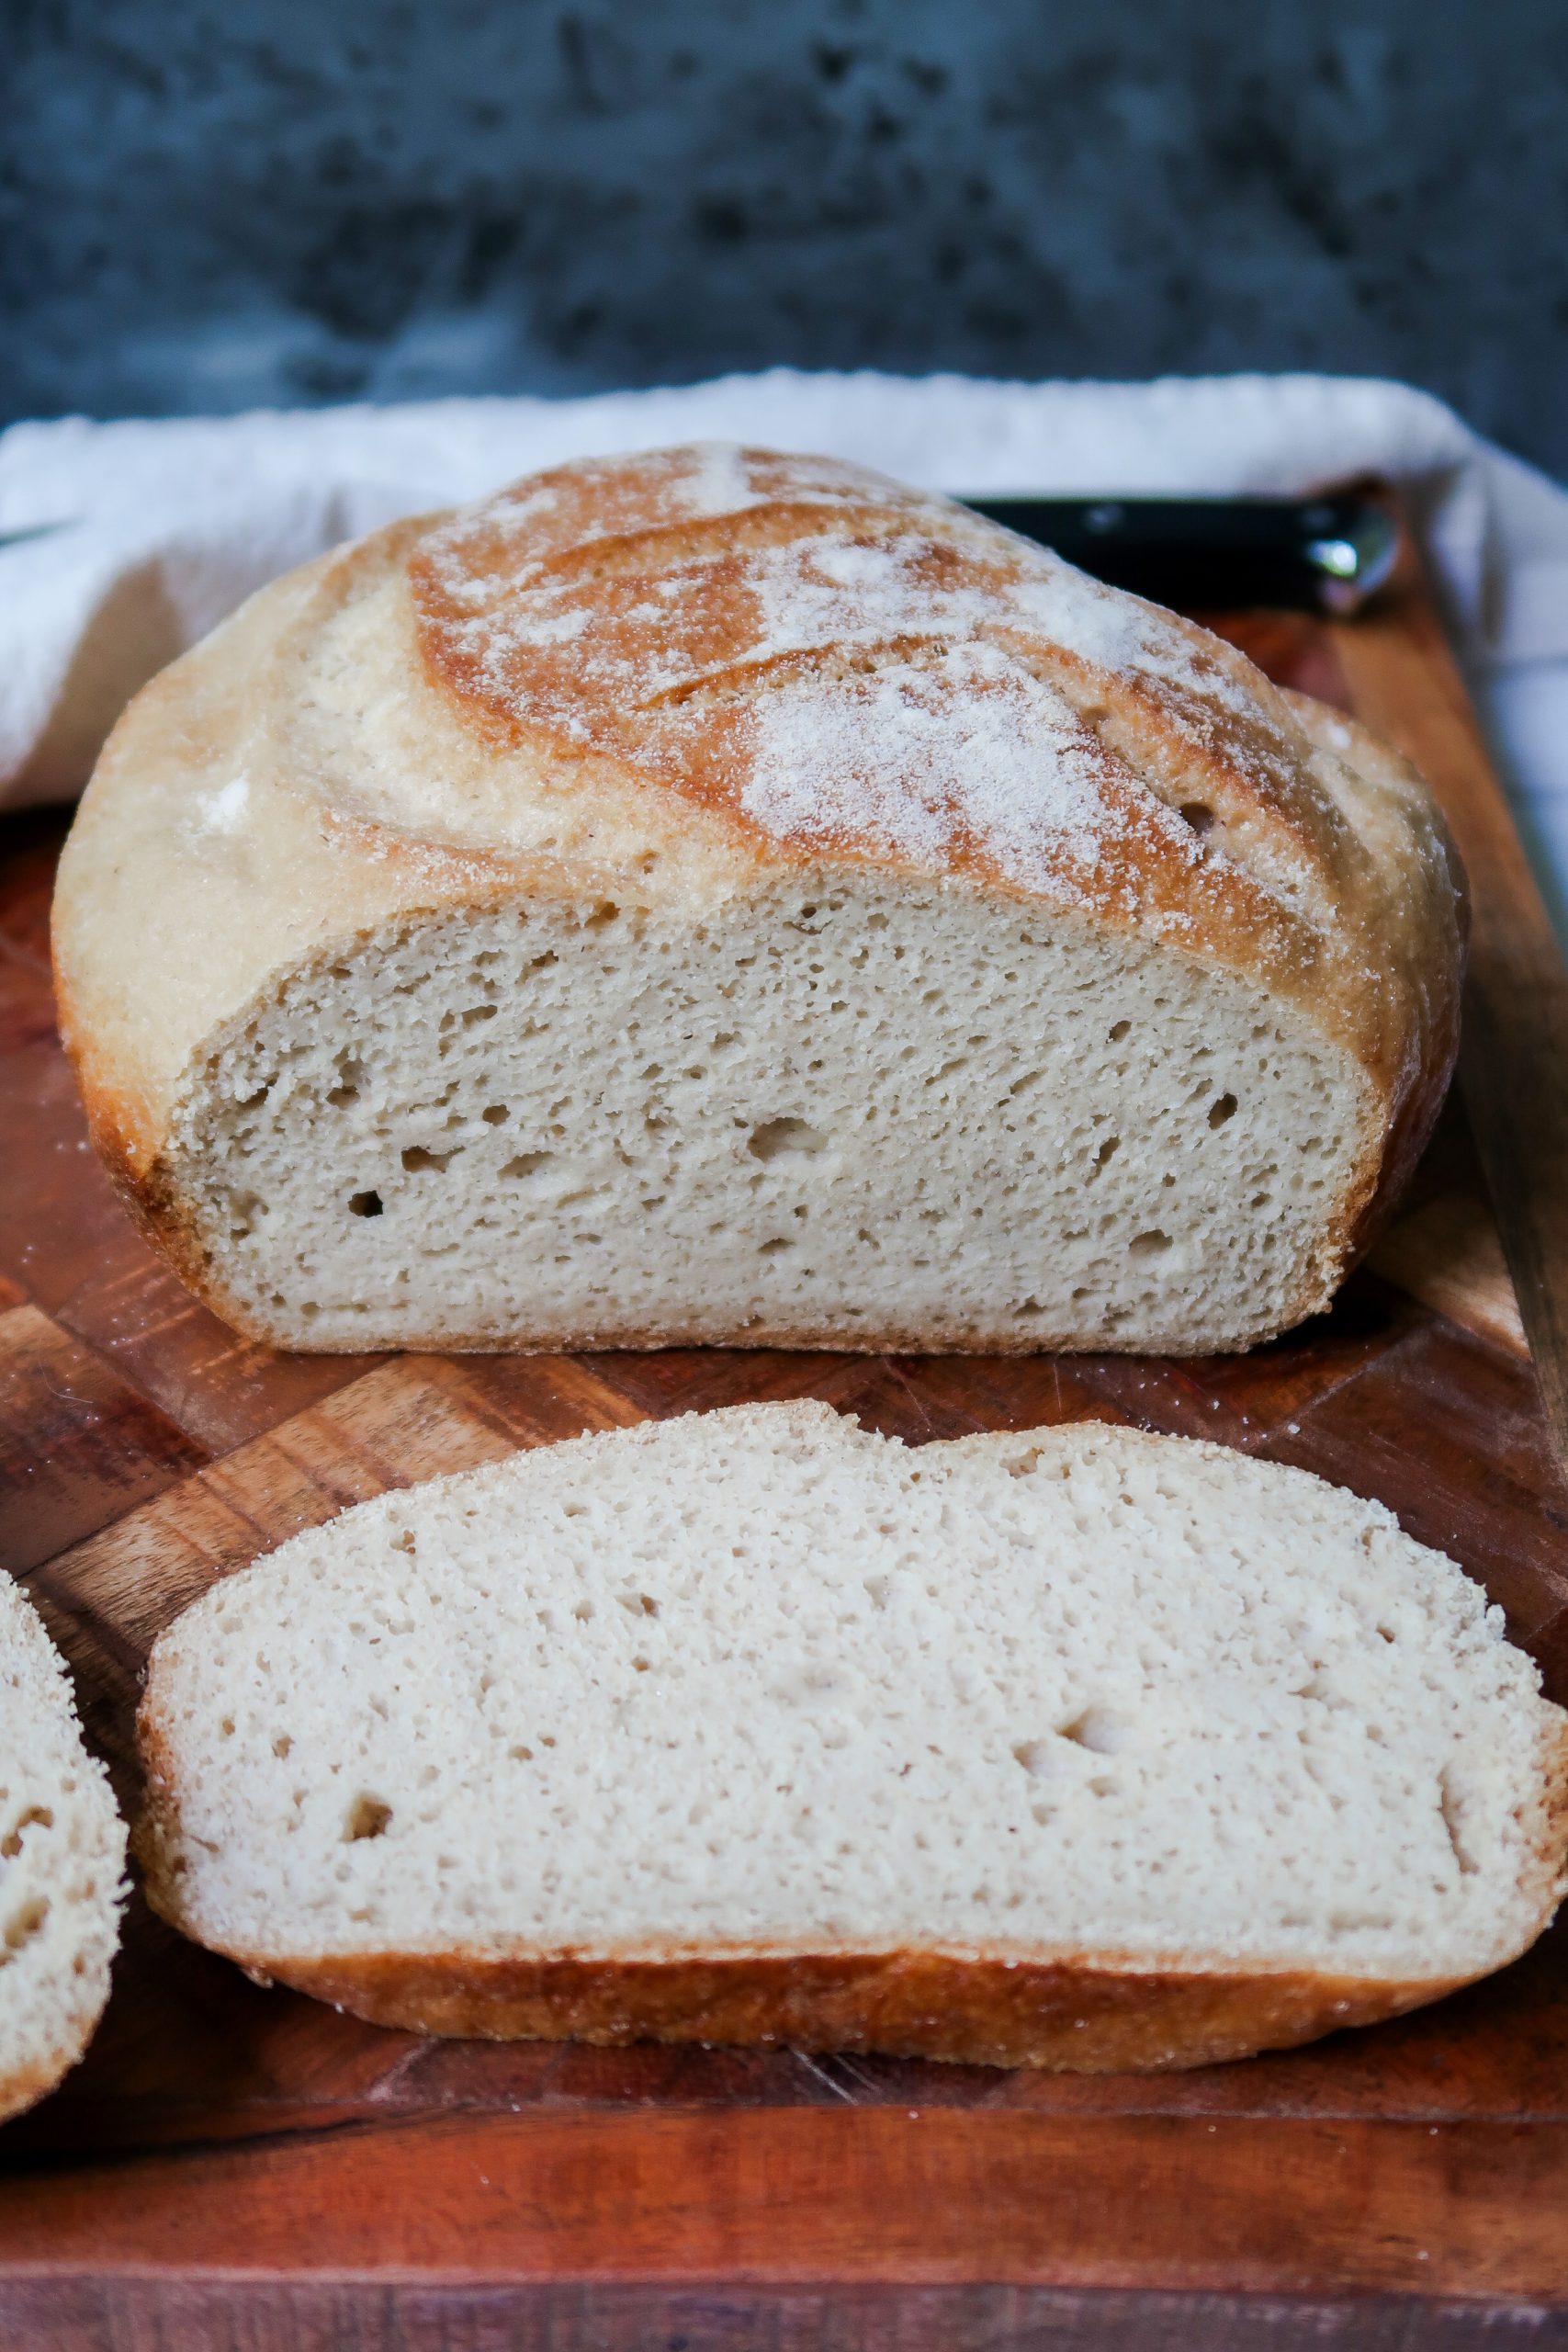
A gluten-free sourdough starter may not rise as much as a traditional one, but it can still produce delicious gluten-free baked goods.
Don't want to make a starter from scratch? This Dehydrated Starter Culture comes with easy-to-follow instructions for maintaining it for years. I also love this website because they offer kits for cheesemaking, yogurt, kombucha, and fermented vegetables. You can also find the gluten-free starter is available for purchase on Amazon here.

Which gluten-free flours should I use?
I currently recommend three types of gluten-free flours for starters: super fine brown rice flour, sorghum flour, and millet flour. A 100% brown rice flour starter is the easiest to maintain for beginners. Sorghum is also beginner-friendly but absorbs water a bit differently and may require slight adjustments to the ratio. If your goal is to incorporate more whole grains into your diet, you can gradually transition to using a combination of flours. For example, two months into maintaining my starter, I switched to using half brown rice flour and half sorghum.
Buckwheat flour can be used to create a gluten-free sourdough starter, although I haven't personally worked with it. Some people have reported that the top layer of buckwheat starters can turn pink, which may be mistaken for mold, making it less beginner-friendly. Additionally, buckwheat starters may not appear as active initially and can take longer to develop bubbles.

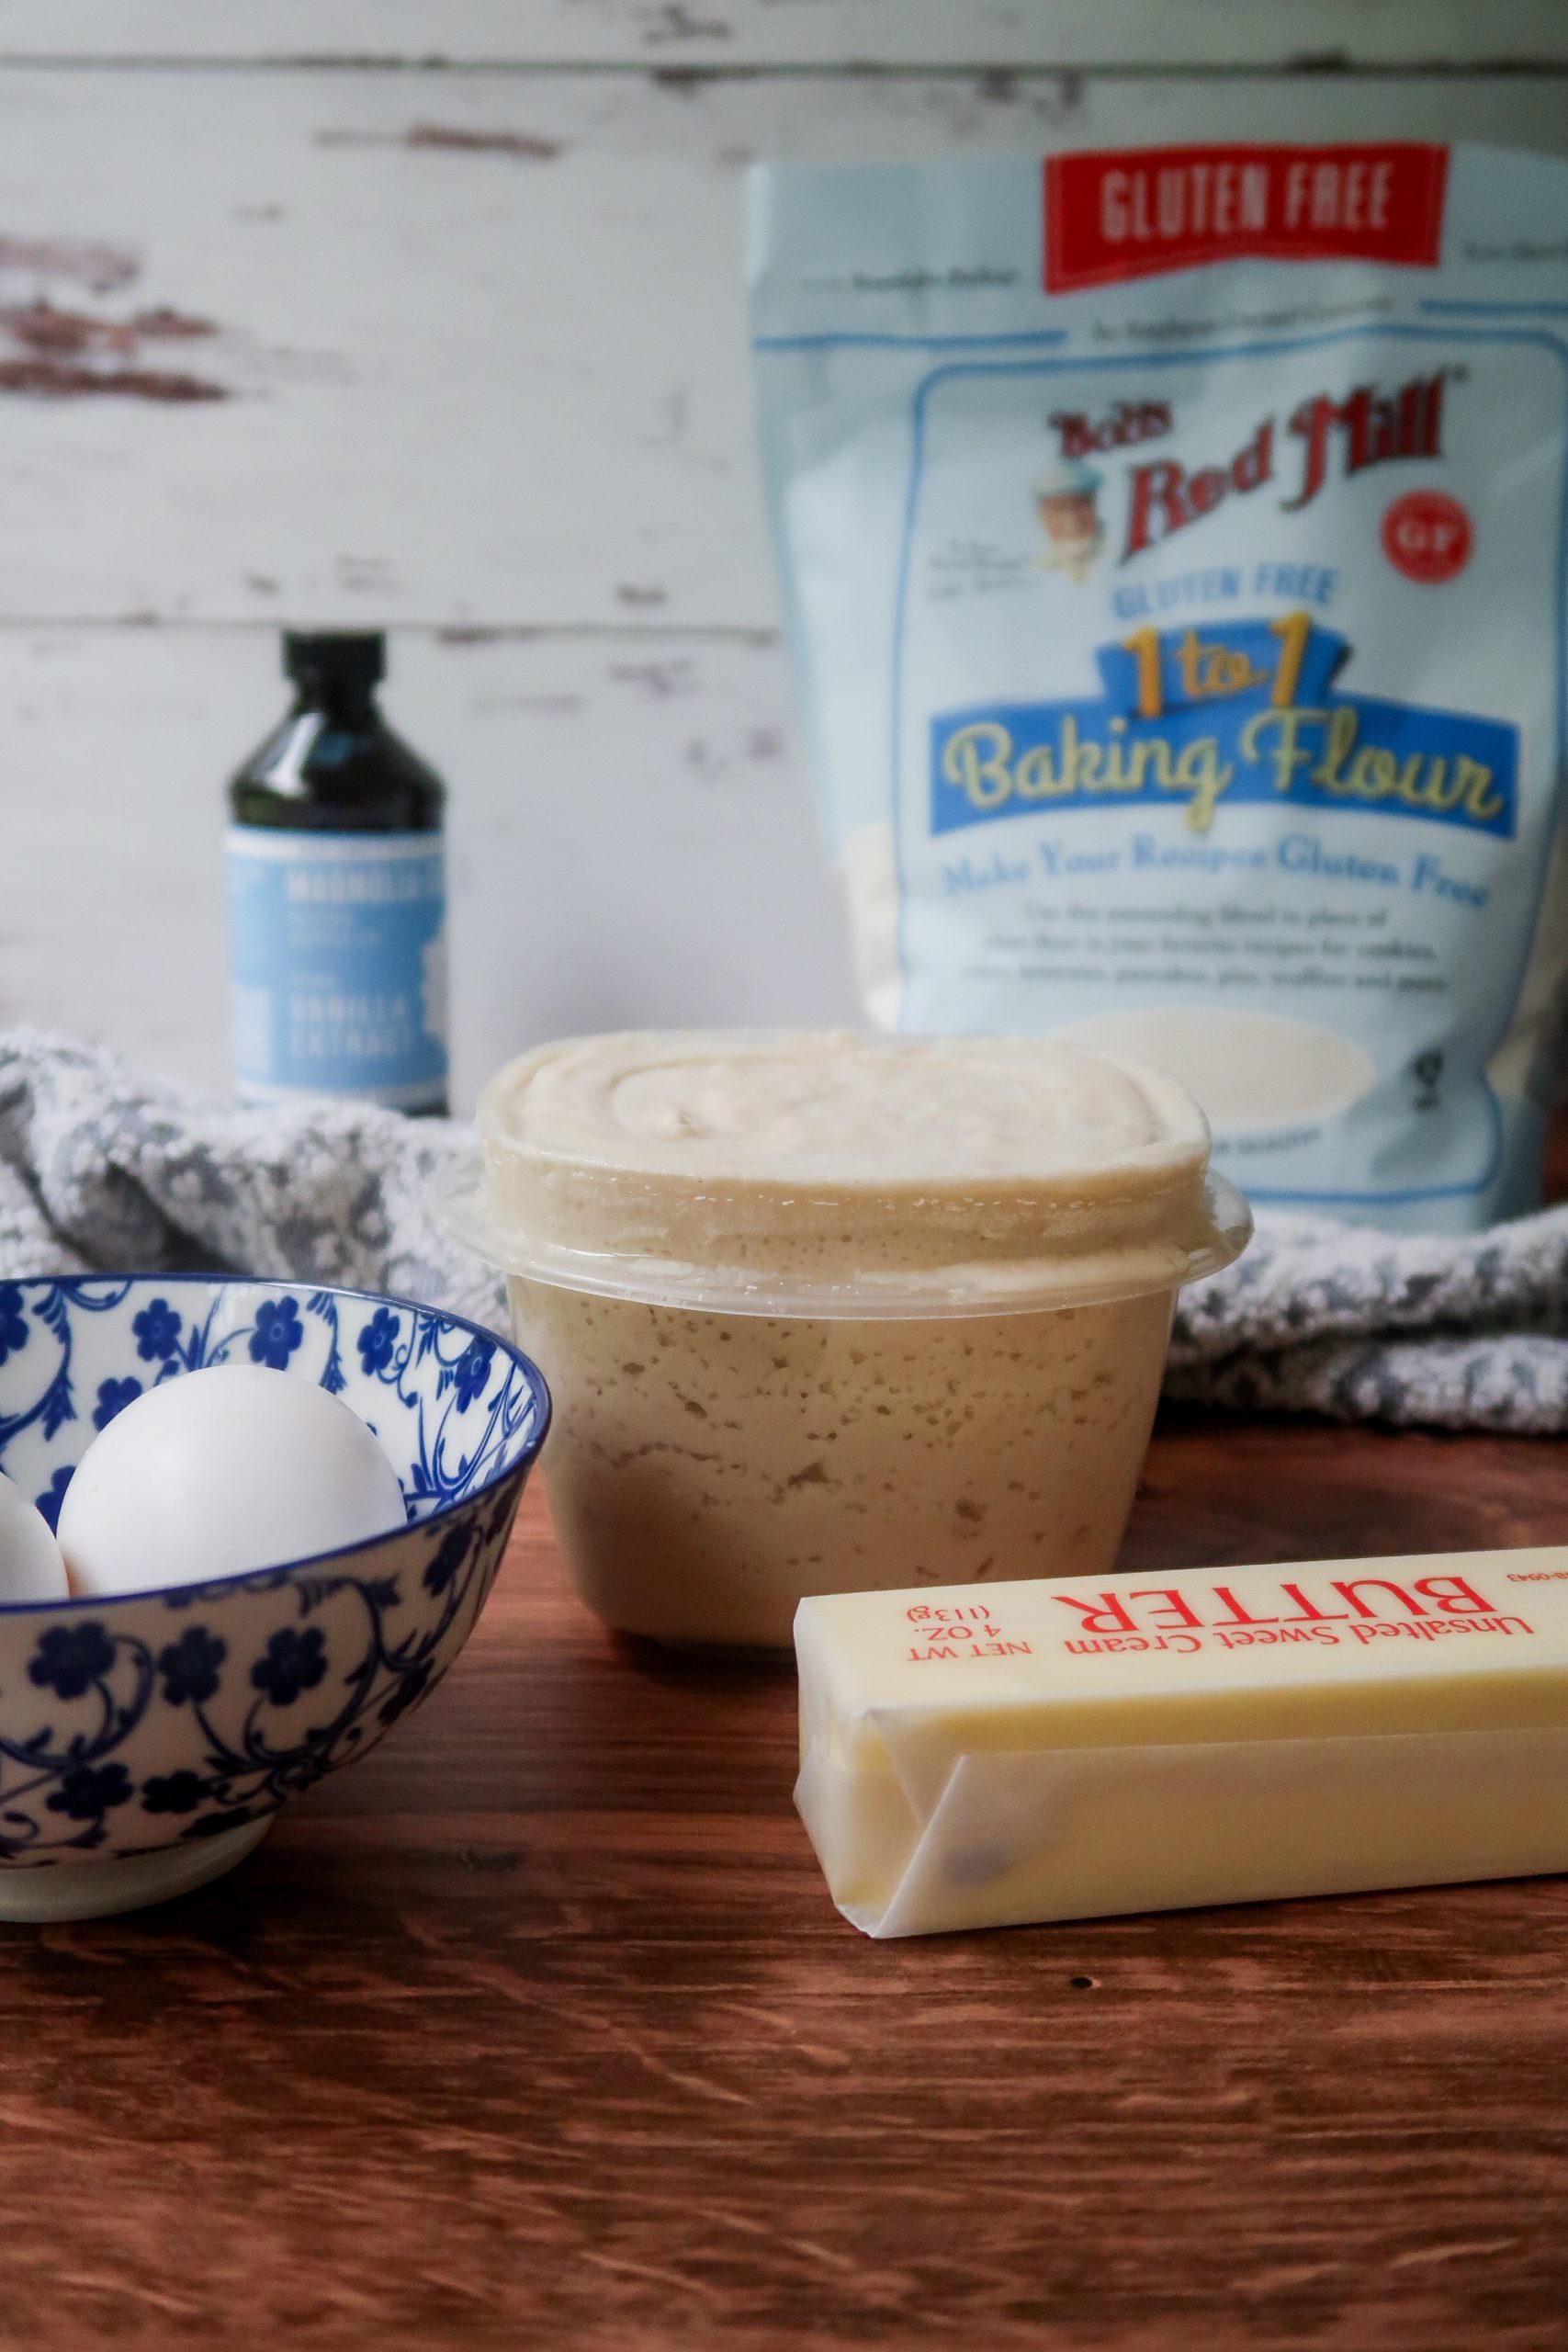
My recommendation: Avoid using all-purpose gluten-free flour blends, such as Bob's Red Mill GF 1:1 or King Arthur GF Measure for Measure, to create your gluten-free sourdough starter. While some people have had initial success, you may run into issues later. These blends contain starches and gums, which aren't needed in a starter and can negatively affect the texture, making it stretchy, gummy, or inconsistent. Additionally, feeding your starter with branded flour mixes can be more expensive.
You can still use gluten-free all-purpose flour mixes for making the bread itself, just not for the starter.
Common sourdough terminology to know:
- Hooch - A grayish liquid that forms on top of sourdough starter as an alcoholic byproduct of wild yeast fermentation. Hooch is not harmful and doesn't indicate that your starter has gone bad. It simply signals that the starter is hungry—perhaps due to missed feedings, neglect, or an imbalance in the starter-to-flour-to-water ratio.
- Discard - The portion of starter that you remove before each feeding. While you don’t throw it away, you store it in a separate jar for later use in recipes that don’t require active yeast for leavening, like pancakes, chocolate chip cookies, and more. Discarding some starter helps maintain a manageable size, as feeding it equal amounts of starter, flour, and water would quickly lead to an unmanageable mess.
- Banneton basket - Also called a proofing basket, this tool is used to shape bread as it rises, especially for wetter doughs that might otherwise lose their shape. A banneton gives the loaf a beautiful ridge design, adding an artisanal touch. They come in various shapes and sizes, but for gluten-free bread, smaller sizes like a 7-inch round (boule) or an 8-inch oval (batard) are recommended.
- Boule - A French word meaning "ball." It refers to the round, traditional shape of sourdough bread. The term is often used to specify a "sourdough boule."
- Batard - A French term for a short, oval-shaped loaf of bread.
- Bread lame - A thin razor blade used to score bread before baking. Scoring serves two purposes: it allows steam to escape during baking, preventing the bread from bursting, and it lets you create decorative patterns on the top of the loaf.
- Bulk ferment (fermentation) - The first rise of dough after mixing, before shaping it into loaves or boules. "Bulk ferment" refers to the dough rising as a single mass, rather than divided into individual loaves.

- Proofing - This is the second and final rise of the dough after shaping it into boules or batards, just before baking.
- Retard/retarding - A technique used to slow down the fermentation of the sourdough boule, which helps prevent over-proofing. This is typically done by refrigerating the dough overnight, also known as cold fermentation.
- Danish whisk - A type of whisk commonly used for mixing sourdough starter. It features several coils designed to cut through dough without over-mixing, making it especially effective for reaching the corners of jars.
- Hydration - This refers to the ratio of water in your starter. For example, 100% hydration means equal parts starter, flour, and water. So, if you have 100 grams of starter, you would feed it with 100 grams of flour and 100 grams of water. While the term can be confusing for beginners, I’ll stick to using specific gram measurements from here on out.
What ingredients will I need to make a gluten free sourdough starter?
To make a gluten-free sourdough starter, you only need two ingredients:
- (1) Gluten-free flour, such as brown rice flour or sorghum flour
For more details, see the section "Which Gluten Free Flours Should I Use?" above. Avoid using gluten-free all-purpose flour mixes, as they contain added starches and gums that are unnecessary for the starter and can affect its texture.
- (2) Room temperature filtered water.
In the beginning, it’s best to store your starter at room temperature on the counter and use room temperature water to encourage quick development. Later on, if you store your starter in the fridge, you can use cold filtered water (like from a fridge filter). You can use bottled, spring, or water from a reusable filter pitcher, but avoid distilled water. Distilled water lacks important minerals that benefit the yeasts and bacteria in your starter.

What supplies will I need to make a gluten free sourdough starter?
To get started making a gluten-free sourdough starter, you'll need a few basic supplies, but the upfront costs can be minimal.
Must-Have's:
- A medium to large-sized glass wide-mouthed mason jar. The size depends on how much starter you want to maintain. I prefer to keep a 100g starter, which becomes 300g once you add flour and water. For the starter to rise and grow (typically doubling in size), I recommend using a 24 oz (about a quart) or 32 oz jar. A wide-mouthed jar makes it easier and less messy to pour in ingredients and stir.
- A lid or cloth, and a rubber band or hair tie: You can either use a loosely fitted lid (not screwed on tightly) or a square of cloth secured with a rubber band or hair tie. There's some differing opinions out there on this topic. One thing that's for sure is sourdough partially uses the wild yeast from the environment (the air) and the CO2 it produces needs some place to escape to, so covering it loosely is best. However, it still needs to be covered enough to protect it from bugs invading it. I suggest using the cloth during the first two weeks and then switching to a loose-fitting lid. If you store your starter in the fridge, cover it with a tight-fitting lid to prevent it from absorbing fridge odors.
- Jars or containers for storing discard: You’ll need something to store the discard in until you use it. Glass jars are ideal for this.
- A kitchen scale is essential for ensuring accurate measurements of ingredients. I don’t recommend using cup measurements, as they can vary in weight and throw off the balance of the starter. A scale also helps you accurately discard some of the starter and maintain your desired amount (for example, 100 grams)
- A non-reactive spoon for for stirring: Use a wooden, stainless steel, silicone spoon, or a Danish whisk for stirring the starter. Avoid aluminum or copper spoons, as they can react with the acidic mixture.
- A small silicone or wooden spatula: This is helpful for scraping the sides of the jar clean to minimize the risk of unwanted growth like mold. The cleaner the jar, the better!
Like-to-Have's:
You won’t need these items until you’re ready to bake your first loaf of bread, which is typically about two weeks after starting your gluten-free sourdough starter. However, I recommend waiting a month before baking, as this allows the starter to strengthen and produce more rise.
- Banneton bowls, or other proofing baskets. I recommend two 7-inch bannetons.
- A lame
- A small to medium-sized Dutch oven is perfect for baking your bread. The lid helps create a chewy, crispy crust. I recommend choosing one that’s no more than 1-2 inches wider than the size of your proofing basket or bowl, as this helps the bread rise upward instead of spreading out.
- Reusable mason jar lids are convenient for keeping discard in the fridge. I prefer them over the metal kind that rust.
- A sourdough starter temperature control device ensures your starter stays at a consistent temperature for optimal rise, helping you time your bread-baking more precisely.
If you'd like to simplify the process, there are also sourdough starter kits available that include jars, in-the-jar thermometers, silicone spoons, scraping spatulas, cleaning brushes, and more—all in one convenient package.

How to Make a Gluten Free Sourdough Starter:
Here’s the method I developed for making a gluten-free sourdough starter through some trial and error. For beginners, I recommend using superfine brown rice flour as it activates quickly and creates large, airy bubbles. Sorghum flour starters, on the other hand, may require slightly less flour (around 80g instead of 100g) and tend to produce smaller bubbles.
Prep the Jar:
- Clean the jar with hot soapy water and dry it thoroughly with a clean towel. Using a clean jar is crucial to avoid any potential bacteria from contaminating the starter during its initial development.
- Next, weigh the jar on a kitchen scale. Attach a label or a piece of tape to the jar and write the weight in grams on it. Alternatively, you can make a note of the weight on your phone for reference.

Days One & Two: Twice-a-Day Feedings
In the Morning:
- Add 50g of gluten-free flour and 50g of water to the clean jar. Stir thoroughly with a non-reactive spoon. The mixture should be thick and pasty when stirred but settle into a flat, smooth surface on top when left to rest. You can gently wiggle the jar to help it flatten. If the top remains uneven and chunky, add a bit more water (no more than 5-10g at a time). If the mixture seems too thin and watery, you may have added too much water, and you'll need to increase the flour. Be sure to reduce the amount of water during the next feeding to maintain the desired consistency and starter weight.
- Scrape down the sides of the jar and wipe the rim and mouth with a clean towel. Cover the jar with a square of cloth and secure it with a rubber band, or place a lid loosely on top (don’t screw it all the way to allow airflow).
- Set in a slightly warm place, not too close to the sink or any air vents.

At Night (about 12 hours later):
- Repeat: Feed the starter with 50g of flour and 50g of water, stir thoroughly, and scrape down the sides of the jar.

The consistency should be thick and pasty when stirred.

But settles flat on the top when at rest. Give the jar a wiggle to help it settle.
Days Three through Seven: Discarding and Once-a-Day 50g Feeds
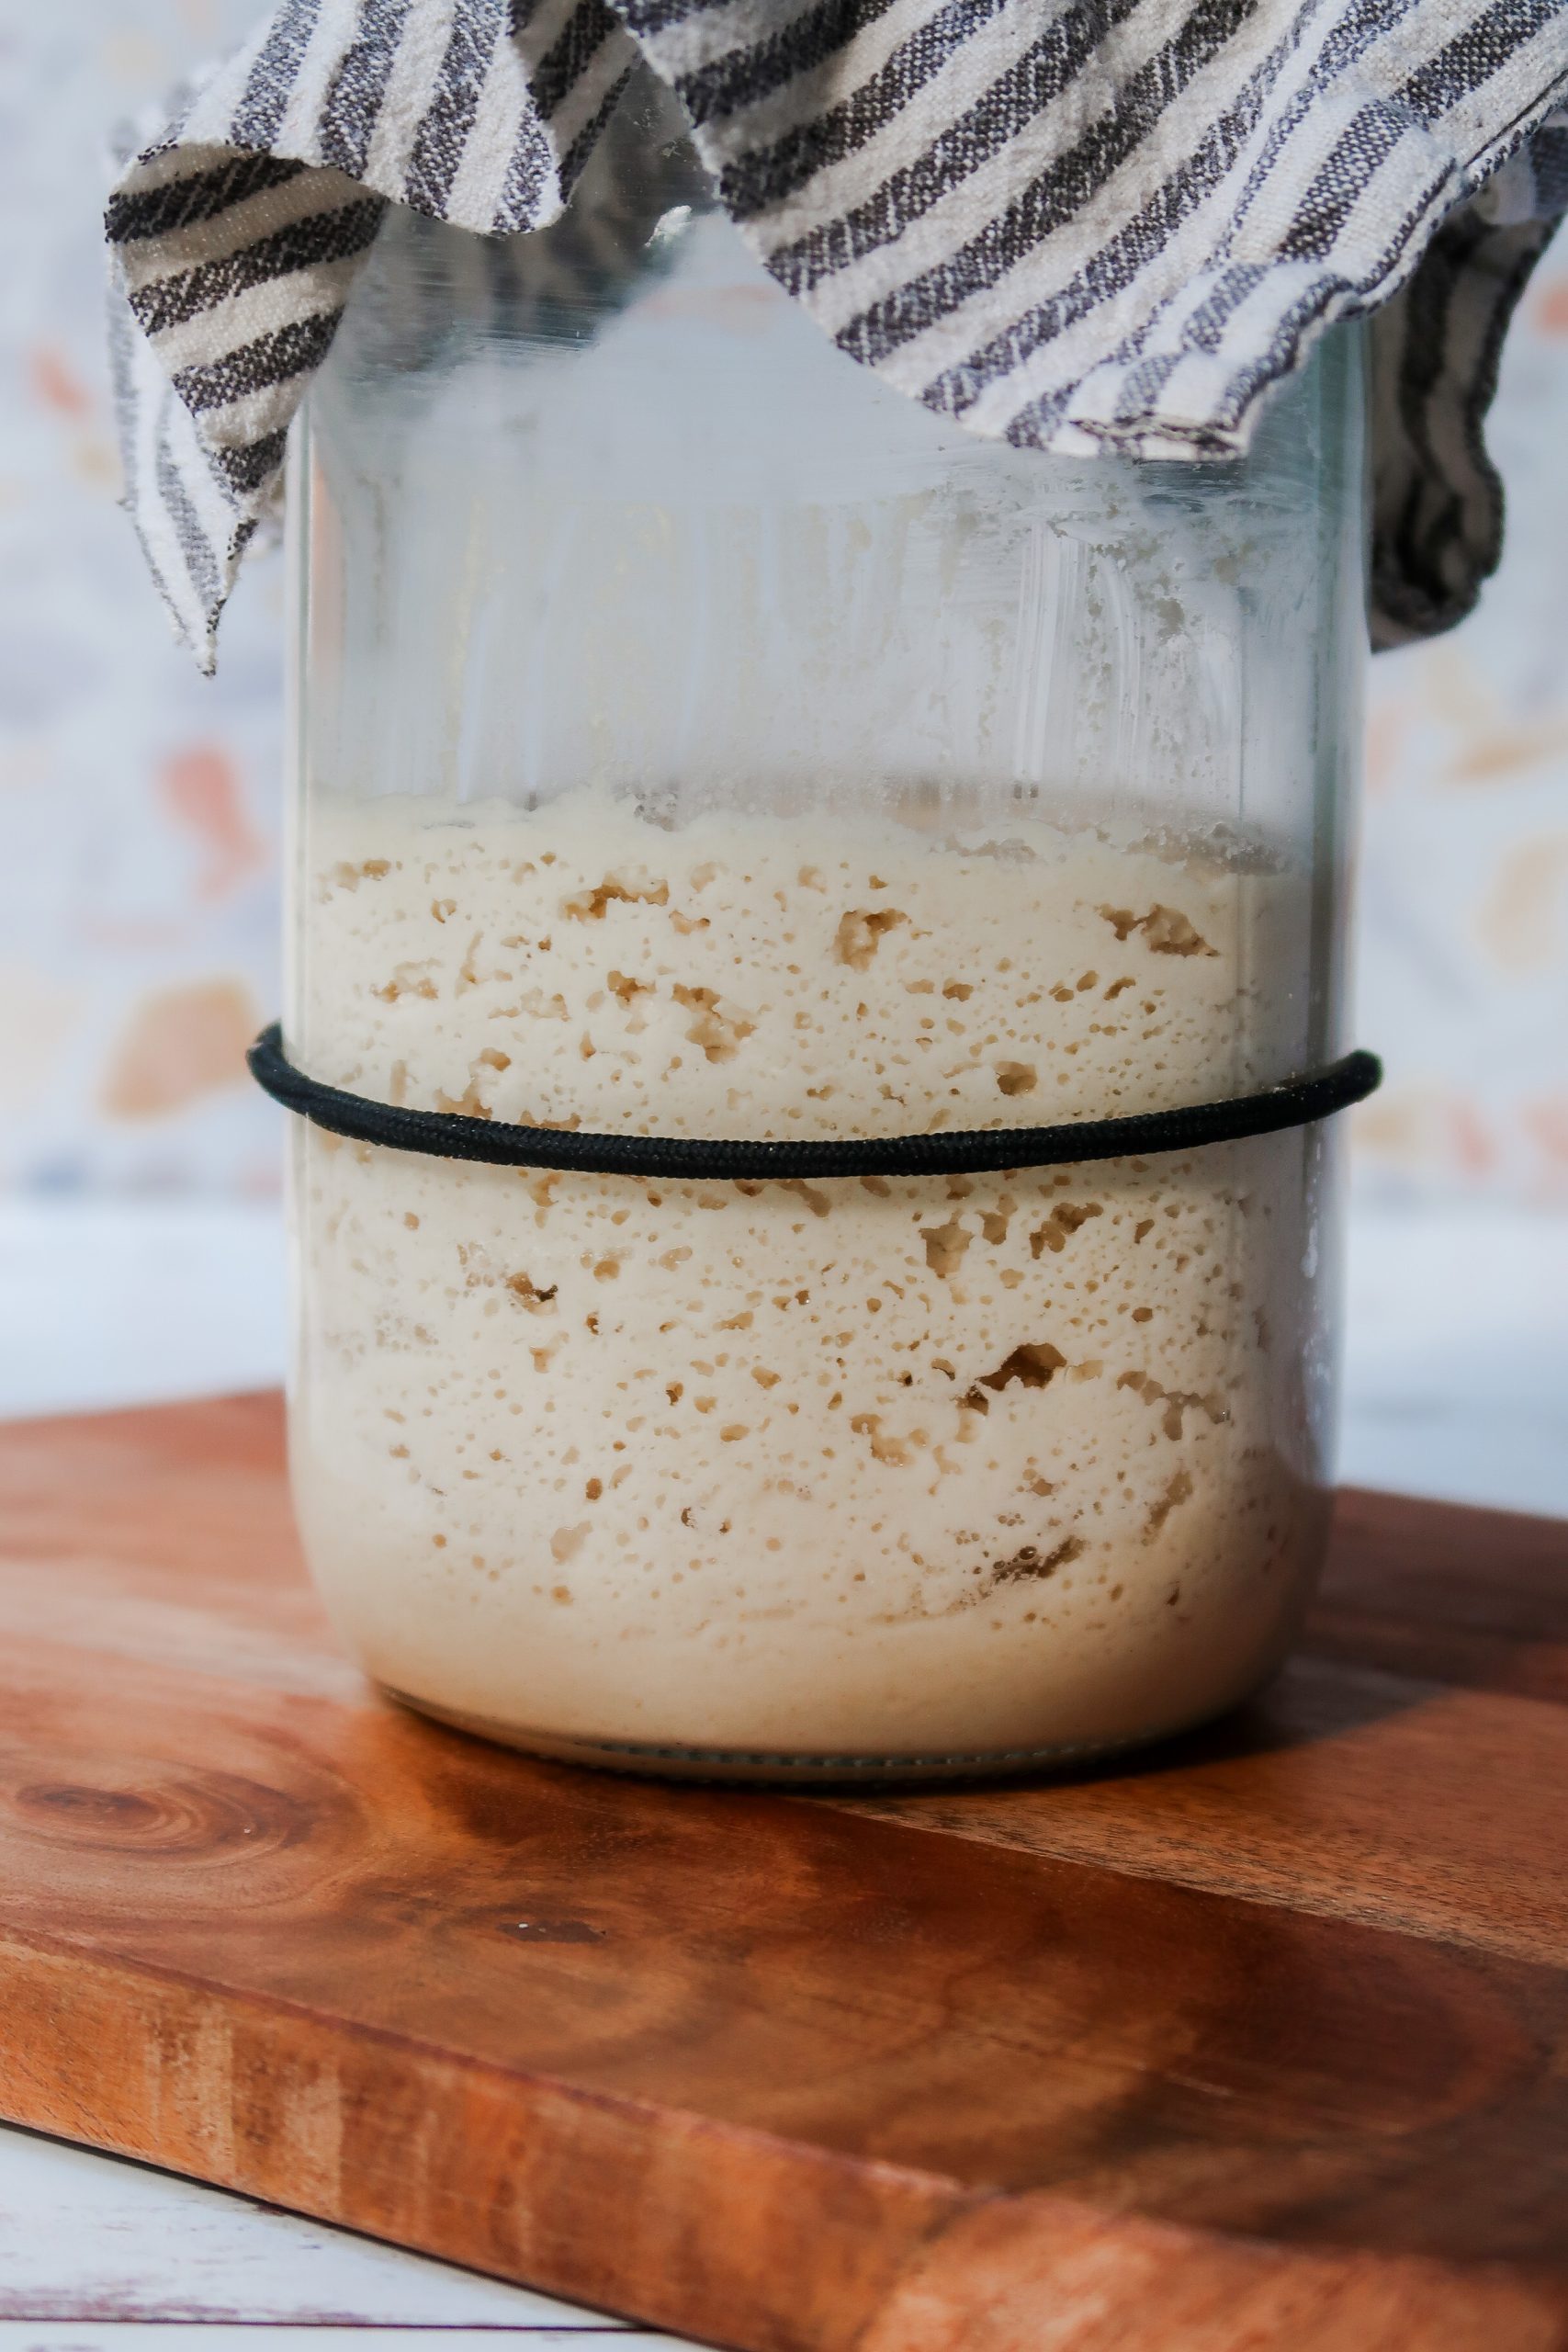
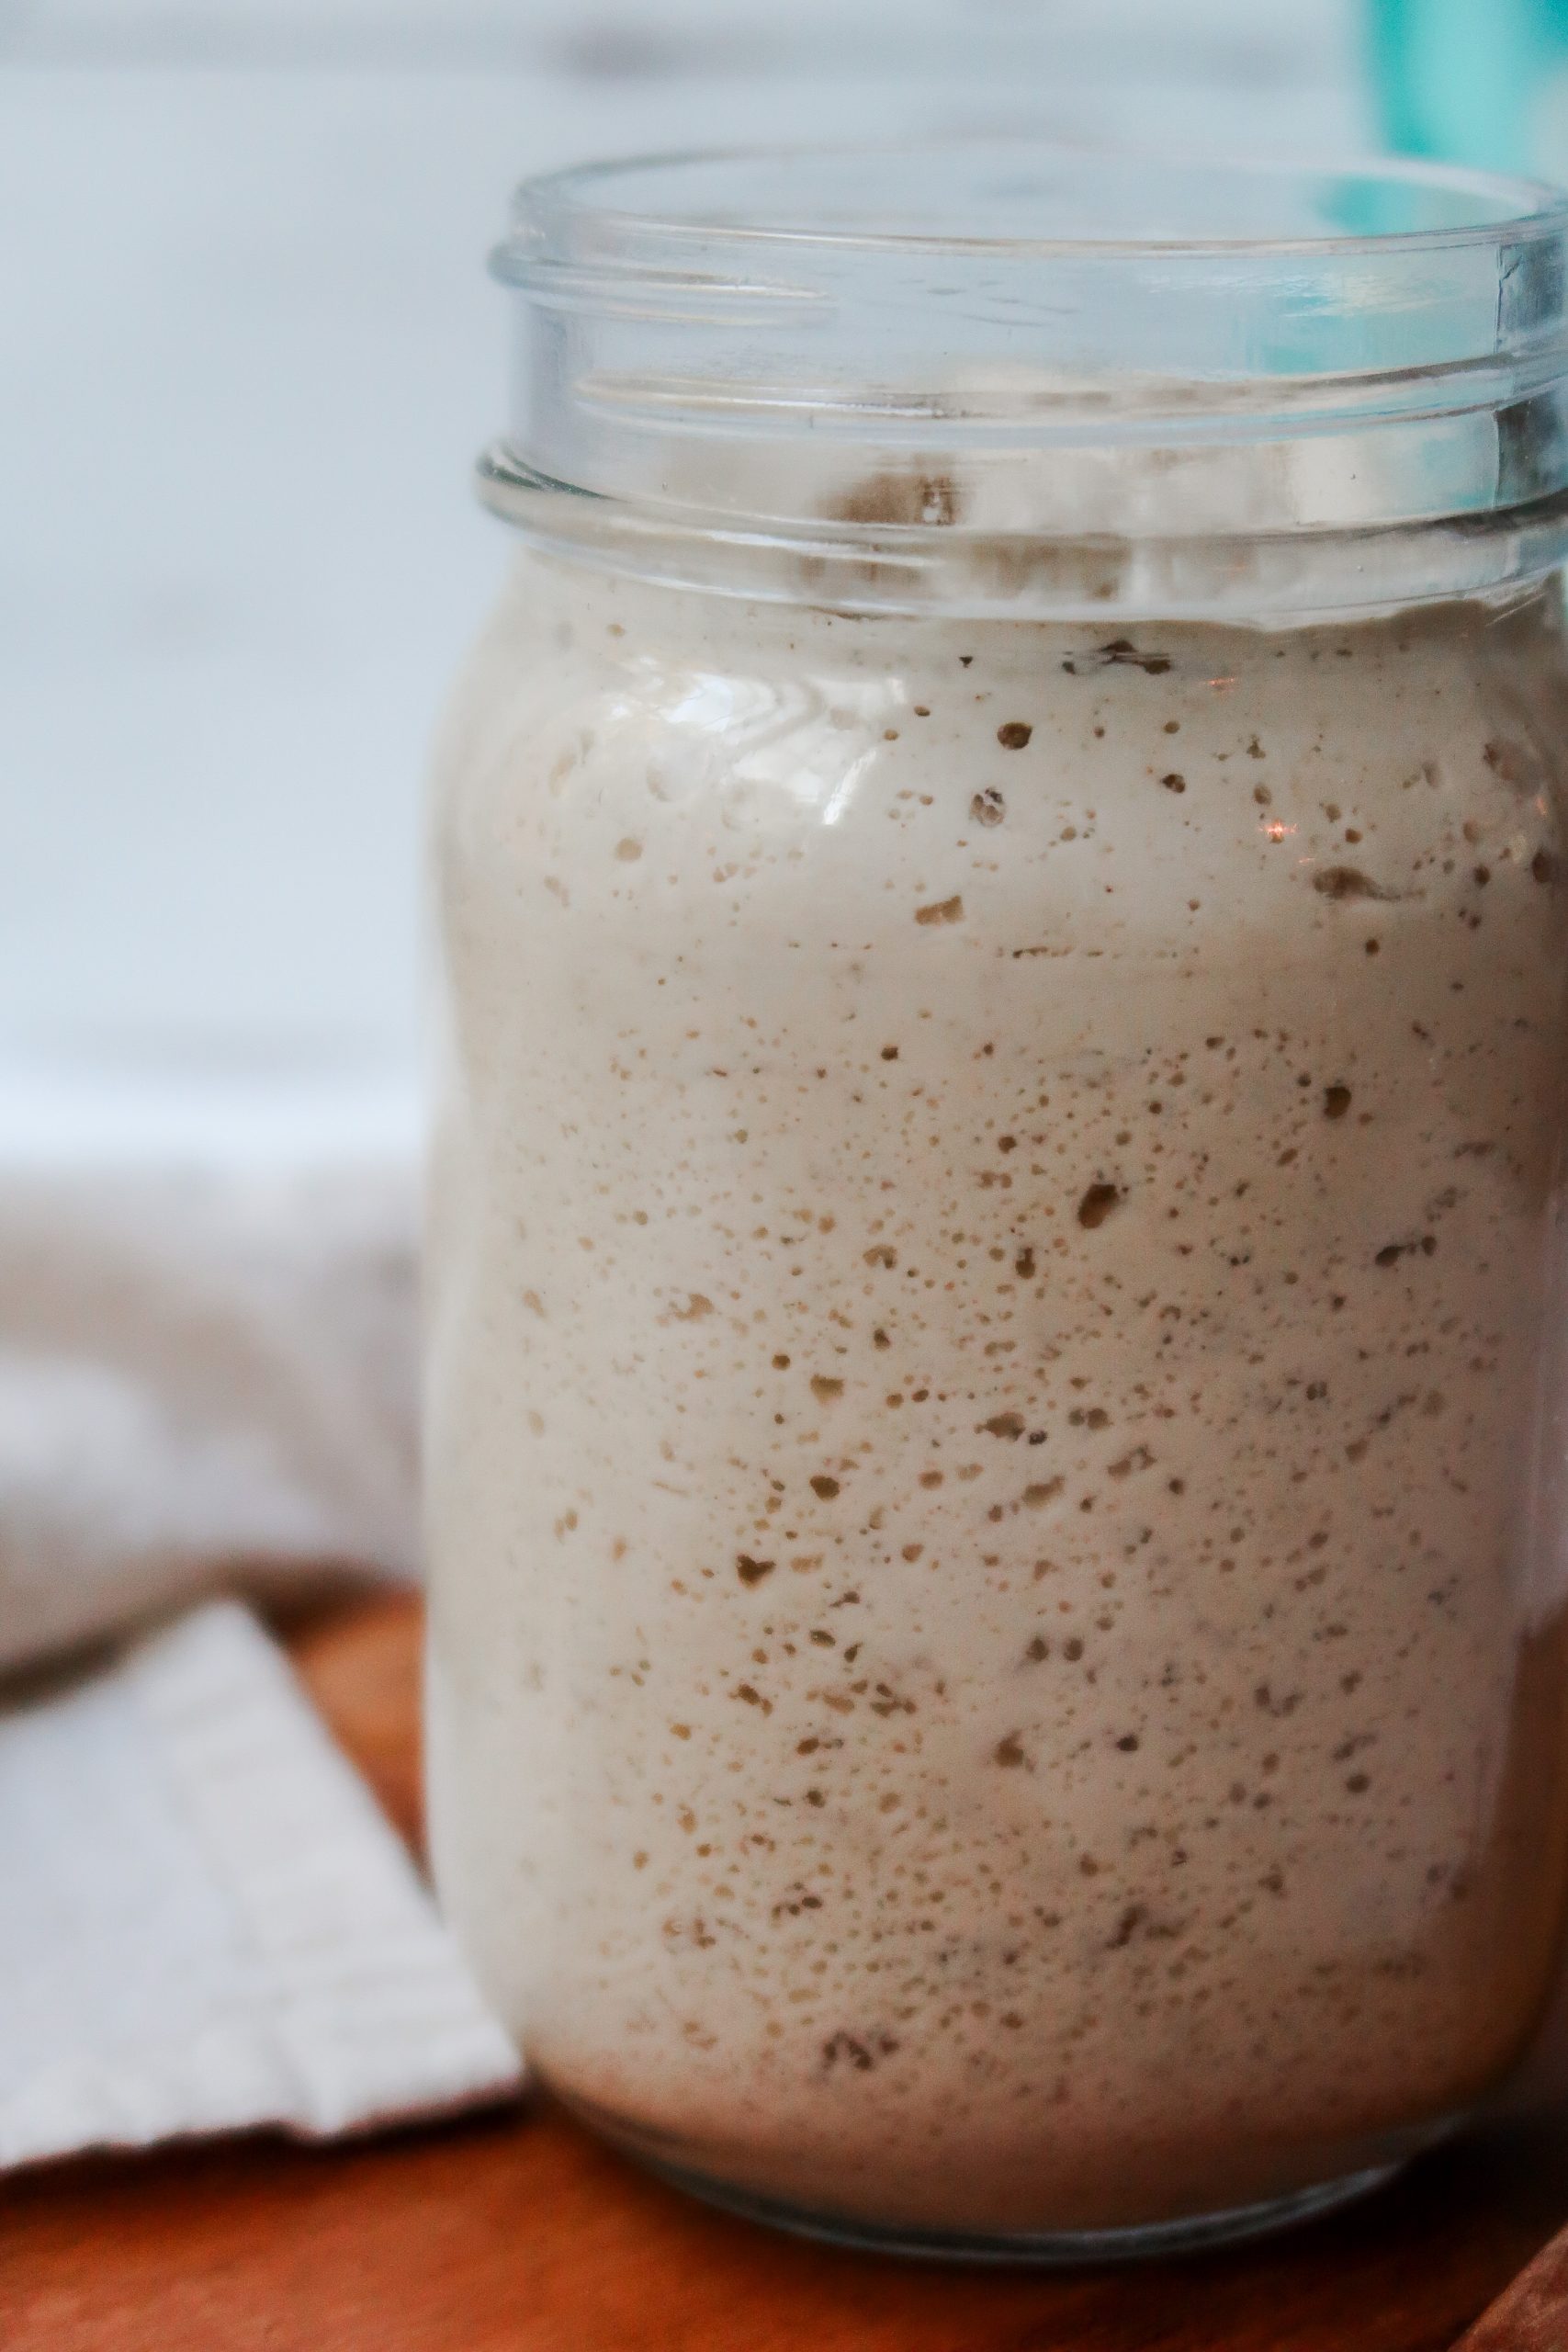
By now, your gluten-free sourdough starter should be showing some bubbles and possibly emitting yeasty, alcoholic, or sour smells. During this phase, the good bacteria is working to out-compete the bad ones, so you may notice periods of good rise followed by slower activity. This is completely normal as the starter continues to strengthen.
- In the mornings, discard the starter down to 50g. Then, add 50g of flour and 50g of water, stir well, scrape down the sides, and cover loosely. We’ll increase the amount to 100g next week, but for now, 50g helps minimize waste. Note: Don’t save the discard until the starter has a consistent, pleasant aroma and bubbles (around day 10-14). For now, you should compost or discard it, as it likely contains too many bad bacteria to be safely consumed.
- Set in a slightly warm place, not too close to the sink or any air vents.
- If your starter hasn't produced bubbles by day 3, or if your house is hot or humid, I recommend feeding it twice a day, 12 hours apart.

Days Eight through Fourteen: Increase to 100g Feeds
Your gluten-free sourdough starter should now be active and bubbly. If it’s consistently rising well, producing plenty of bubbles, and has a pleasant smell, you can start using the discard in recipes. If the starter still only has a few bubbles and minimal rise, continue with consistent feedings. Adding a teaspoon of honey at each feed may help boost its activity. Switching to 100g feedings will also support the starter’s growth and help it become more vigorous.
- In the mornings, discard the starter down to 100g. Add 100g of flour and 100g of water. If using sorghum flour, you may only need about 80g, as it absorbs water differently than brown rice flour. Stir well, scrape down the sides, and cover loosely.
- Place the jar in a slightly warm spot, away from sinks or air vents. Keep an eye out for peak activity, which typically occurs 3 to 5 hours after feeding, when the starter is at its highest rise.
Maintenance:
- After week two, your gluten-free sourdough starter should be active, bubbly, and have a pleasant, yeasty smell. At this point, you can maintain it at your preferred amount of grams (I like 100g, but some prefer keeping smaller starters, like 50g). If you're baking frequently, I recommend keeping your starter at room temperature and feeding it equal parts starter, flour, and water twice a day. If you're baking less often, store your starter in the refrigerator and feed/discard it once a week. Before baking with the active starter, make sure to give it two hearty feedings—typically around 150g starter, 150g flour, and 150g water.
- If you're still encountering issues with your starter after week two, check out my troubleshooting tips or leave a comment with your questions.
- Happy baking!
What is the difference between using the sourdough starter and the discard in a recipe?
Great question! A lot of people get the two confused, but it's really simple to understand once you know the difference.
Discard is the portion of the gluten-free sourdough starter that is removed before each feeding. Remember, you don't actually throw this portion away!
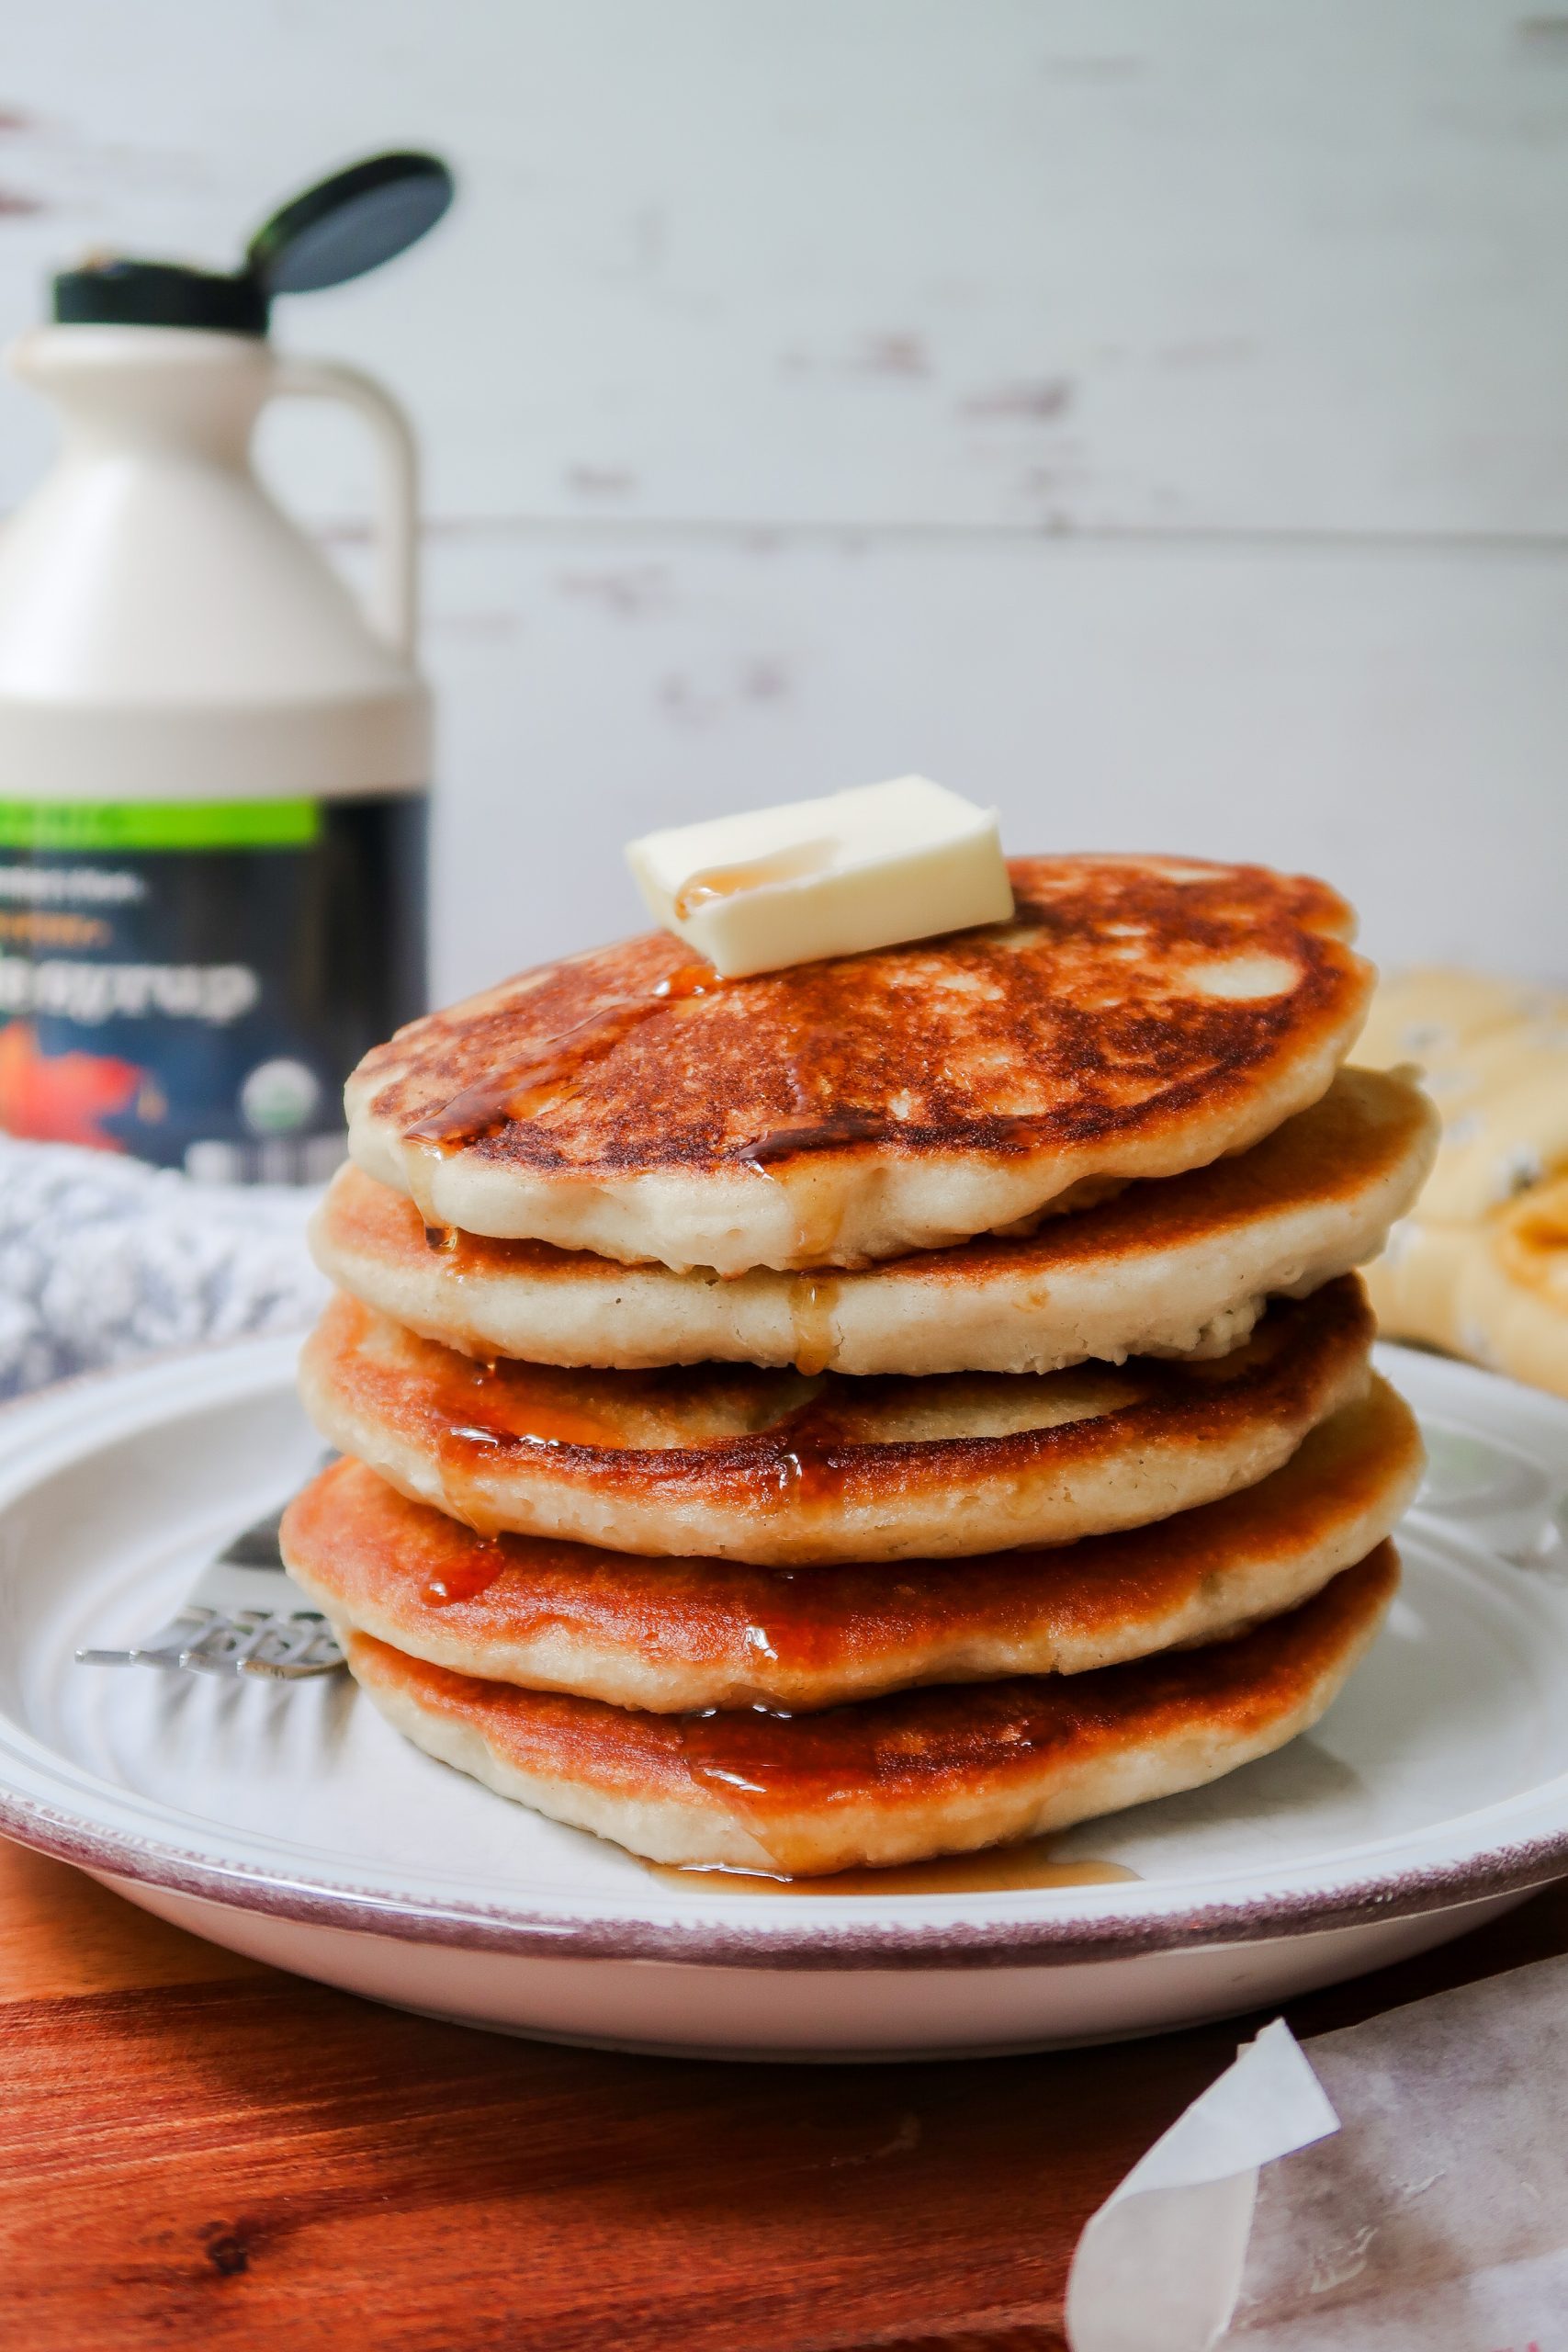
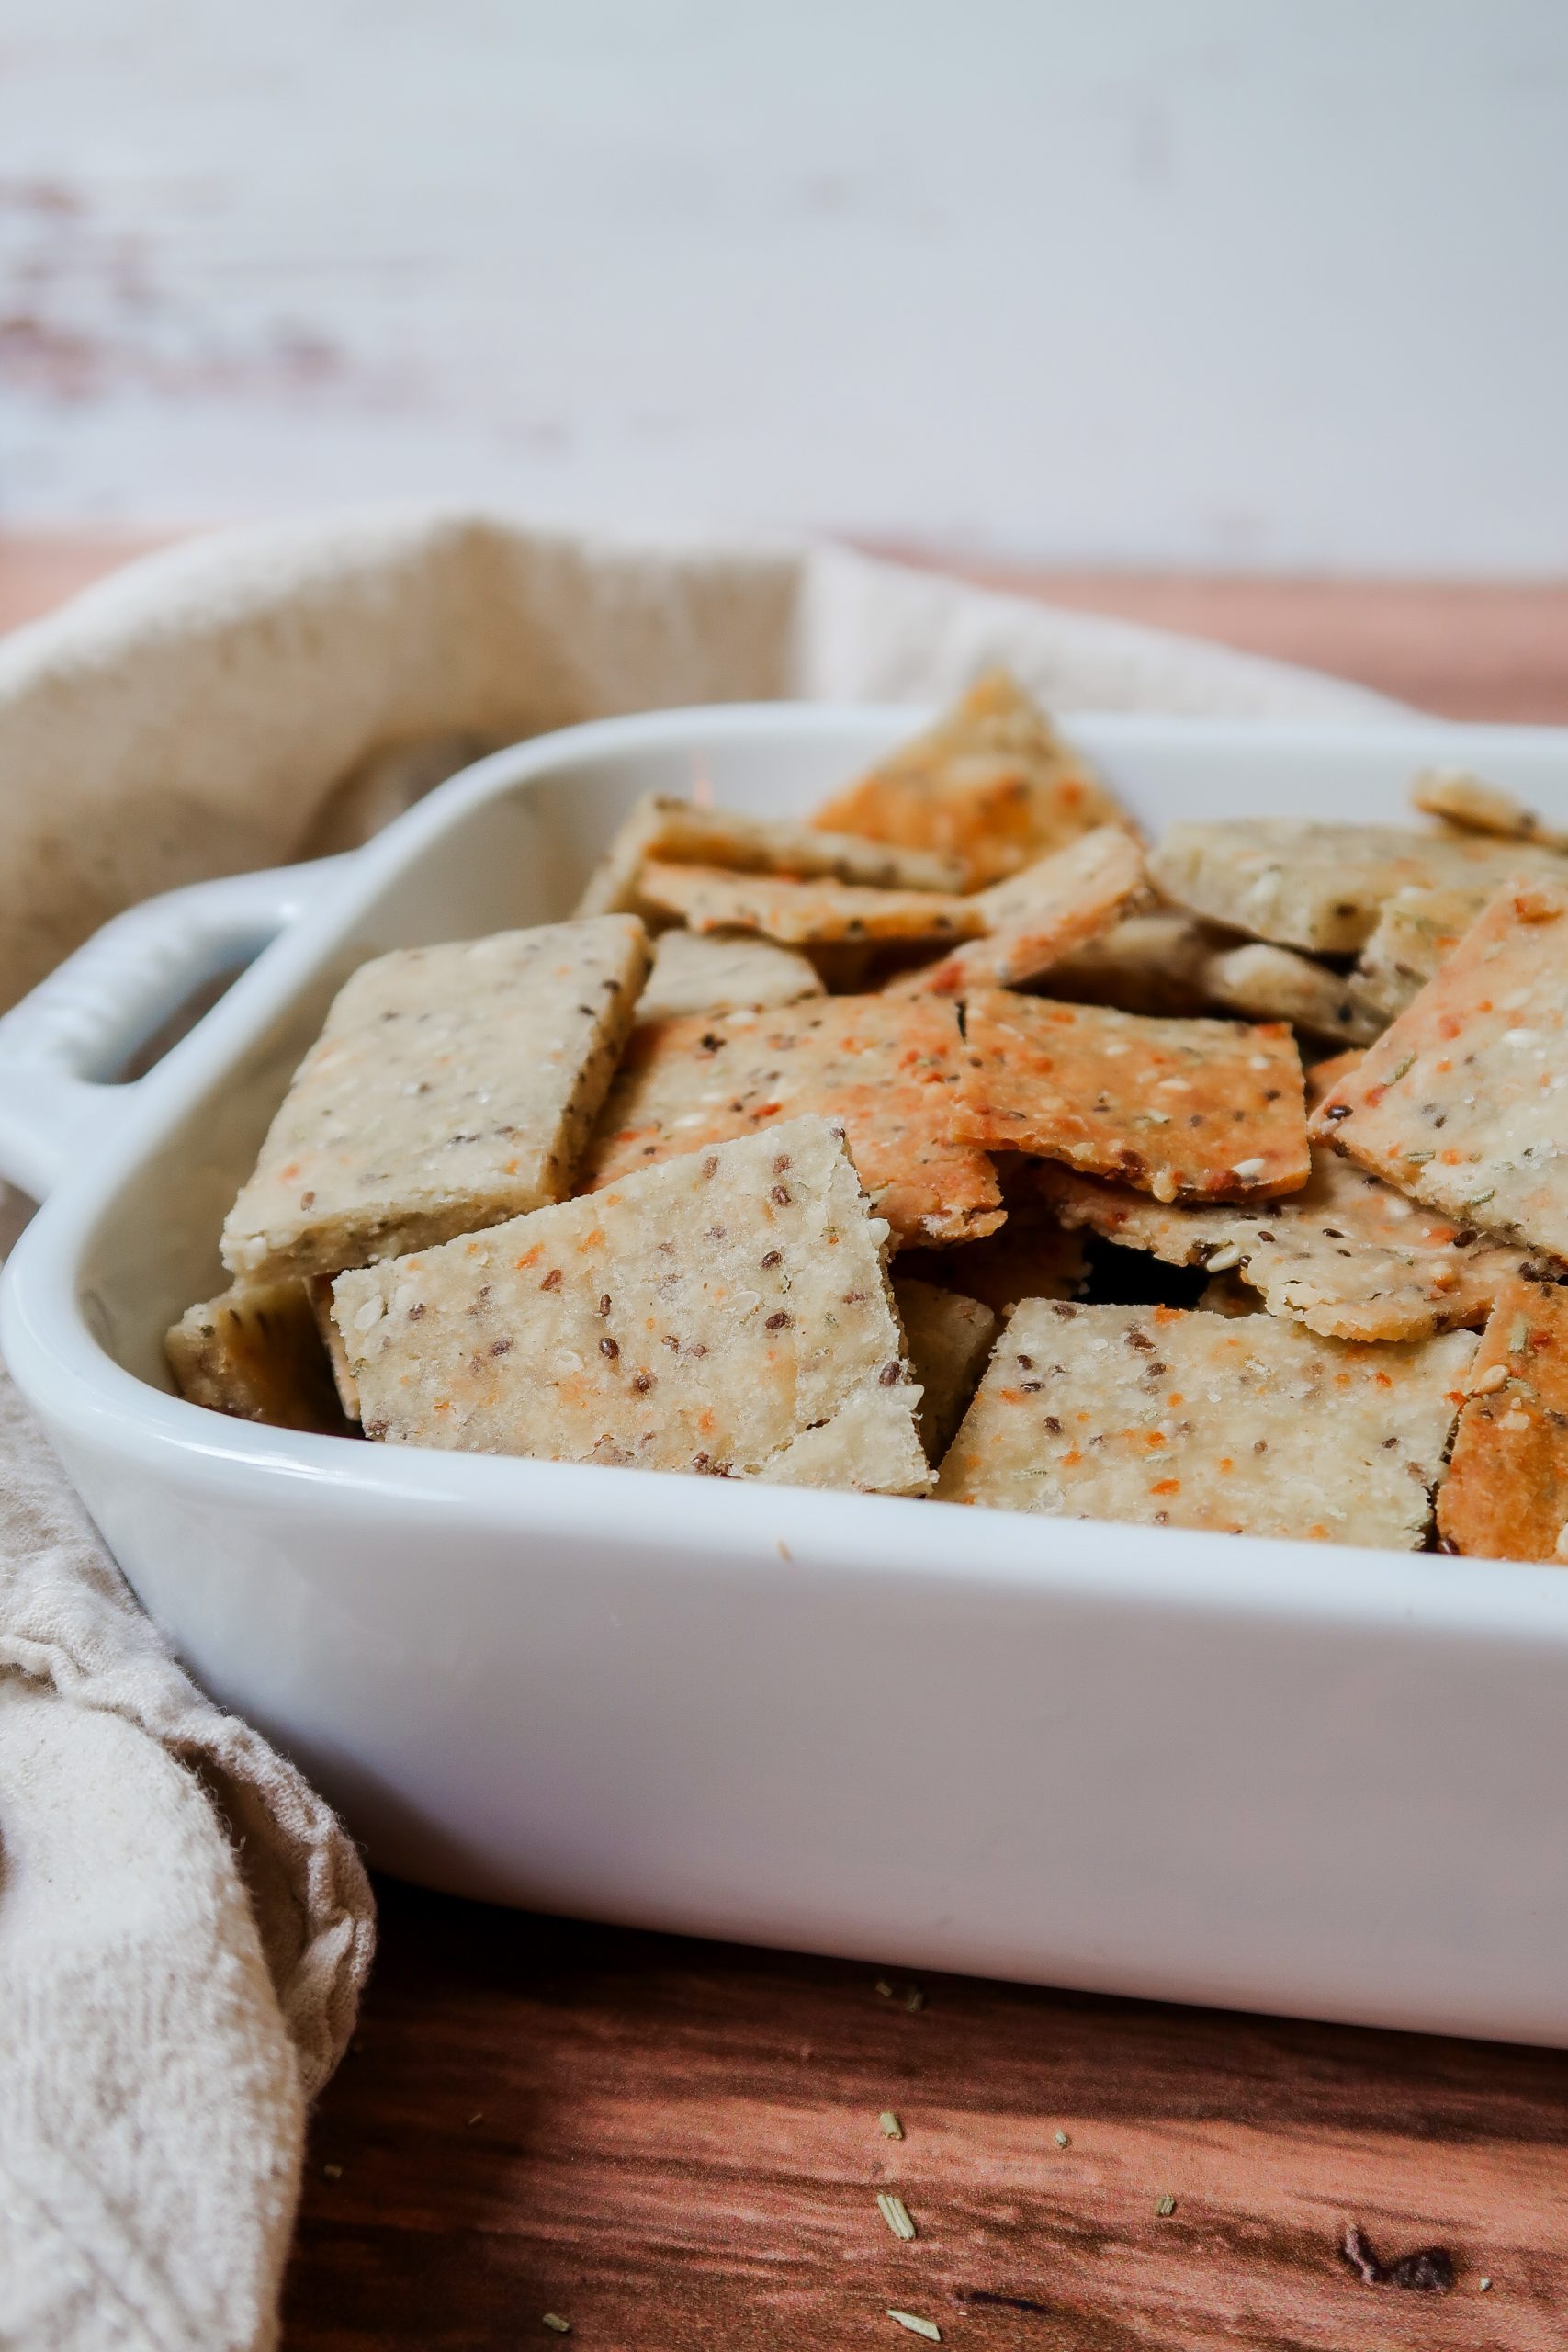
The discarded starter is considered inactive because the wild yeast and bacteria have consumed all of the flour and water's energy, and no new energy is added. Since it’s no longer active, it can be used in recipes that don’t require yeast to help them rise. You can use discard in a variety of baked goods, such as pancakes, brownies, cookies, banana bread and other quick-breads, crackers, pie crust, discard pizza crust, etc.
Starter, in contrast, is the active portion of your sourdough. Each time you feed it with fresh flour and water, the wild yeast and bacteria consume the energy and produce carbon dioxide, which causes it (and your baked goods!) to rise. You'll usually want to use your starter at its peak rise to bake bread and other goods that require leavening, such as pizza dough or focaccia.
If you're still confused, read more about it here: Sourdough Starter vs. Discard | What is the Difference? | Gluten-Free Sourdough
Now you can see that making a sourdough starter yields two forms of baking. Cooking with discard is a more relaxed form of sourdough baking that allows you to make goods that don't need to rise (or that use yeast for a quick rise but still with the flavor of sourdough). The active starter is used for baking bread or other goods that need rise time.
Soon you'll find yourself eating sourdough at any and every opportunity!

Where to Store an Active Gluten-Free Sourdough Starter
You have two options for storing your sourdough starter: at room temperature on the counter or in the fridge, where it stays in a dormant state. Which option you choose depends on how often you plan to use your starter. Over time, you'll develop a routine—knowing that if you want to bake on a certain day, you'll need to prep your starter on the days leading up to it.
For frequent bakers:
- Planning to bake bread or other risen baked goods two or more times a week?
If you bake this often, I recommend keeping your starter at room temperature on the counter. To save on flour and costs, consider maintaining a smaller starter (50g or less) daily, then giving it two larger feeds (150g or more) before baking.

For infrequent bakers:
- Want to bake bread or other rise-time baked goods once a week? Or maybe just occasionally, even once a month?
If you fall into this category, I recommend storing your starter in the refrigerator. Since you’re not baking frequently enough to justify daily feedings, keeping it chilled helps reduce flour waste and maintenance costs. When you're ready to bake, take the starter out of the fridge one or two days in advance and give it two substantial feedings.
For example, if you plan to bake on Friday, remove the starter from the fridge Thursday evening. Discard and feed it, then repeat the process the next morning.
Important: Even if you're not baking weekly, it's crucial to take the starter out, discard, and feed it at least once a week. This prevents mold growth and keeps it active and healthy.
Where to Store Gluten-Free Sourdough Discard: Do I Need to Maintain It?
I recommend storing sourdough discard in a glass jar (or multiple jars) in the refrigerator. You can continue adding new discard to the same jar over time—just be sure to stir it occasionally to mix the older discard with the fresh. Note: This may cause it to rise some—always leave space in the jar. Before adding new discard or stirring, pour off any hooch that may have collected on top, as mixing it in will result in a pungent flavor.
Sourdough discard stays good in the fridge for quite a while (I’ve kept mine for up to six weeks), but for the best results in recipes that don’t require active yeast, use it within 1–2 weeks. The older the discard, the more pronounced its sour flavor will be.
For sweeter recipes like pancakes, newer discard is ideal, while older discard works well in savory recipes like crackers. That said, I’ve used two-week-old discard in pancakes without noticing much difference—it really depends on your starter’s composition, including the flours used, hydration ratio, and feeding schedule.
Sourdough discard requires no maintenance other than an occasional stir if it’s been sitting for a while. You may come across people online who claim to feed their discard, but this isn’t necessary—discard is inactive, meaning it no longer needs to be fed. Feeding it would essentially just create another jar of active starter.
If you find yourself with more discard than you can use, you can freeze it for later. Just be sure to let it fully defrost before using it in a recipe.
Can I make a traditional wheat sourdough starter gluten-free by switching flours?
Yes and no. It really depends on the reason behind your question. While you can switch the flour in a traditional wheat sourdough starter to gluten-free flour, it’s difficult to be certain that all traces of gluten have been removed. Since you discard part of the starter and add new flour each time, it could take a long time—or possibly never—to completely eliminate all gluten.
If you've been diagnosed with Celiac Disease and can no longer consume wheat, I highly recommend starting from scratch with all gluten-free flours. It’s not worth the risk of gluten contamination, even in small amounts. The good news is that it only takes about two weeks to establish a gluten-free starter, so you’ll be back to baking in no time!
If you're simply wanting to try eating gluten-free without a medical diagnosis, it's perfectly fine to switch your current starter to gluten-free flour. However, keep in mind that it can take a long time—or potentially never—to fully transition a starter to gluten-free. So, it might not give you a clear trial period to assess whether going gluten-free makes a noticeable difference in how you feel.

Troubleshooting:
What should the consistency of my gluten-free sourdough starter be?
The consistency you're aiming for is thick and pasty. Some might describe it as similar to thick pancake batter, but I find that comparison a bit misleading—it can sound too watery and open to interpretation.
The starter should be very thick, almost pasty when stirred, but still settle into a smooth, flat surface when left at rest. You can gently shake the jar to help it flatten out. If the top is still uneven or chunky, add a little more water (no more than 5-10g at a time).
If it's too runny, you’ve likely added too much water and will need to adjust by adding more flour. Just make sure to reduce the water amount in the next feeding to maintain your desired starter weight.
What should I do if my gluten-free sourdough starter isn't rising or bubbling as expected?
Sometimes a sourdough starter will rise and double in the first few days but then slow down or become inactive for a period. This is a natural phase, often due to the good bacteria battling the bad.
For consistent rise and doubling, make sure your starter is the right consistency (see the section above). If it’s been a week or more and your starter still isn't rising much, try adding 1 teaspoon of honey with each feeding for a few days or until it becomes bubbly. The extra sugar will give the yeast something to feed on and can help kickstart its activity. Also, ensure your starter is kept in a warm environment, ideally between the mid-70s and low 80s°F. If it's too warm, though, you may need to feed it twice a day to prevent hooch from forming and to avoid a strong acetone smell.
Another tip is to experiment with the type of flour you're using. If you're just using sorghum flour, try adding some brown rice flour or even a 50/50 mix. I've found that superfine brown rice flour yields the best bubbles, while sorghum doesn't rise quite as much.
What should I do if I notice mold or any unusual discoloration on my starter or jar?
If you notice a grey or dark liquid on top, that's called hooch, and it's completely safe to pour it off and continue with your starter. It just means your starter is hungry or a bit unbalanced. You can read more about hooch in the Common Sourdough Terminology section.
If you see small white mold spots, you can scrape them off with a spoon, and the starter beneath it should still be safe to use. Personally, I’d probably discard it, but it’s not always necessary to toss the entire batch.
However, if you spot orange or pinkish hues or streaks on the starter or jar, you’ll need to discard the entire batch and start over with a clean jar. This discoloration indicates harmful Serrati Marcescens bacteria that could lead to infections. Thankfully, this is a rare issue, and I've never encountered it myself. The bacteria might result from the environment in which your starter is kept, so be sure your starter isn’t too close to the sink, air vents, or any other sources of contamination. Make sure the surface your jar is on is clean and dry as well.

Why does my gluten-free sourdough starter smell like acetone or nail polish remover? Is it still safe to use?
Yes, it's completely safe to continue using and baking with a sourdough starter that smells strongly like acetone. This odor simply indicates that your starter is hungry or unbalanced. Make sure you're feeding it the proper flour-to-water ratios and achieving the correct consistency (see troubleshooting sections for more details). It's also possible that you're not feeding the starter often enough. If your starter is kept at room temperature or in a warm, humid environment (especially during the summer), it may require feeding and discarding twice a day instead of just once.
To eliminate the acetone smell as quickly as possible, try discarding a little more starter than usual (for example, down to 50g instead of 100g) and then feed and discard twice a day. It may take a few weeks to normalize.
Other common smells, like vinegar or a slightly sweet scent, are also perfectly safe. However, if your starter has a foul smell that’s unpleasant and doesn’t resemble acetone or vinegar, it’s best to discard it and start over with a fresh jar.

Can I use a gluten-free all-purpose flour blend to create my starter?
Avoid using all-purpose gluten-free flour blends like Bob's Red Mill GF 1:1 or King Arthur GF Measure for Measure to create your sourdough starter. While some people have had initial success, problems can arise later on. These blends often contain starches and gums, rather than pure whole grain flour, which aren't needed in a starter. These additives can affect the texture, making it overly stretchy, gummy, or just strange. Additionally, feeding your starter with branded mixes can be much more expensive in the long run.
When should I transfer my sourdough starter to a clean jar?
In some pictures of sourdough starter online, you may notice jars with starter smeared around the rim or streaks climbing up the sides. Even though we're fermenting, it’s still important to keep the jar clean. Be sure to scrape down the sides of the jar into the starter to avoid buildup, which can be a potential place for mold growth. I also like to wipe the mouth and just under the rim of the jar, as condensation can collect here and lead to mold over time.
Personally, I’m a bit particular about this (living in a humid climate makes it even more important), so I use four cloth squares for the top of the jar, rotating them once a week and washing them for a fresh start. If you're extra cautious, you could switch to a new clean jar every couple of weeks, giving the old jar a thorough wash, preferably in the dishwasher. If you're using a reusable mason jar lid, those can also be cleaned in the dishwasher and replaced.
To transfer your starter to a new jar, simply wait until your next discard/feeding time, and spoon the starter into the clean jar.
Is it necessary to discard half of the starter at every feeding?
This is another case of misinformation. Many guides recommend discarding half of your sourdough starter at each feeding, but this isn't the most accurate or effective method. As mentioned earlier, I recommend maintaining 100% hydration, meaning equal parts starter, flour, and water. For example, if you have 100g of starter, you should feed it with 100g of flour and 100g of water.
The issue with discarding HALF of the starter is that it can quickly become unbalanced. Let’s break it down: 100g of starter + 100g water + 100g flour = 300g in total. If you divide 300g in half, you get 150g. Now, you’re feeding 150g of starter with only 100g of flour and 100g of water. At the next feeding, you’ll have 350g (150g starter + 100g water + 100g flour). If you discard half again, you’ll have 175g of starter, which continues to grow every day, increasing in size. Over time, your starter will outgrow the flour and water ratios, starving the wild yeasts and bacteria of their food. This often leads to excessive hooch production and a strong acetone smell.
Instead of discarding half, I recommend removing enough starter to maintain your desired amount. For example, if you want to keep 100g of starter, weigh the jar with the starter on a kitchen scale, then subtract the jar's weight. Spoon out enough starter until you have the desired amount left. Place the discard in a separate jar to refrigerate.
For example, if the jar weighs 338g, and the starter makes it 638g, the starter weighs 300g. To keep 100g, discard 200g. Subtract 200g from 638g, leaving 438g. Spoon out starter until the weight reaches 438g, then add 100g flour and 100g water. This method ensures a well-balanced starter.

Is it possible to buy a gluten-free sourdough starter instead of making one from scratch?
Yes, you can buy a gluten-free sourdough starter culture packet, like the one from Cultures for Health, which comes with a dehydrated starter and instructions for long-term maintenance. They also offer other fermentation kits (and use code WONDERS15X for 15% off!). The starter is also available on Amazon.
Alternatively, check local Facebook groups for someone willing to share a gluten-free starter, but be sure to vet the source for Celiac safety.
Remember, whether you start from scratch or buy one, you'll still need to learn how to maintain, feed, and bake with your starter.
Did you make this Gluten Free Sourdough Stater? Leave a 5-Star Rating Below!
You can also join my Facebook group, Gluten Free Sourdough Baking Recipes and Advice, to share recipes, post photos, and get real-time advice. We're currently 13,000 members strong and growing!

How to Make a Gluten Free Sourdough Starter
Your rating helps support the making of more tested, delicious gluten-free recipes.
Equipment
- wide-mouthed glass jar I recommend 24 oz or 32 oz size
- square of cloth and a rubber band, or a mason jar lid
- non-reactive spoon for mixing wood, stainless steel, silicone, or a Danish whisk. Do not use spoons made of aluminum or copper.
Ingredients
- brown rice flour or sorghum flour Avoid gluten-free all purpose flours since they contain gums and starches which can change the consistency and texture of the starter
- room temperature filtered water Avoid distilled water - it lacks minerals that can help the starter's growth
Instructions
Prep the Jar:
- Wash the jar with hot soapy water and dry it thoroughly with a clean towel. Using a clean jar is crucial to avoid any potential bacteria from contaminating the starter during its initial development.
- Next, weigh the jar on a kitchen scale. Attach a label or a piece of tape to the jar and write the weight in grams on it. Alternatively, you can make a note of the weight on your phone for reference.
Days One and Two: Twice a Day Feedings
In the morning:
- Add 50 grams of gluten-free flour and 50 grams of water to the clean jar. Stir well with a non-reactive spoon (wood, stainless steel, or silicone). The mixture should be thick and pasty when stirred, but smooth out to a flat surface when at rest. You can gently wiggle the jar to help it settle.If it remains lumpy and doesn’t flatten, add 5–10 grams more water. If it’s too runny, add a bit more flour.Be sure to adjust the water amount in your next feed to maintain your starter at the desired weight.brown rice flour or sorghum flour, room temperature filtered water
- Scrape down the inside walls of the jar with a small spatula to clean them. Wipe the mouth of the jar and the area under the rim with a clean towel.Cover the jar with a piece of cloth secured with a rubber band, or loosely place a lid on top to allow air circulation inside.
- Place the jar in a slightly warm spot, away from the sink or any air vents.
At night (about 12 hours later):
- Repeat: Feed the starter with 50g of flour and 50g of water, stir thoroughly, and scrape down the sides of the jar.
Days Three Through Seven: Discarding Starter Down to 50g and 1:1:1 Feeds
- By now, your starter should have some bubbles and may have a yeasty, alcoholic, or sour smell. During this phase, the beneficial bacteria are fighting off the harmful ones, so you might experience "false starts", periods of rising followed by reduced activity. This is completely normal as the starter continues to strengthen.
- Each morning, discard the starter down to 50g. Then, add 50g of flour and 50g of water, stir, scrape the sides, and cover loosely. We'll increase to 100g next week, but for now, stick with 50g to minimize waste. Important: Until your starter consistently has a pleasant smell and bubbles (usually around days 10-14), it's best to compost or dispose of the discard. It’s not safe to consume yet, as it may still contain harmful bacteria.
- Place the jar in a slightly warm spot, away from the sink or any air vents.
Days Eight Through Fourteen: Discarding Starter Down to 100g and 1:1:1 Feeds
- Your starter should now be active with large craters and small pinprick bubbles. If it rises well, has lots of bubbles, and smells pleasant, you can use the discard in recipes. If it’s not rising or bubbling, continue feeding it consistently. Adding a teaspoon of honey per feeding and increasing to 100g should help boost growth.
- Each morning, discard the starter down to 100g. Then, add 100g of flour and 100g of water (or slightly less if using sorghum flour, as it absorbs water differently). Stir well, scrape the sides clean, and cover loosely.
- Place the jar in a slightly warm spot, away from the sink or any air vents. Watch for peak activity, which typically occurs 3 to 5 hours after feeding.
Onward:
- By the second week, your starter should be bubbly, lively, and have a pleasant yeasty smell. You can keep it at your preferred amount (100g, or smaller like 50g or 30g). If you bake often, store it at room temperature and feed it equal parts starter, flour, and water twice a day. If you bake less frequently, refrigerate it and feed or discard once a week. Before baking, give it two substantial feedings (about 150g of starter, 150g of flour, and 150g of water each time).
- If you're still having trouble with your starter after two weeks, check out my troubleshooting tips or leave a comment with your questions.
- Happy baking!
Notes
What are you going to name your gluten free sourdough starter?
For the longest time, my starter was nameless. I didn't want to get too connected with it in case it went kaput and I didn't want to pick a name just for the sake of a picking a name - it felt weird to me.
However, one day it occurred to me that I take my starter out of the fridge and feed it on Wednesday's. Well, now my starter's name is Wednesday! Both for the love of Wednesday Addams, and so I never forget what day of the week I'm supposed to feed it. Of course, this could get very confusing if I decided to change my baking day and then it turns out Wednesday starts getting fed on Friday, but nevertheless...
Let me know in the comments what you're going to name your starter, or what the name of your current one is!


Brook
When I store my start in the fridge and take it out once a week to discard/feed. Do I immediately put it back into the fridge, or do I need to let it sit out for a specific time frame before placing it back into the fridge?
madison
It all depends on when you want to use your starter! If you don't plan to bake anything in the next day or two, go ahead and put it straight back into the fridge. If you plan to bake, keep it out and feed at least twice before using.
Nikki
Thank you so much for publishing this very informative method! Having not baked with sourdough before I'm a little unsure what to do on the two big feeds before using - do you still discard down to your initial amount of starter or is the idea to just add to it so you have plenty to bake with?
madison
I'm so glad you're finding it helpful, Nikki! I will be adding sourdough recipes throughout the coming month and will be sure to go over this question in detail in a bread baking post. For now, I will give two examples to explain how to feed before baking. (1) Say your starter weighs 300g (100g starter + 100g water + 100g flour). Instead of the normal discarding down to 100g, I would discard down to 150g or 200g depending on how many loaves and then feed equal parts flour and water(150g or 200g). (2) If you keep a small starter, say 50g and it weighs 150g with the flour and water added to it, I don't recommend discarding any. Simply just feed it flour and water equal to how much it weighs (in this case 150g of each). If you keep an even smaller starter, you may need to do this a couple of times to get it large enough. The reason you don't have to discard is because the purpose of discarding is so that we don't have to maintain a huge starter. In this case, we're intentionally bulking it up. After baking bread, you can then return your starter to your desired amount of grams. I hope that helps!