The Best No Bake Cheesecake Recipe - Vanilla Bean with Gluten Free Graham Cracker Crust
Your rating helps support the making of more tested, delicious gluten-free recipes.
Yield: 8 slices
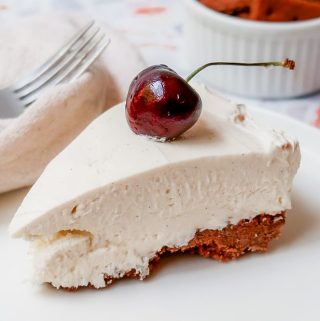
No Bake Cheesecake is eaten cold, incredibly fluffy, and perfectly sweet and tangy. Fresh whipped cream is folded into a cream cheese and powdered sugar mixture. Then, instead of baking, you set it in the fridge to firm up. This recipe is perfect in the summertime when it's too hot to want to leave the oven on for extended periods of time.
Print
Pin
Share
Save
Ingredients
For the Gluten-Free Graham Cracker Crust:
- 2 cups gluten-free graham crackers (240 g) I used Mary's Gone Kookies Cinnamon Graham-Style Snacks
- ⅓ cup light brown sugar
- ½ cup unsalted butter melted
For the Vanilla Bean Cheesecake Filling:
- 1 and ¼ cups heavy whipping cream *Cold, straight from the fridge
- 3 8 oz blocks of full-fat cream cheese room temperature
- ½ cup granulated sugar
- ¼ cup sour cream room temperature
- 3 tablespoon powdered sugar
- 1 tablespoon vanilla bean paste or sub 1 tablespoon pure vanilla extract, or 1 vanilla bean pod
- 2 teaspoon freshly-squeezed lemon juice
- Optional toppings: Fresh fruit, pie fillings, homemade strawberry sauce, etc.
Instructions
For the Gluten-Free Graham Cracker Crust:
- Grease the bottom and sides of a 9 or 10-inch spring form pan with butter or nonstick cooking spray. Set aside.
- Place the graham crackers in a gallon storage bag, seal tightly, and crush into fine crumbs with a rolling pin or mallet.
- Add the graham cracker crumbs to a medium-sized mixing bowl along with the brown sugar and melted butter. Stir until well-combined. The mixture should look like wet sand.
- Pour the crumbs into the prepared spring form pan. Using the palms of your hands and/or the bottom of a measuring cup, pack the crumbs down firmly in an even layer on the bottom and a little up the sides. Press as firmly as you can to prevent the crumbs from falling apart later when the cheesecake is cut.
- Place the pan with the crust in the freezer for 15-20 minutes, or as long as it takes to prepare the cheesecake filling.
For the Vanilla Bean Cheesecake Filling:
- To make the whipped cream: Use an electric mixer or stand mixer fitted with a whisk attachment on medium-high speed to whip the cold heavy whipping cream into stiff peaks, about 4-5 minutes. If new to making homemade whipped cream, you can also use a cold bowl by placing it in the freezer for 5-10 minutes beforehand. This helps the cream to whip a little faster. Set aside.
- In a large mixing bowl, add the cream cheese and granulated sugar. Using an electric mixer or stand mixer fitted with a paddle attachment, beat on medium speed until smooth and creamy, about 3 to 4 minutes.
- Add in the freshly-squeezed lemon juice, powdered sugar, sour cream, and vanilla bean paste. Beat an additional 2 to 3 minutes until smooth and no lumps remain. Tip: You can sift your powdered sugar if worried about lumps.
- Carefully and slowly fold the whipped cream into the cheesecake mixture using a rubber spatula until just combined. Be careful to not over turn the mixture or else the air in the whipped cream will deflate.
- Remove the crust from the freezer and place the filling on top of the crust. Spread into an even layer, smoothing out the top.
- Cover with plastic wrap and refrigerate for at least 8 hours, preferably overnight, to allow the cheesecake to set up properly. When serving: Top with optional toppings just before serving. Topping just before helps prevent any pie filling from seeping into the crust or through the cheesecake. To cut: Use the edge of a knife to go around the cheesecake in a circle to help loosen it from the sides of the pan. Release the spring form pan and remove the rim. Cut into the cheesecake using a sharp dessert knife, wiping the knife clean between cutting each slice.
- Enjoy!
Notes
Storage Instructions: This cheesecake must be kept refrigerated at all times and is recommended to be eaten within 3 to 4 days. Store in the spring form pan, tightly covered in plastic wrap or foil to prevent from drying out.
Did you make this recipe?Mention @wondersofcooking or tag #wondersofcooking!