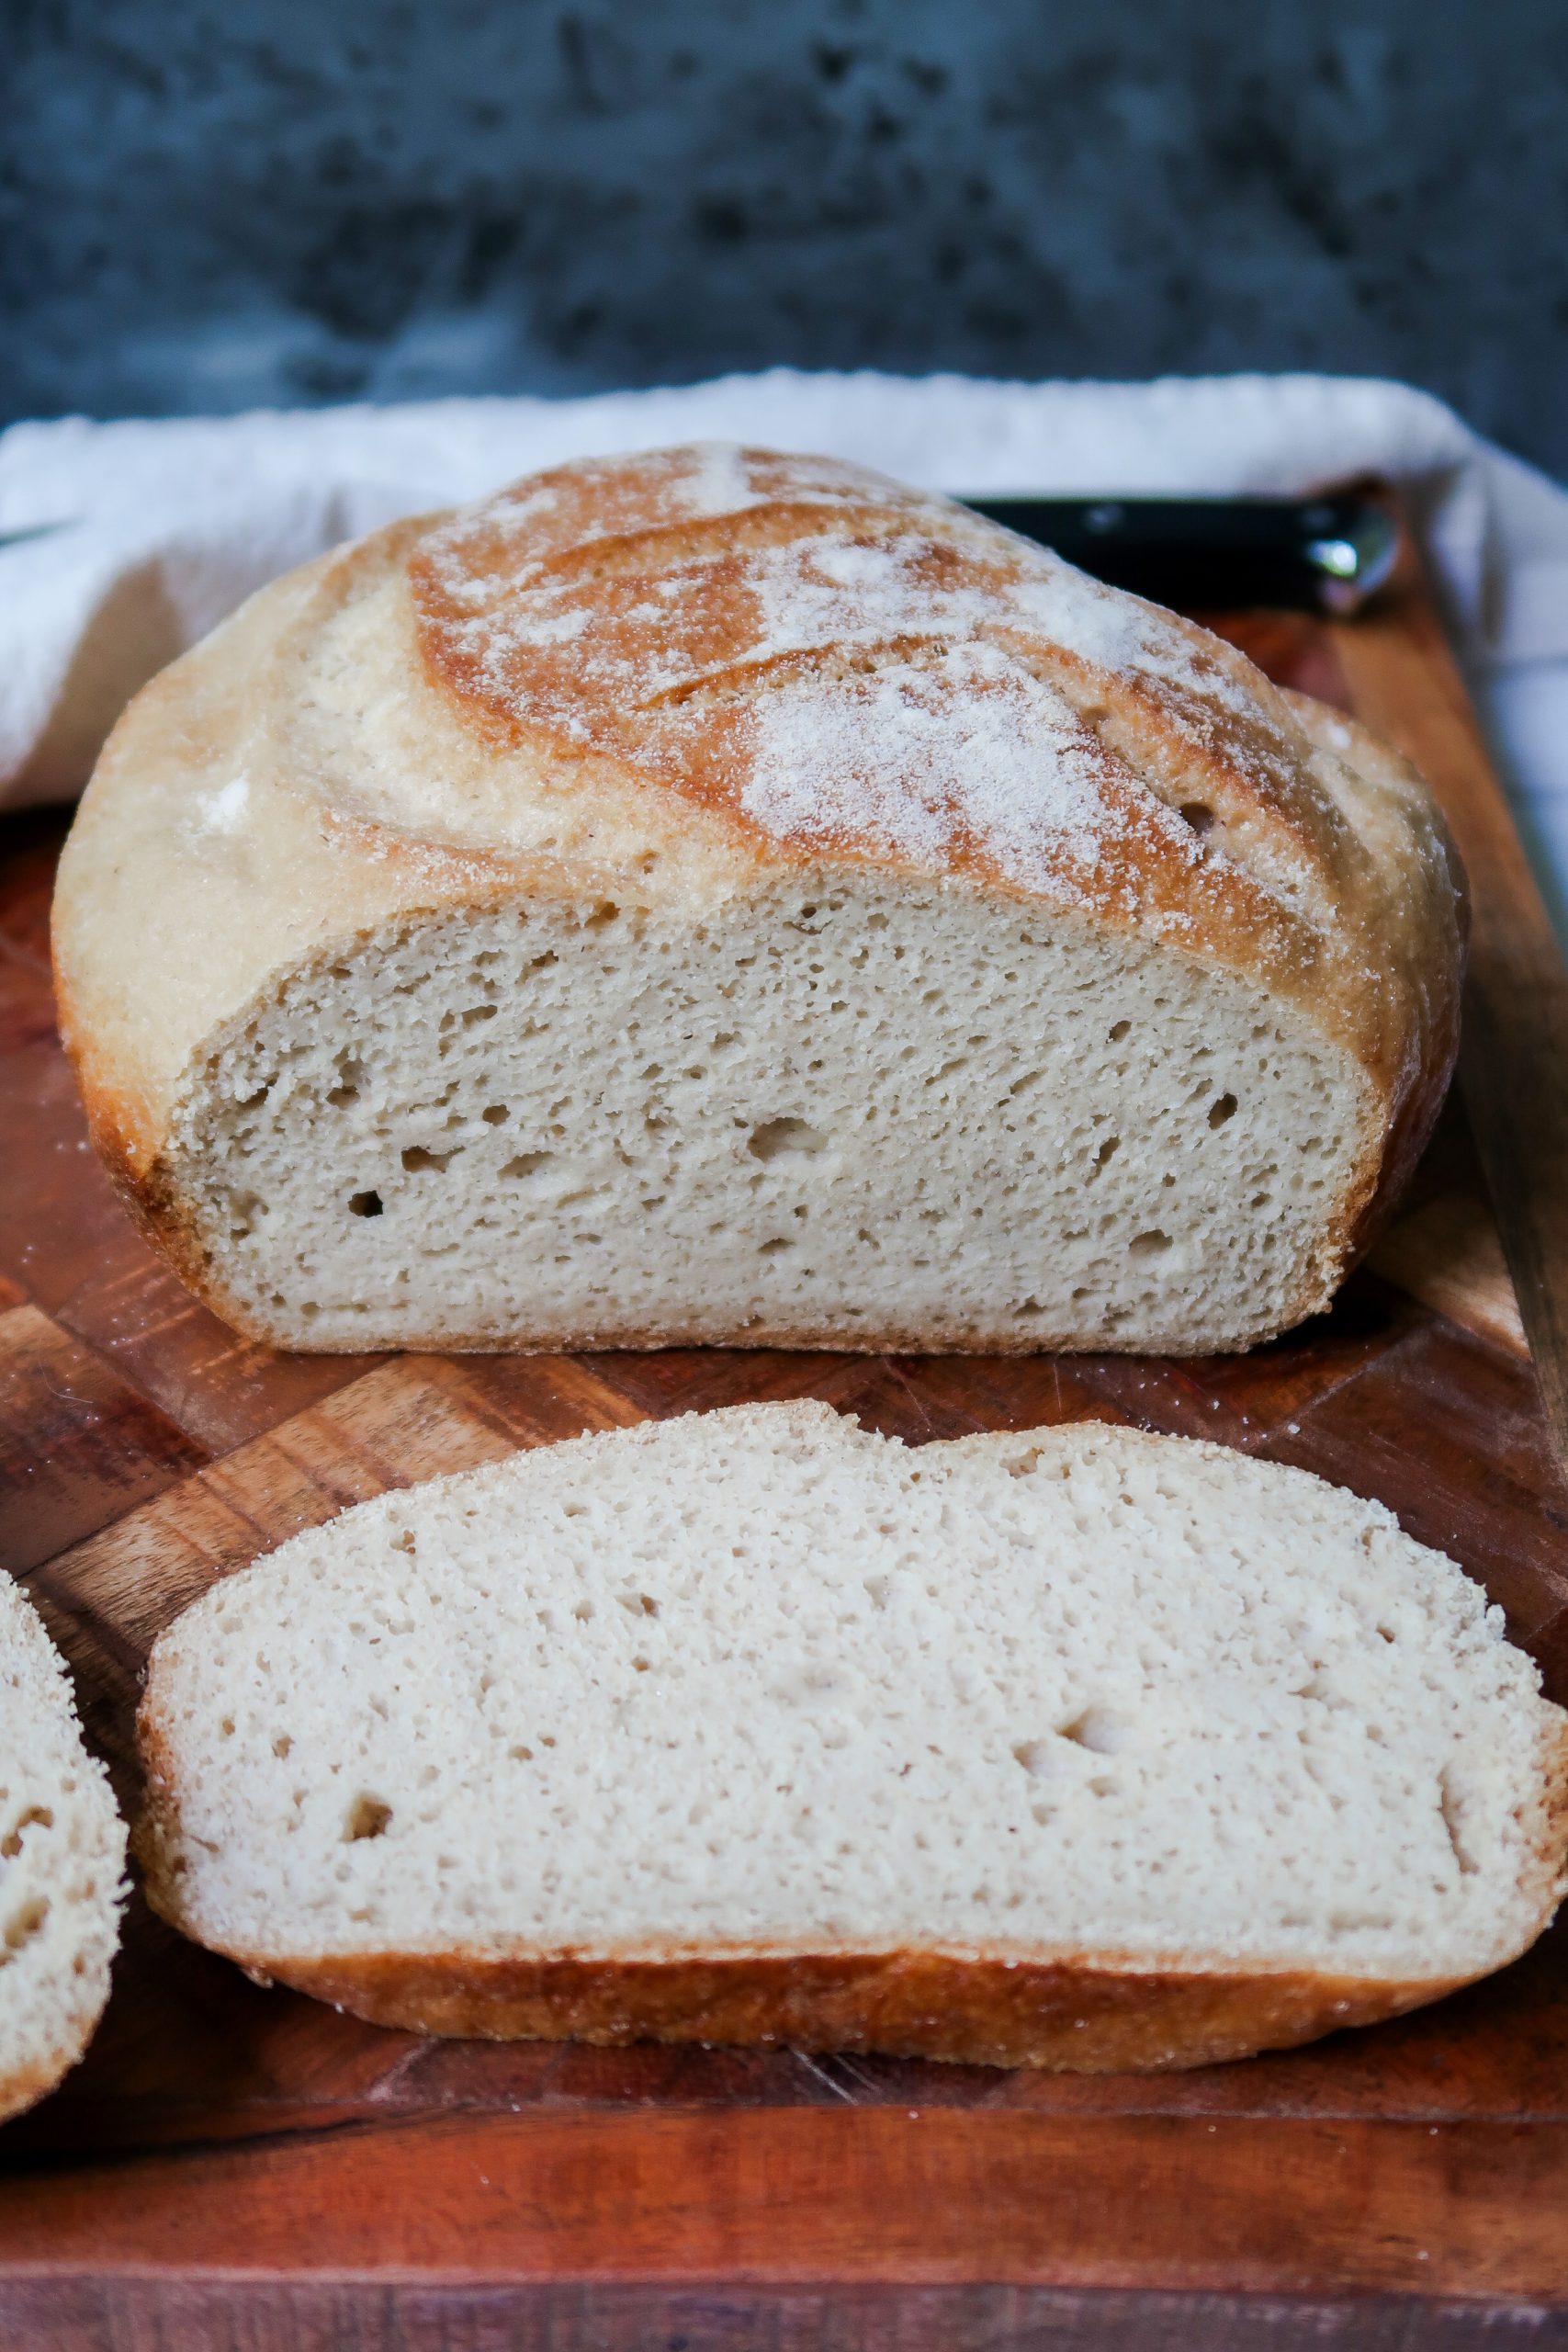
This Gluten Free Sourdough Bread Recipe is perfect for beginners. It bakes up golden and crusty with a slight chew, while staying soft and tender on the inside.
This recipe skips a preferment, so you can enjoy fresh bread the same day. Since preferments develop sour flavor over time, I suggest using a mature starter (at least 1–2 months old) for a deeper taste. If your starter is younger and you prefer a milder loaf, go for it!
You'll need a gluten-free sourdough starter, ideally made with superfine brown rice or sorghum flour. If you don’t have one, check out my guide on How to Make a Gluten-Free Sourdough Starter. The bread pictured was made with a 100% brown rice starter.
Jump to Recipe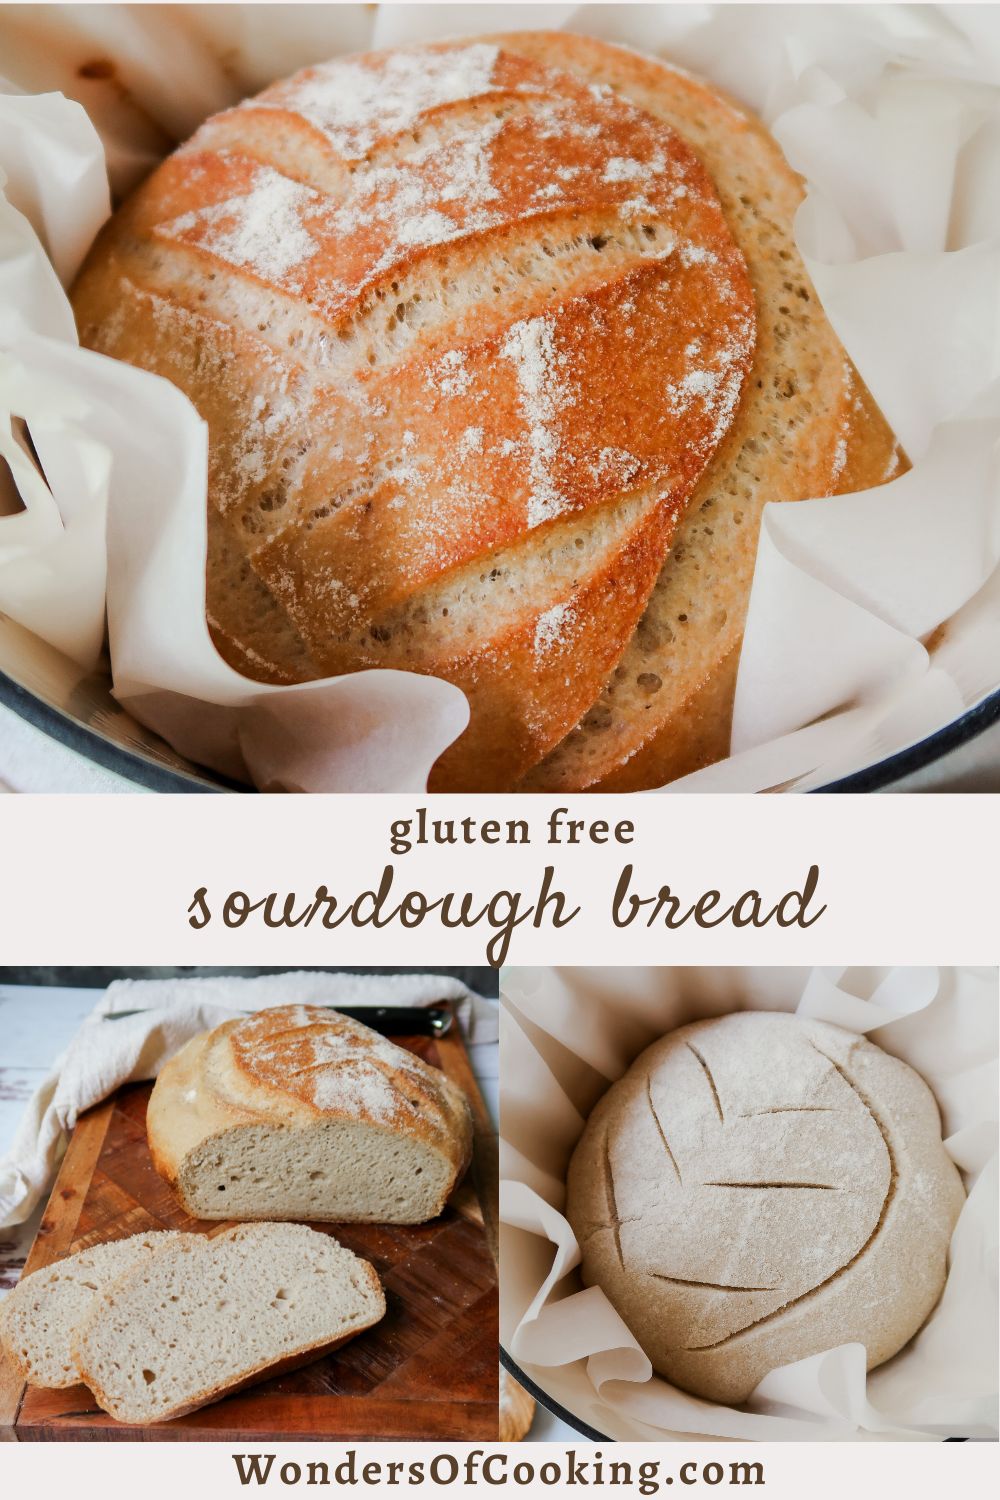
As an Amazon Associate, I earn from qualifying purchases. This post contains affiliate links for products I use and love. You can read my full disclosure here. All thoughts and opinions expressed are my own. Thank you for supporting Wonders of Cooking so that I can continue to provide you with free gluten-free recipes.
Looking for more Gluten Free Sourdough Recipes?
- Gluten Free Sourdough Discard Crackers | Best Gluten Free Cracker Recipe
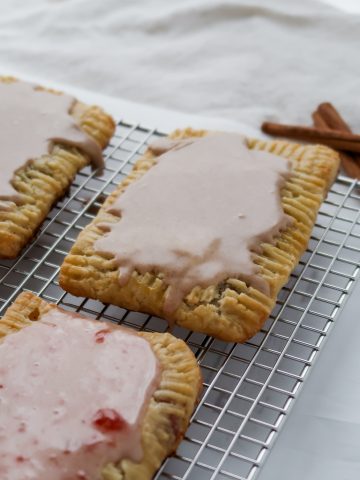
- Gluten Free Sourdough Poptarts | Homemade Strawberry Poptarts
- Gluten Free Soft Pretzel Bites | Best Sourdough Discard Recipes
- Gluten Free Lemon Bundt Cake | Best Sourdough Discard Recipes
- Gluten Free Sourdough Pancakes | Sourdough Discard Recipes | Best Fluffy Pancakes
- Sourdough Chocolate Chip Cookies | Gluten Free Sourdough Discard Recipes
- Gluten Free Sourdough Banana Bread | Sourdough Discard Recipes
- Gluten Free Sourdough Pizza Crust - Best Sourdough Discard Recipes
- Gluten Free Sourdough Pie Crust - Sourdough Discard Recipes

Tips for Making the Best Gluten Free Sourdough Bread:
- Start with this gluten free sourdough bread recipe as written before experimenting with mix-ins like raisins, seeds, or herbs. You can also adjust flour ratios for different textures, but keep total flours at 200g and starches at 140g.
- One golden rule: Your sourdough bread can only be as good as your starter. For the best flavor and rise, use a mature starter (at least 1–2 months old). A strong, bubbly starter is key to airy, well-risen bread. If yours isn’t quite active, let it develop for a few more days or try adding 1 teaspoon of honey to boost fermentation.
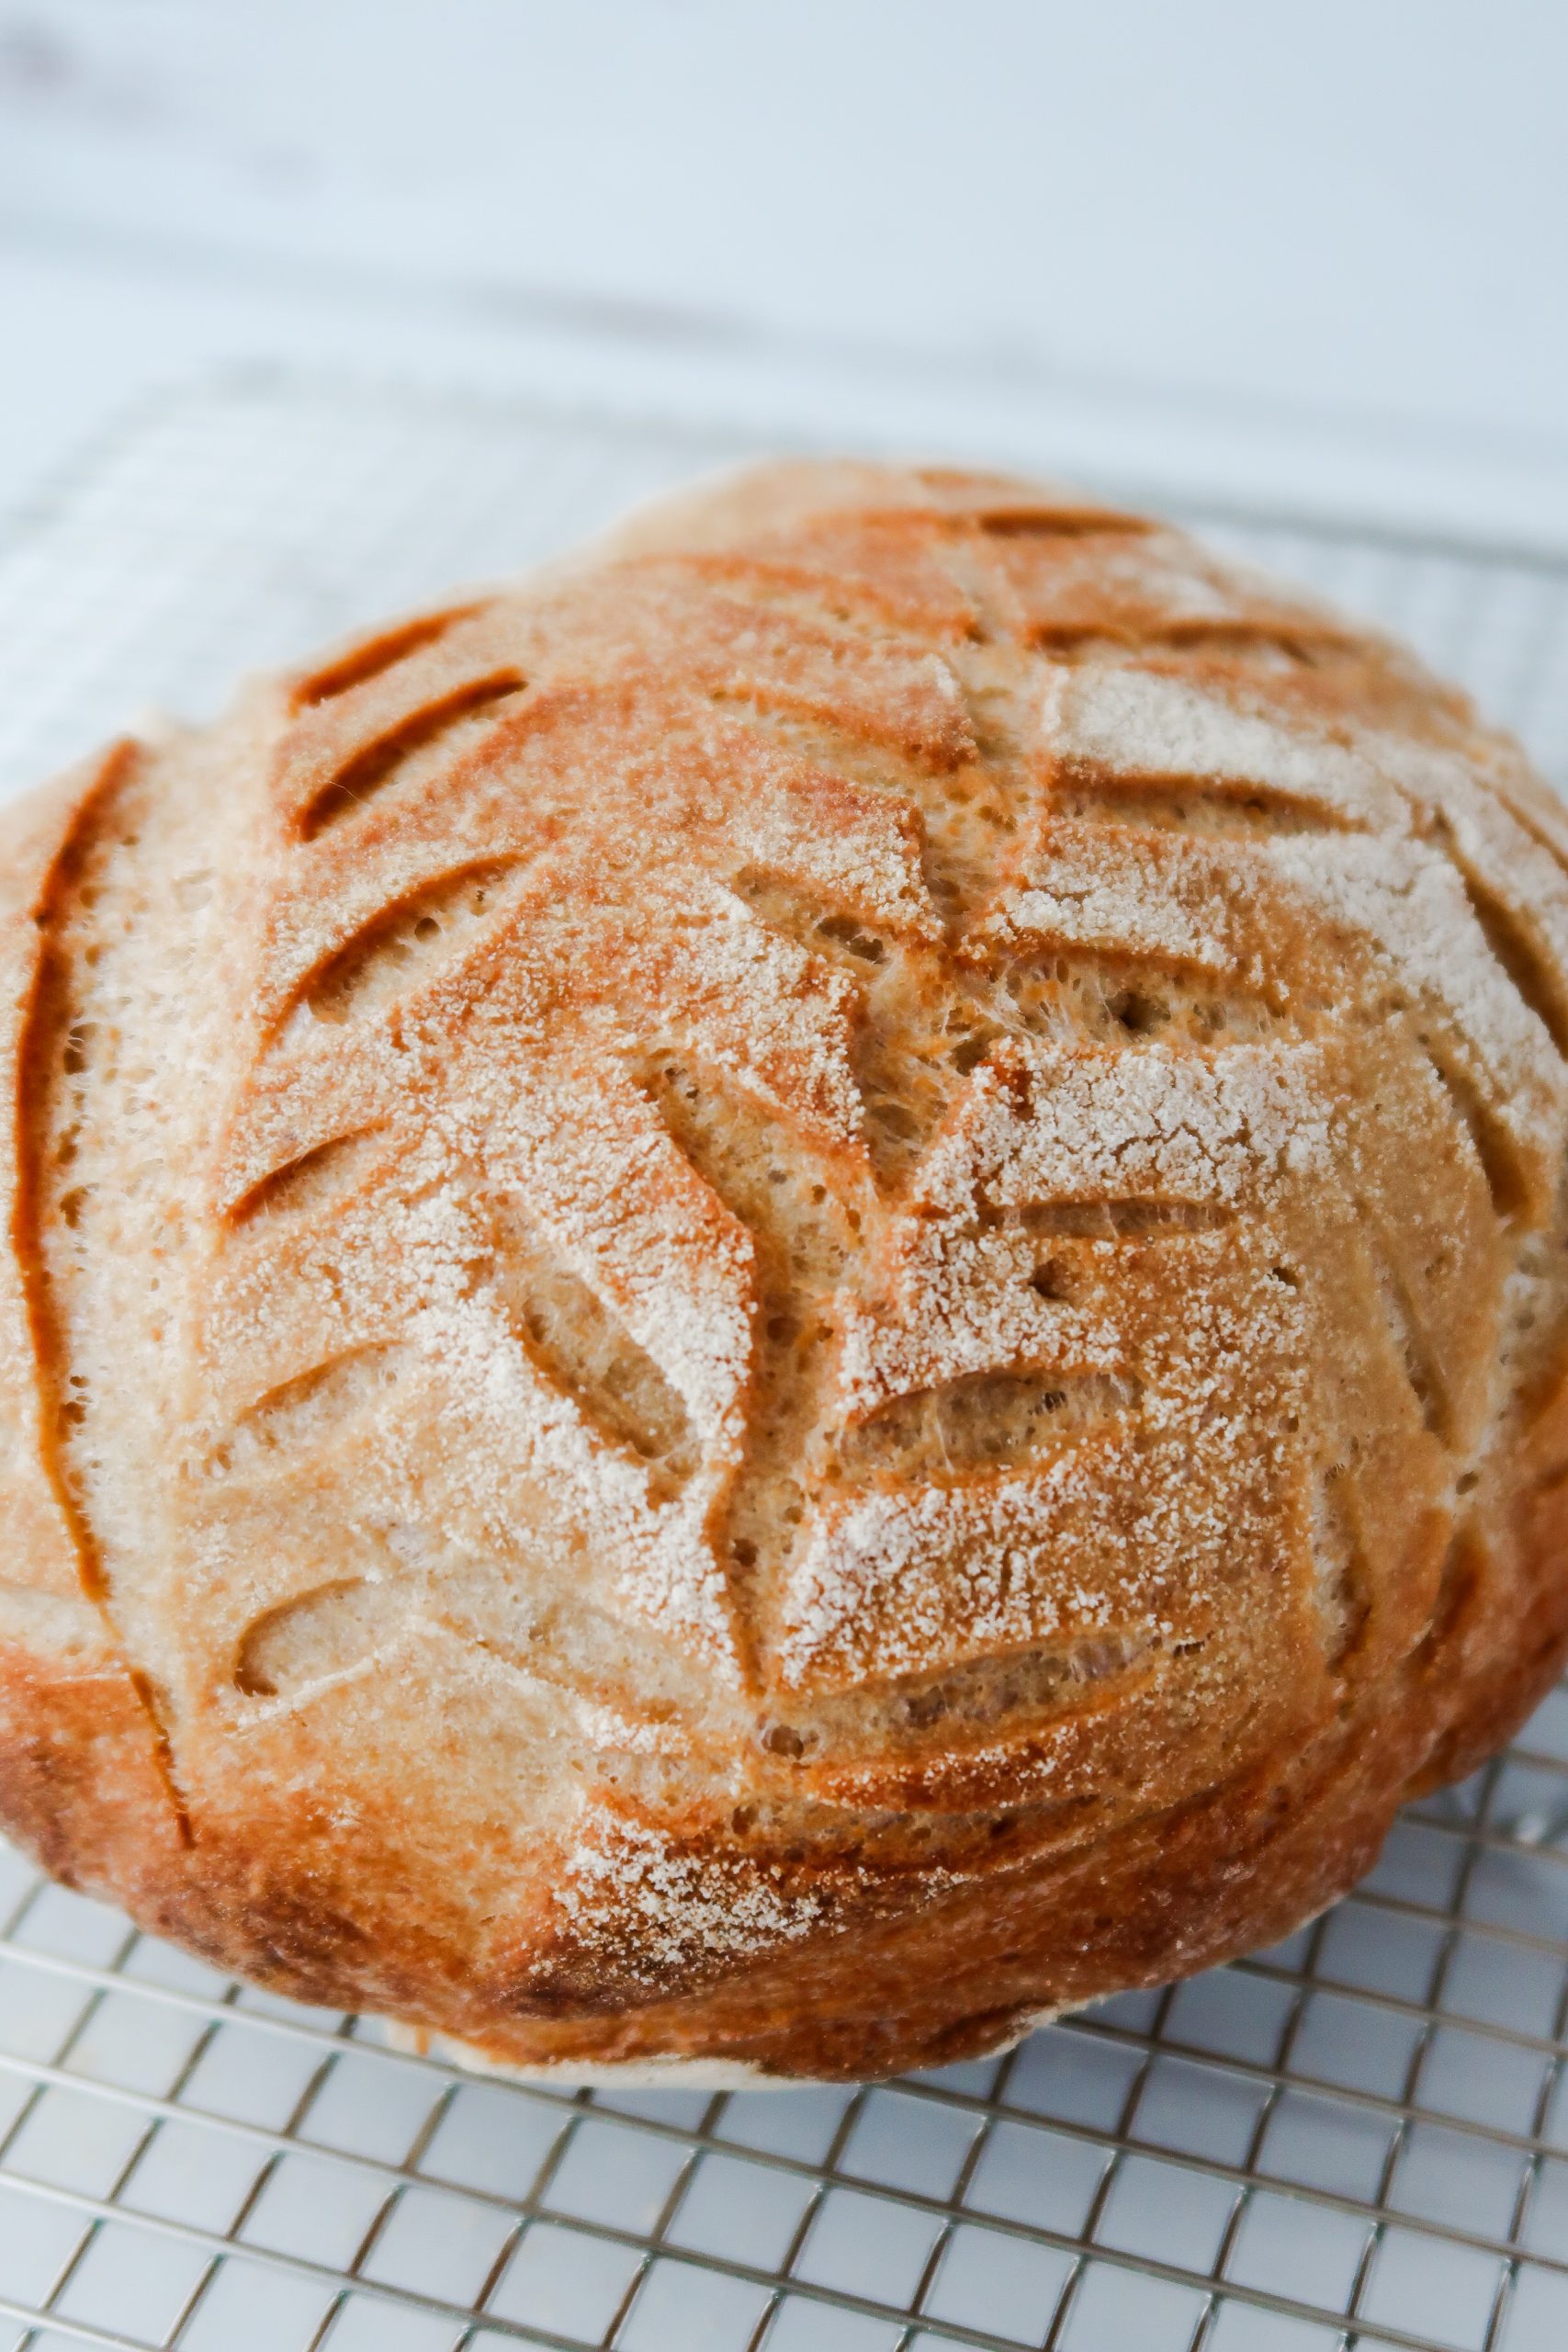
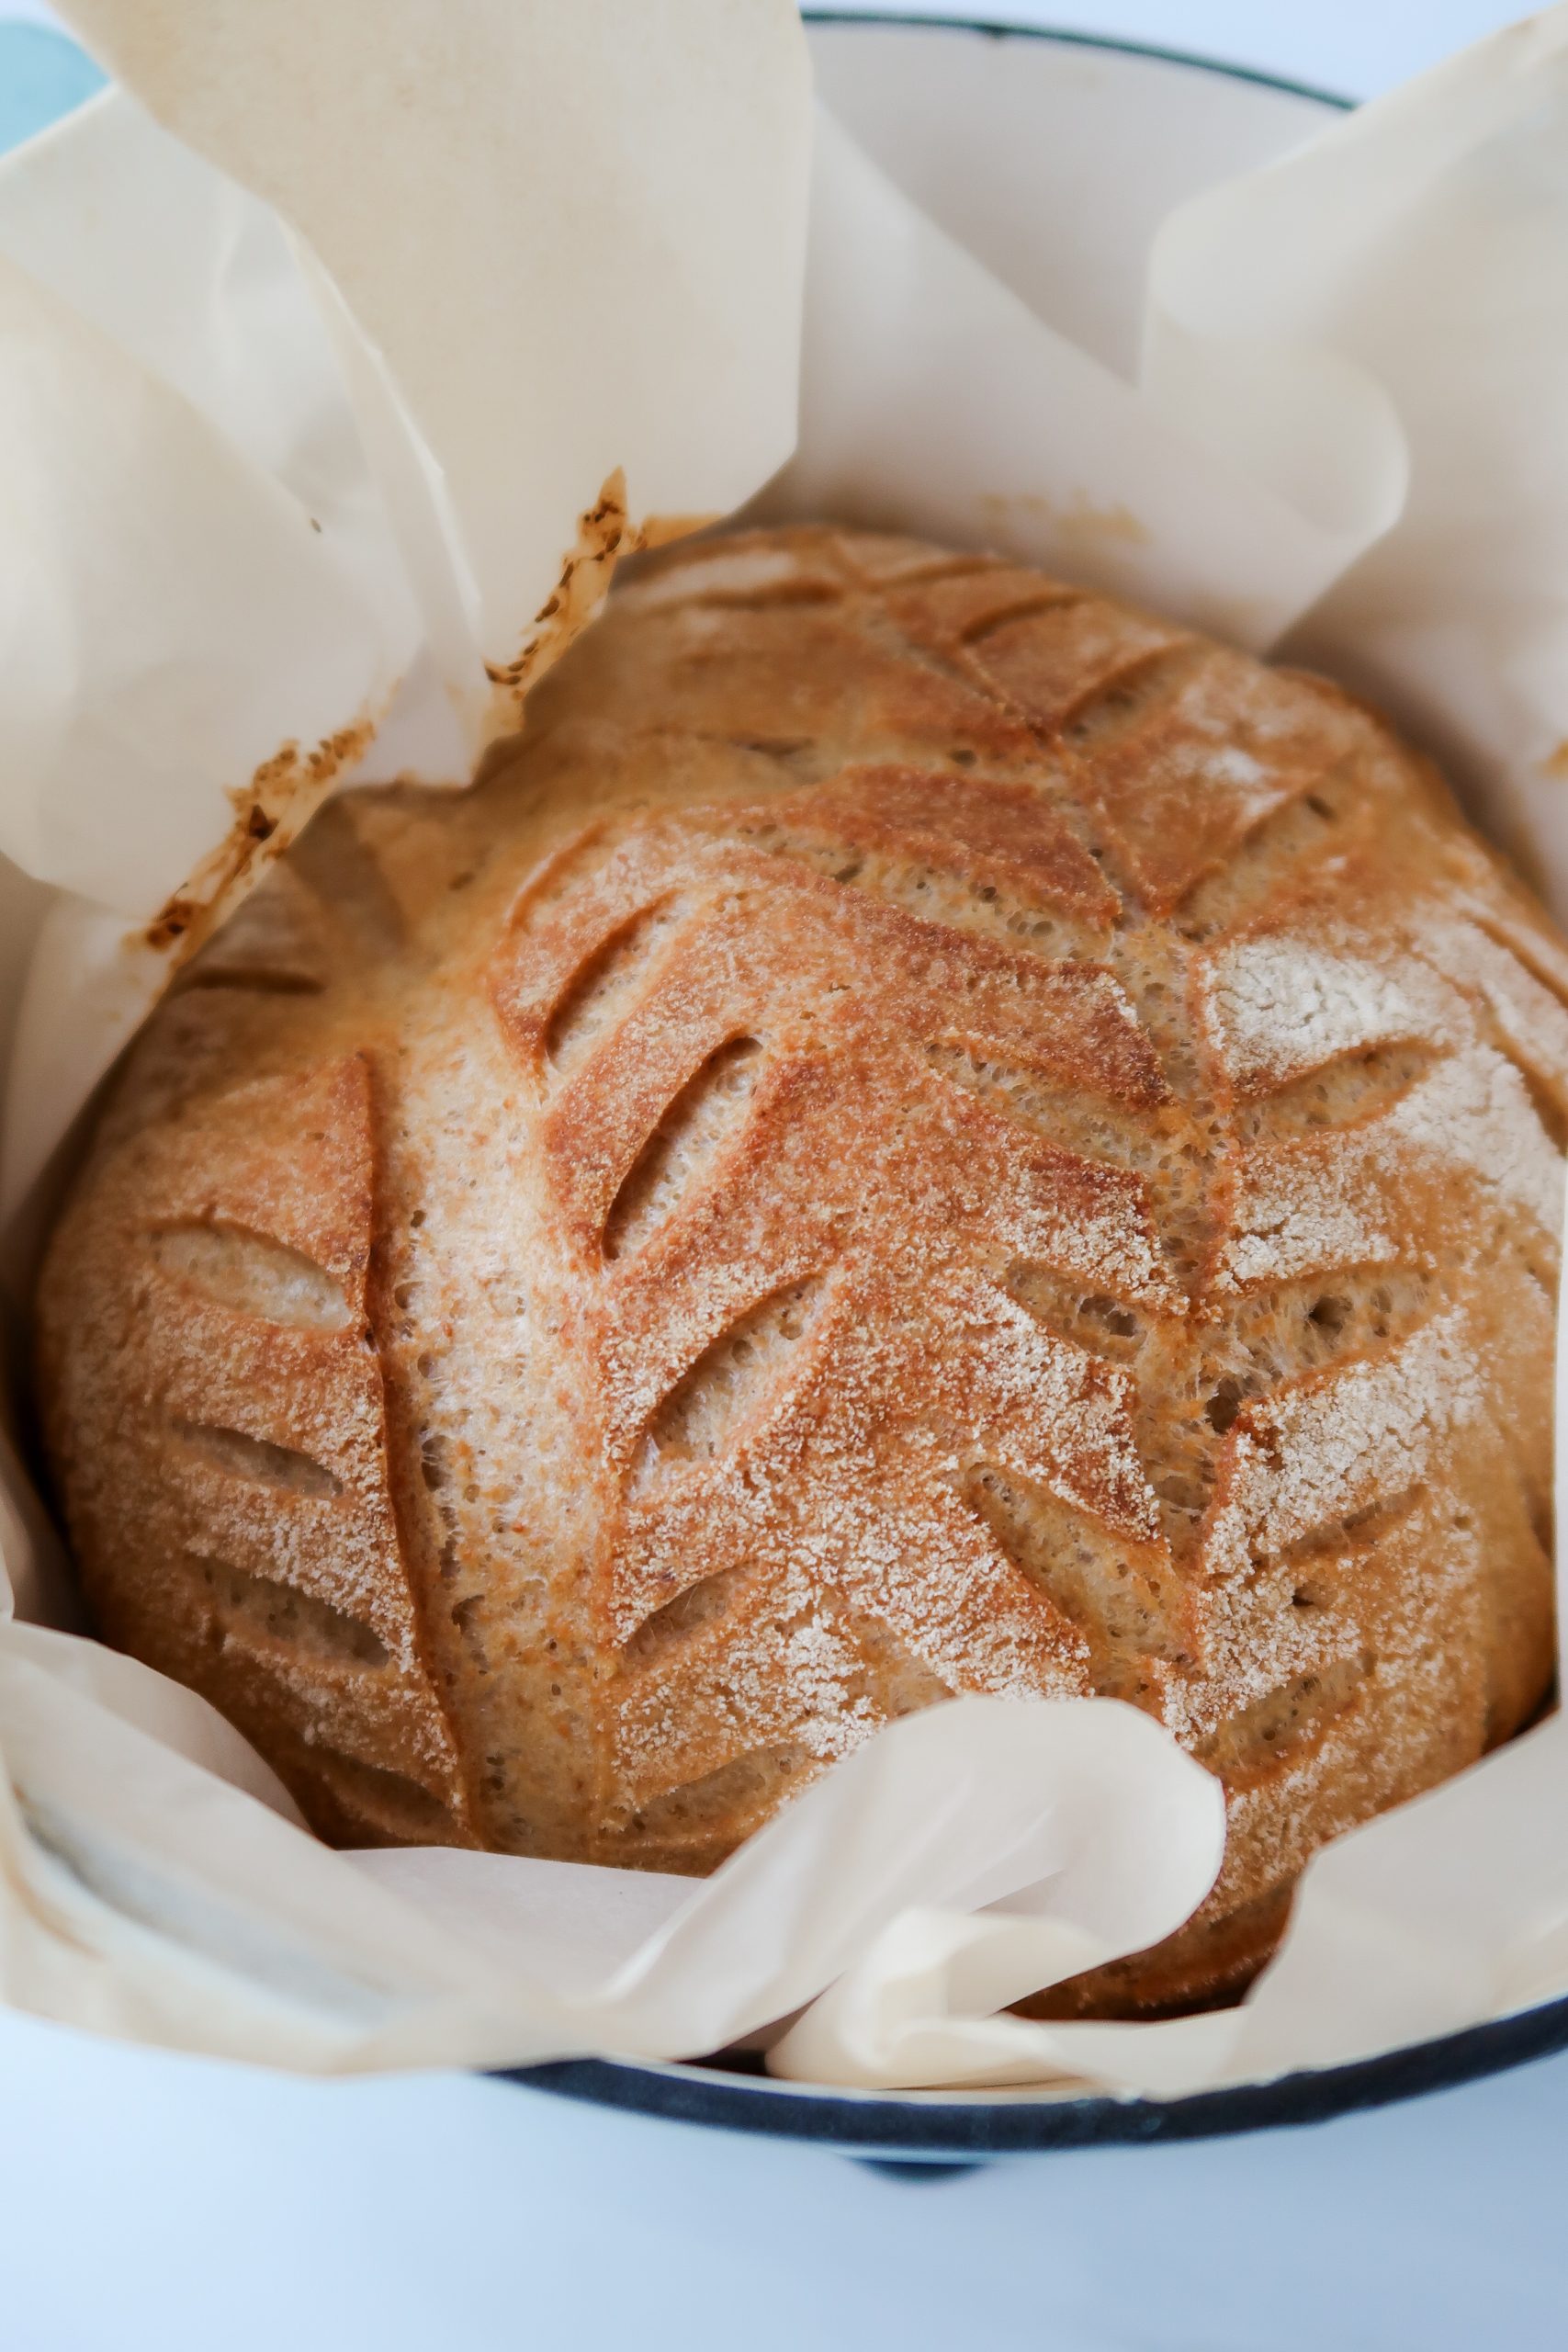
- Score the dough ¼–½ inch deep to allow steam to escape. Generously dusting the top with brown rice flour before baking brings out the design.
- If your starter isn’t strong enough to rise the dough, don’t worry! Salvage it by baking it in a loaf pan instead—its tall shape will prevent the bread from spreading too much.
- Join my Facebook group, Gluten Free Sourdough Baking Recipes and Advice, to share photos, swap recipes, and get real-time tips from our growing community of 13,000 members.

How do I prep my starter to make gluten-free sourdough bread?
Feed your starter at least twice (8-12 hours apart) before baking to ensure it's active and bubbly. You'll need to feed it more than usual to have enough to bake with and enough leftover to keep it going.
Here's an example: If you keep a 300g starter (100g starter + 100g flour + 100g water) in the fridge, take it out the day before baking and let it warm up for a few hours. Then, discard less than usual (down to 150g–200g instead of 100g) and feed it equal parts flour and water. Repeat the next morning—discarding back to 150g–200g and feeding again. Your starter will be ready to use in about 3–4 hours, once it's bubbly and at peak rise.

If you keep a small starter (say 50g, totaling 150g with flour and water), don't discard during the two feedings before baking. Instead, feed it an amount equal to its weight (150g in this case) to ensure you have enough to make bread and have starter leftover.
Discarding is only needed to avoid maintaining a large starter, but since you're bulking it up for baking, skipping it is fine.
For multiple loaves, feed the starter 200–250g to ensure you have plenty left. After baking, you can return the starter to your preferred maintenance size.

Gluten Free Sourdough Bread Ingredients
- Active gluten-free sourdough starter, preferably brown rice.
- Whole psyllium husk + room temperature water. Use whole psyllium husk, not powder. It’s essential for this recipe, as it acts as the main binder, mimicking gluten.
- Sorghum flour, a mild-flavored flour packed with nutrients.
- Certified Gluten-Free Oat flour. If you can't tolerate oats, substitute it with an equal amount of brown rice flour. This ingredient adds a slightly chewy texture, plus fiber and nutrients to the bread.
- Superfine brown rice flour adds a bit of heartiness to the bread’s texture and provides additional nutrients.
- Tapioca starch, sometimes labeled as tapioca flour.
- Potato starch, not potato flour. It makes the crumb of the bread tender while helping to provide structure.
- Maple syrup, or honey activates the natural yeasts in the starter, promoting a good rise.
- Olive oil softens the crumb, preventing gumminess, and adds depth of flavor.
- Salt (or sea salt) is essential to enhance the flavors of the bread. Without it, the bread would taste bland.

Recommended Equipment
- A 7-inch boule banneton basket or an 8-inch batard (oval) banneton basket
- Use a Dutch oven or a high-heat safe ceramic dish with a lid, capable of withstanding temperatures between 400-500°F. I recommend choosing a Dutch oven that’s 1-2 inches larger than your banneton basket (for example, I use a 7-inch banneton bowl and an 8.5-inch Dutch oven). This helps the loaf rise tall, not spread wide. Avoid using a Dutch oven that's too tall to keep the steam and convection close to the top of the bread as it bakes. My Dutch oven is 6 inches tall.
- A lame or sharp knife to score the bread.
- A kitchen scale for accuracy.
- A wire cooling rack to ensure the bread cools completely.
- A silicone bread sling makes transferring the boule to and from the Dutch Oven a breeze.
- A sourdough starter temperature control device is a handy tool to keep your starter at a steady temperature, ensuring it rises properly for making bread dough.
- Don't want to make a starter from scratch? This Sourdough Starter Culture packet gives you a head start with a dehydrated gluten-free starter and easy-to-follow directions for long-term maintenance. I love this site because they also offer kits for cheesemaking, yogurt, kombucha, and fermented vegetables. (Use code WONDERS15X at Cultures For Health to get 15% off!) You can also find the GF starter on Amazon here.
Gluten Free Sourdough Bread Baking Schedule
Here’s a guide for when and how to prepare your starter and dough. If your starter is kept at room temperature and is very active, you could technically make and bake the bread in one day after a single feeding. The first evening feeding is mainly to revive refrigerated starters or bulk up small ones.
Day One (Evening Before Baking)
If your starter is refrigerated, take it out and feed a larger amount than usual. For one loaf, I recommend 150g starter, 150g flour, and 150g room temperature water. Note: To bulk up the starter, you may need to discard less than normal. If you have a small starter, refer to the "How do I Prep My Starter" section above. Leave the starter at room temperature overnight.
Day Two (Baking Day)
- In the morning, discard and feed the starter again, using the same ratios as the night before. Place it in a slightly warm spot and let it rise to its peak, about 2 to 4 hours.
- Once the starter is at its peak, mix the dough ingredients, shape the boule, and place it in a banneton bowl. Let it rise for another 3 to 5 hours.
- An hour before baking, preheat the oven with the Dutch oven inside.
- Bake the bread for about 1 hour to 1 hour 20 minutes, until 210 F.
- Let the bread cool for at-least 4-6 hours to allow the inside to soften. Cutting into it too soon will make it dry and tough.
- Enjoy!
How to Make Gluten Free Sourdough Bread:
Follow the baking schedule above and proceed with the steps once your starter has reached its peak rise:


- In a large mixing bowl or the bowl of a stand mixer, combine slightly warm filtered water (78-85°F), whole psyllium husk, maple syrup, and olive oil. Whisk until well mixed, then set aside for 5 to 10 minutes to let it "gel up."
Note: Be sure to use filtered water. I like to let filtered water from my fridge sit out while the starter is rising, then check the temperature with a meat thermometer. If it’s not warm enough, you can heat it in the microwave in 5 to 10-second intervals.


- Sift the dry ingredients—sorghum flour, oat flour, brown rice flour, potato starch, and tapioca starch—into a medium-sized mixing bowl. Add the salt, and stir until everything is well combined.

- Add the dry ingredients to the bowl with the wet ingredients, then mix in 265g of the active sourdough starter. Stir with a spoon, by hand, or use an electric mixer until a dough forms, then mix for another 30 seconds. The dough should be sticky but smooth and easy to work with. If it’s too dry and not coming together, add 1-2 tablespoons of water.

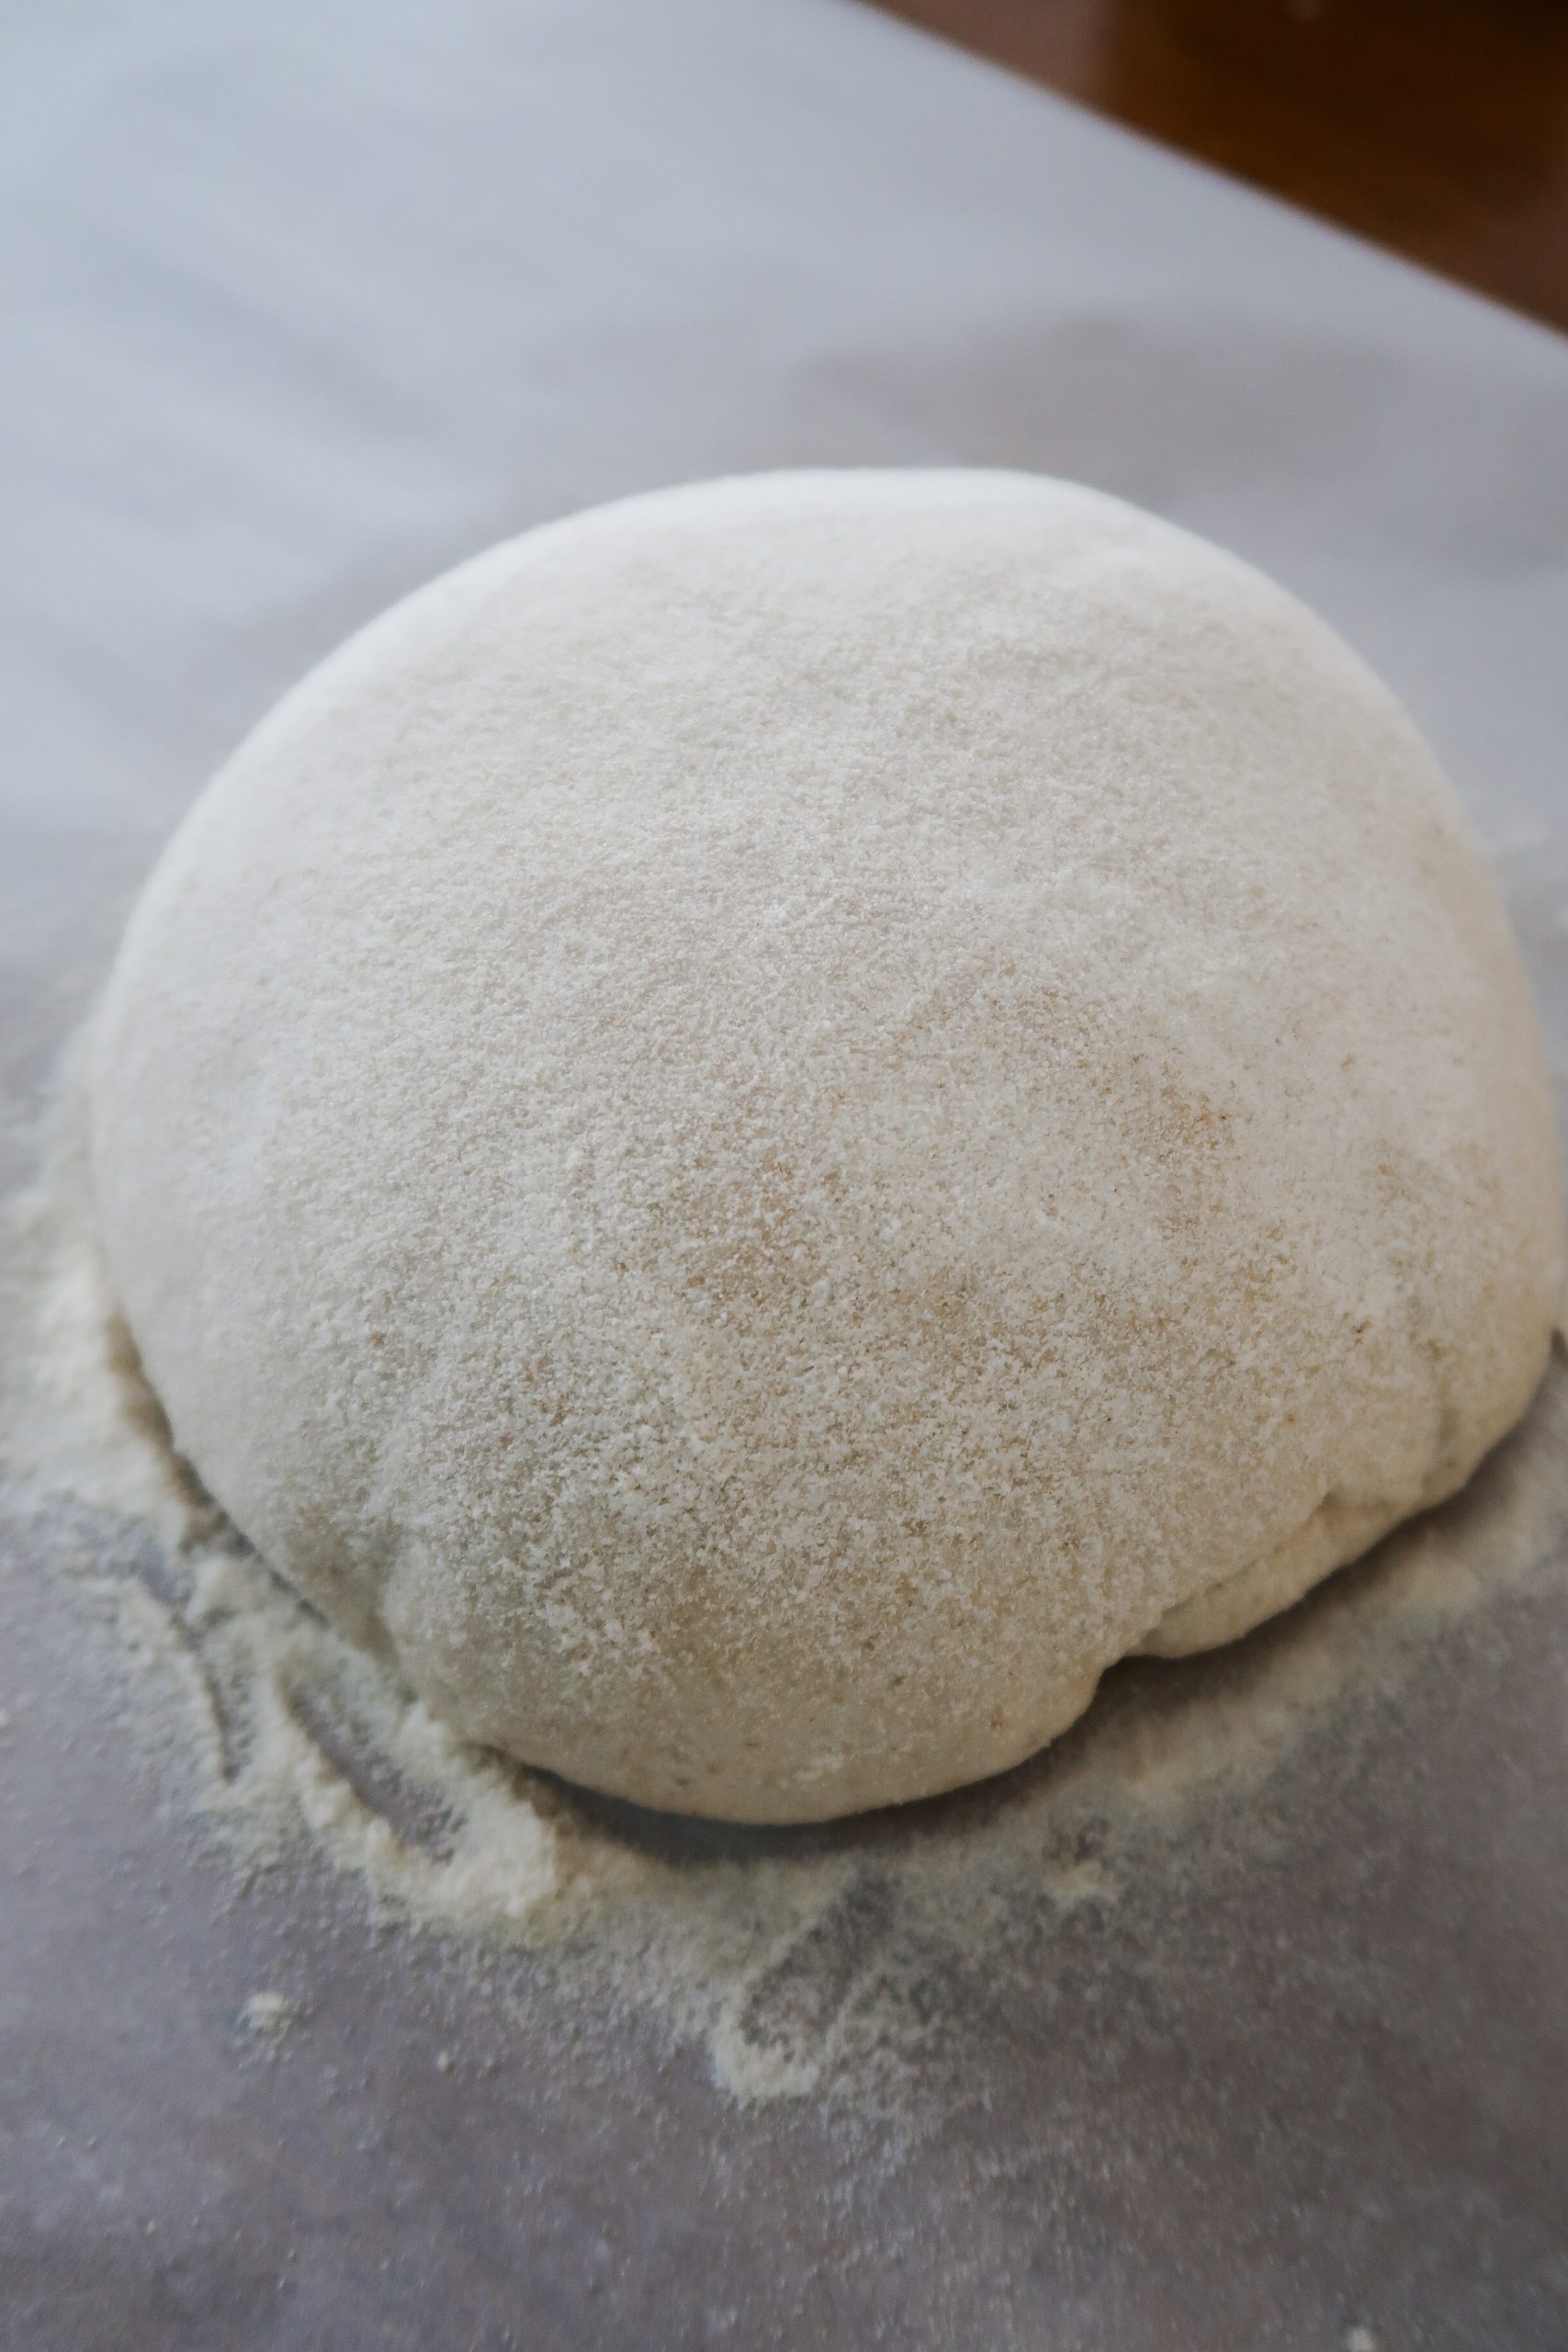
- Dust a 7-inch banneton basket or proofing bowl with brown rice flour to prevent sticking. Shape the dough into a classic ball or "boule" shape, smoothing out any imperfections. Place the dough smooth side down in the basket (when flipped, the bottom will become the top of the loaf).

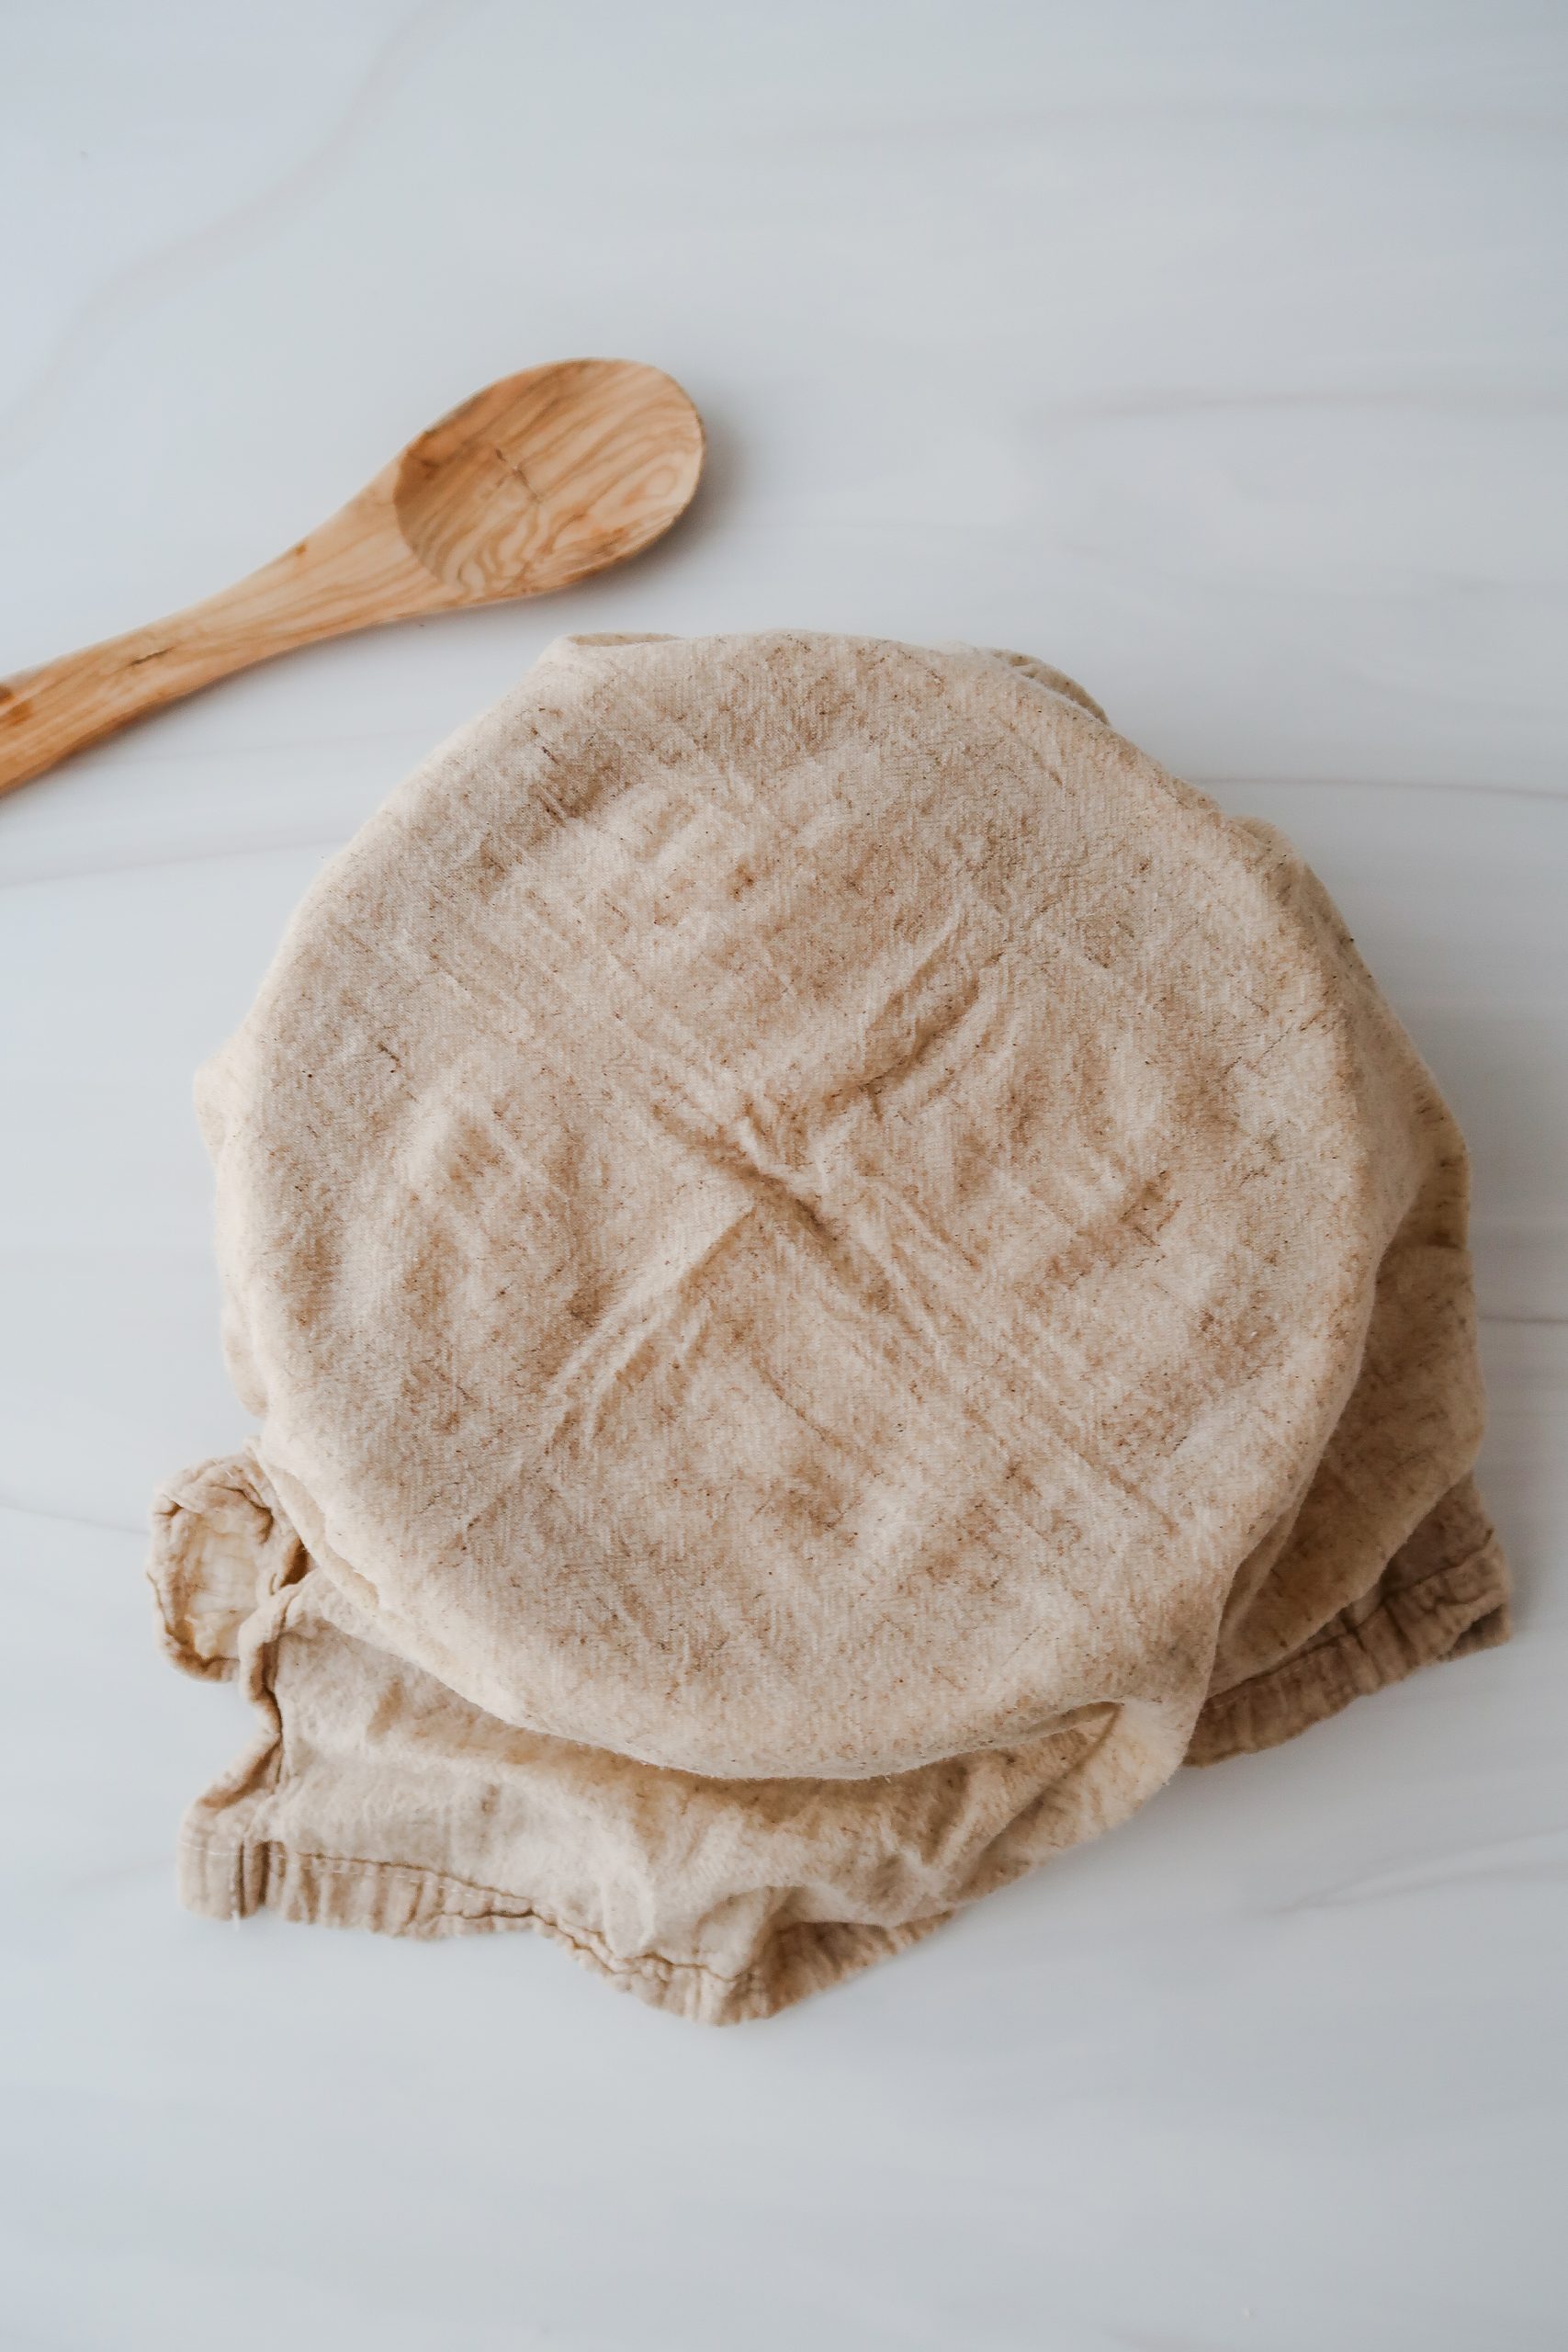
- Cover the basket with a damp tea towel and set it aside to rise for 3 to 5 hours. Once the boule has risen ½ to 1 inch, it’s ready to bake.
Note: The change is very subtle to the naked eye. To be sure, try snapping a before photo to compare how it's changed.
- An hour before the boule reaches peak rise, preheat the oven to 425°F with the Dutch oven inside. Tip: Position the racks so the Dutch oven is centered in the oven.

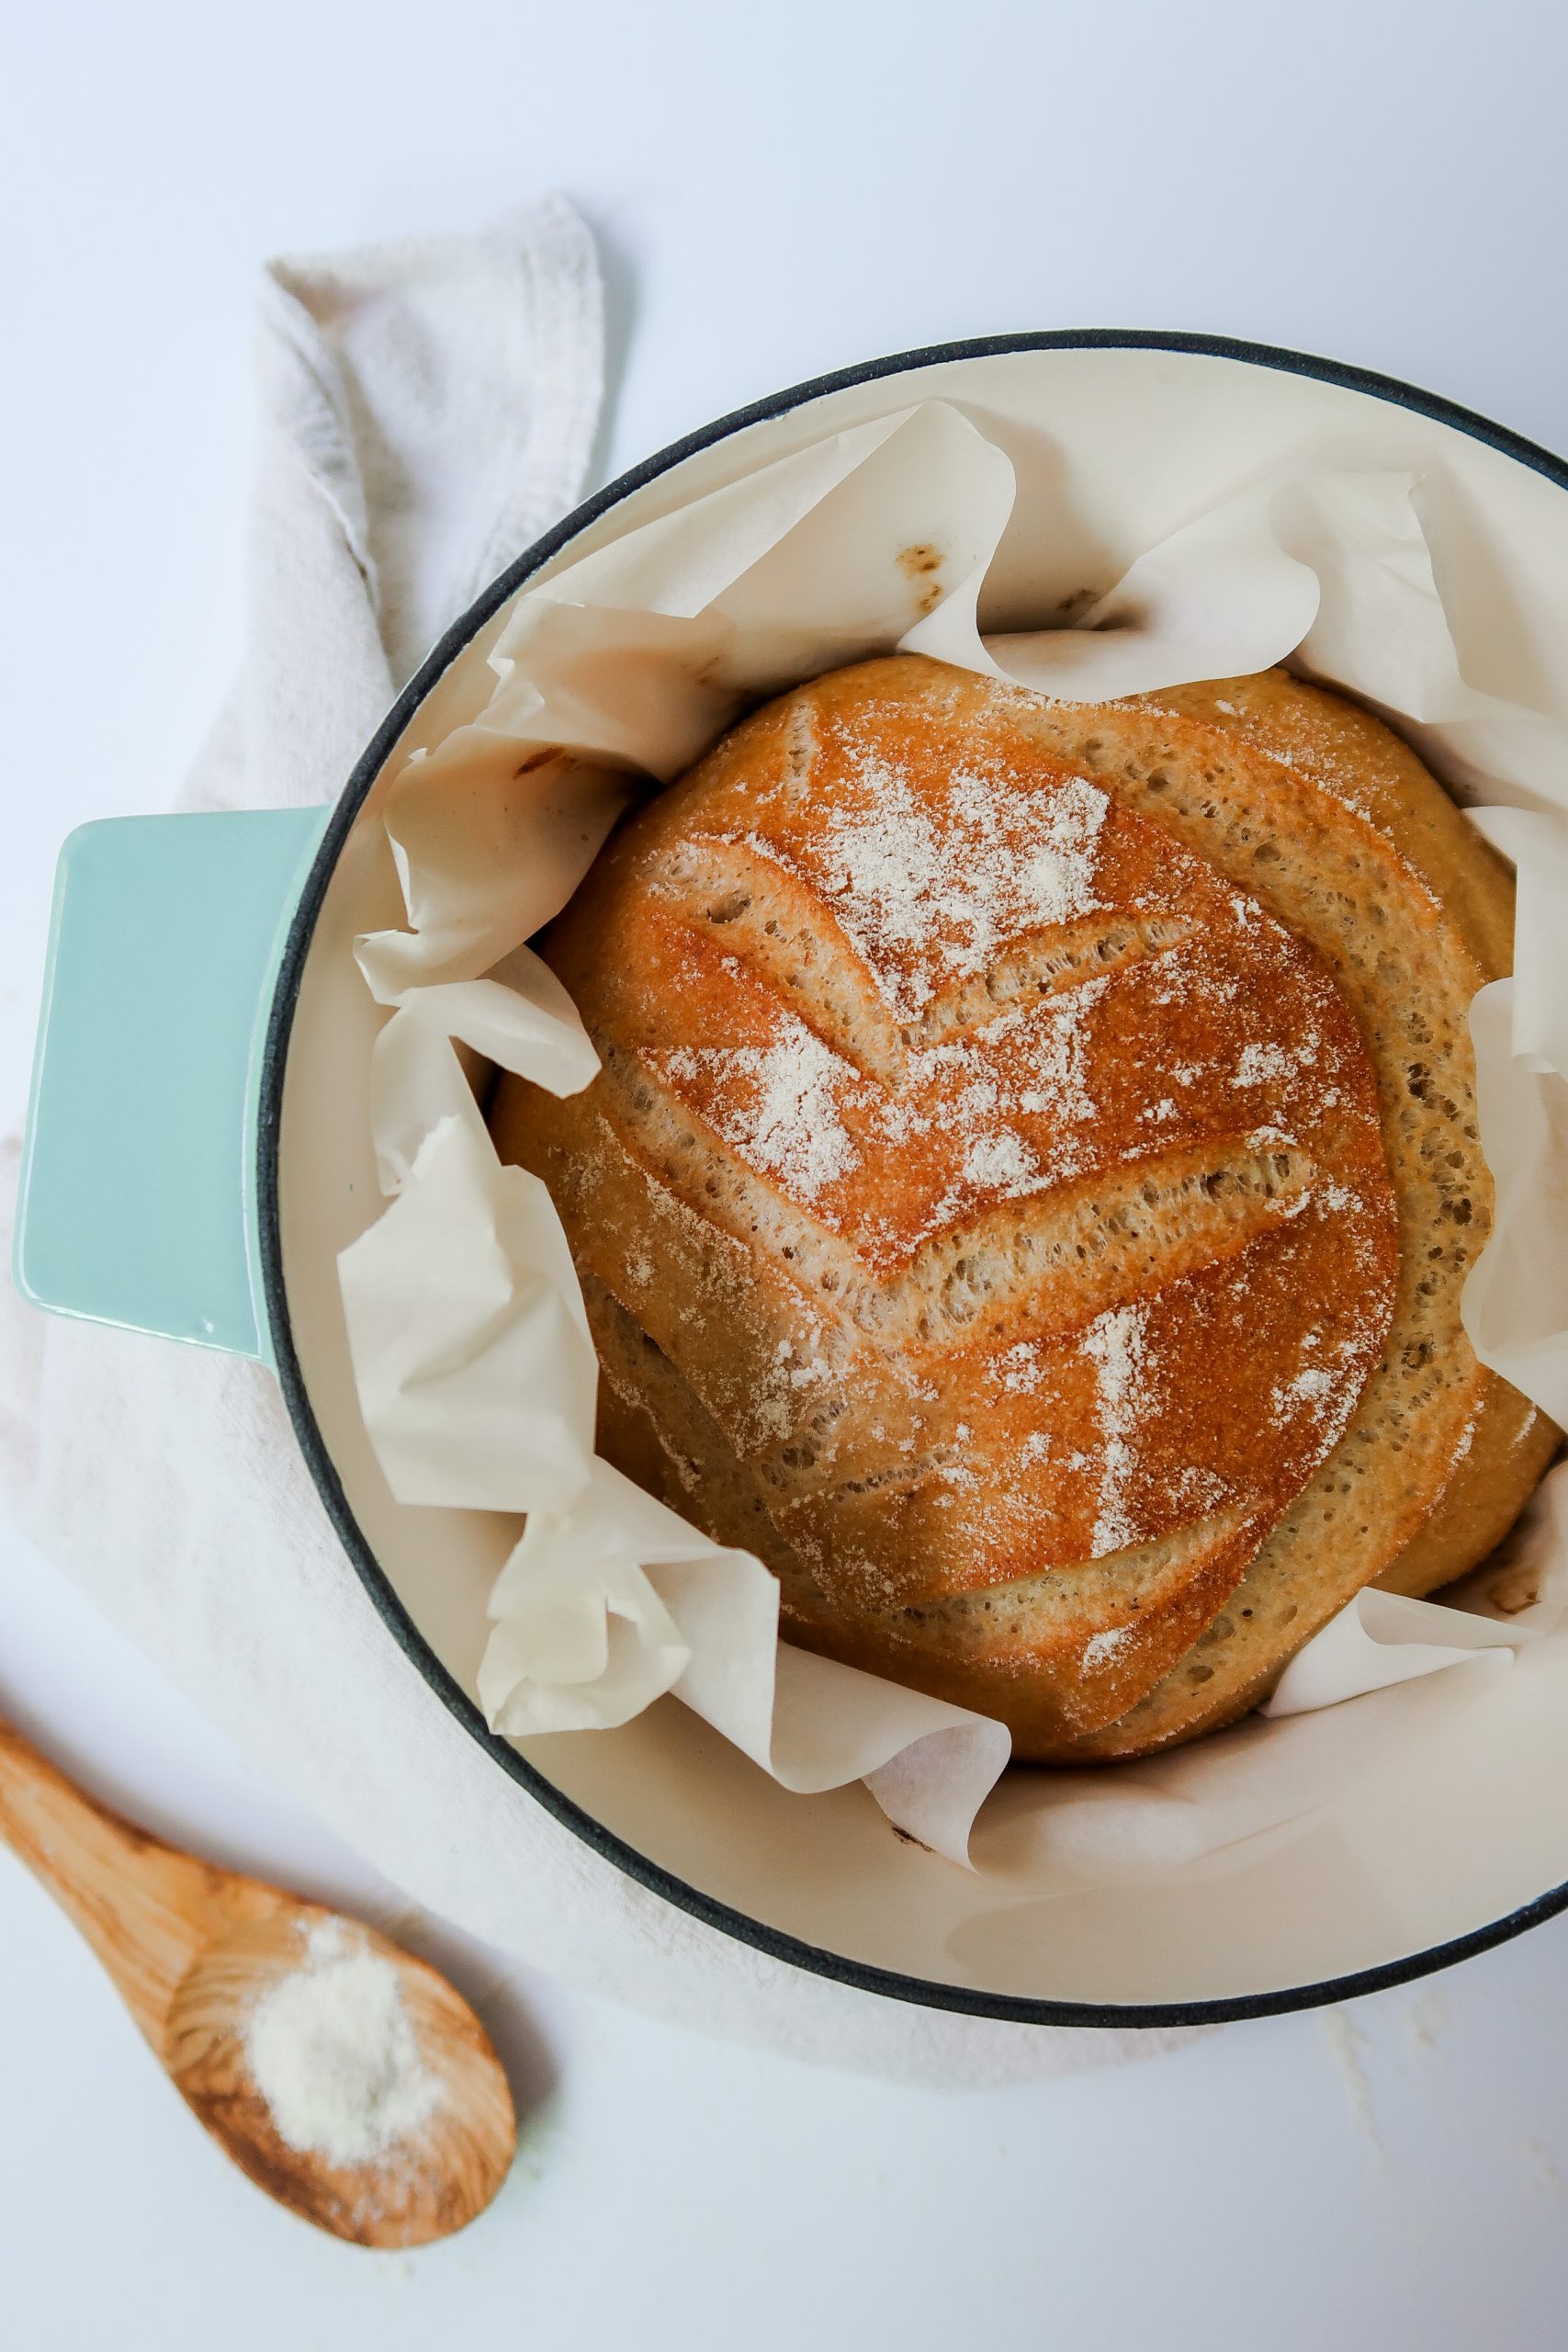
- Once the boule is ready, carefully remove the Dutch oven from the oven. Flip the boule onto a piece of parchment paper, then score a pattern into it with a lame, about ¼ to ½ inch deep. Dust the top with a little brown rice flour to help the pattern stand out after baking. Carefully lift the parchment paper and place the boule into the Dutch oven. Add 2 to 3 ice cubes behind the parchment paper (away from the bread), then cover with the lid.

- Bake the bread for 40 minutes with the lid on, then bake for an additional 20-40 minutes uncovered. The crust should be golden brown, firm to the touch, and sound hollow when tapped. The internal temperature should reach around 210°F. For a softer crust, bake uncovered for 20 minutes; for a harder crust, bake the full 40 minutes uncovered.

- Remove the bread from the oven and carefully lift the parchment paper, placing the boule on a wire rack to cool. Let it cool for at least 4-6 hours. The crumb will soften as it cools, so avoid cutting into it too soon to prevent it from drying out.

- Enjoy!

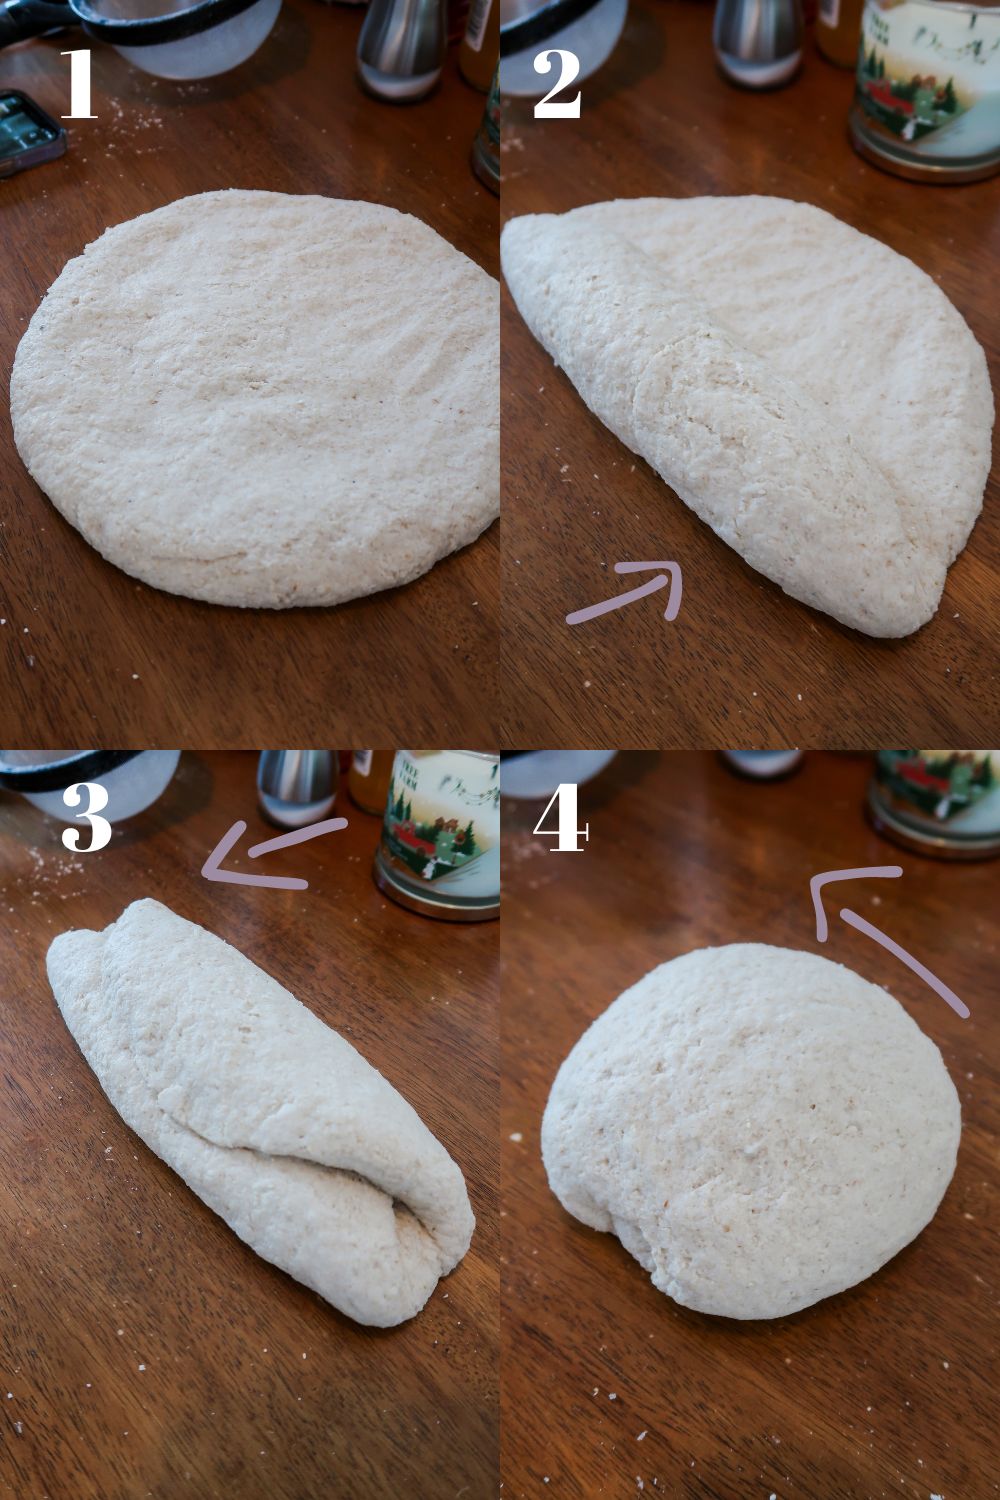
How to Shape Gluten Free Sourdough Bread:
A full post on how to shape gluten-free sourdough bread is coming soon! In the meantime, I hope the photos and steps above help you.
*Only shape and knead gluten-free sourdough bread immediately after mixing the dough and before any rising. Avoid kneading or shaping the dough after it has risen to prevent collapsing its delicate structure. Without gluten, the dough is more fragile and less structured.
- After mixing the ingredients and kneading the dough, flatten it into a thick disc, about 8 inches across, similar to making a pizza crust. Place the disc on an oiled surface.
- Fold one side of the disc to the center (hamburger style).
- Fold the other side over the first fold, also hamburger style.
- Roll the length of the folded dough, tucking it into itself as you reach the end (hotdog style).
- You should now have a ball of dough. Roll it back and forth on the counter a few times to seal the seams.
- Continue with the proofing instructions and the rest of the recipe.
How to Store Gluten Free Sourdough Bread:
Keep gluten free bread covered in an airtight container and at room temperature when not in use. This bread will stay fresh for 3 to 4 days.
You can slice and freeze this bread to keep on hand. Simply thaw it on the counter before use, then heat it up in the toaster or oven.
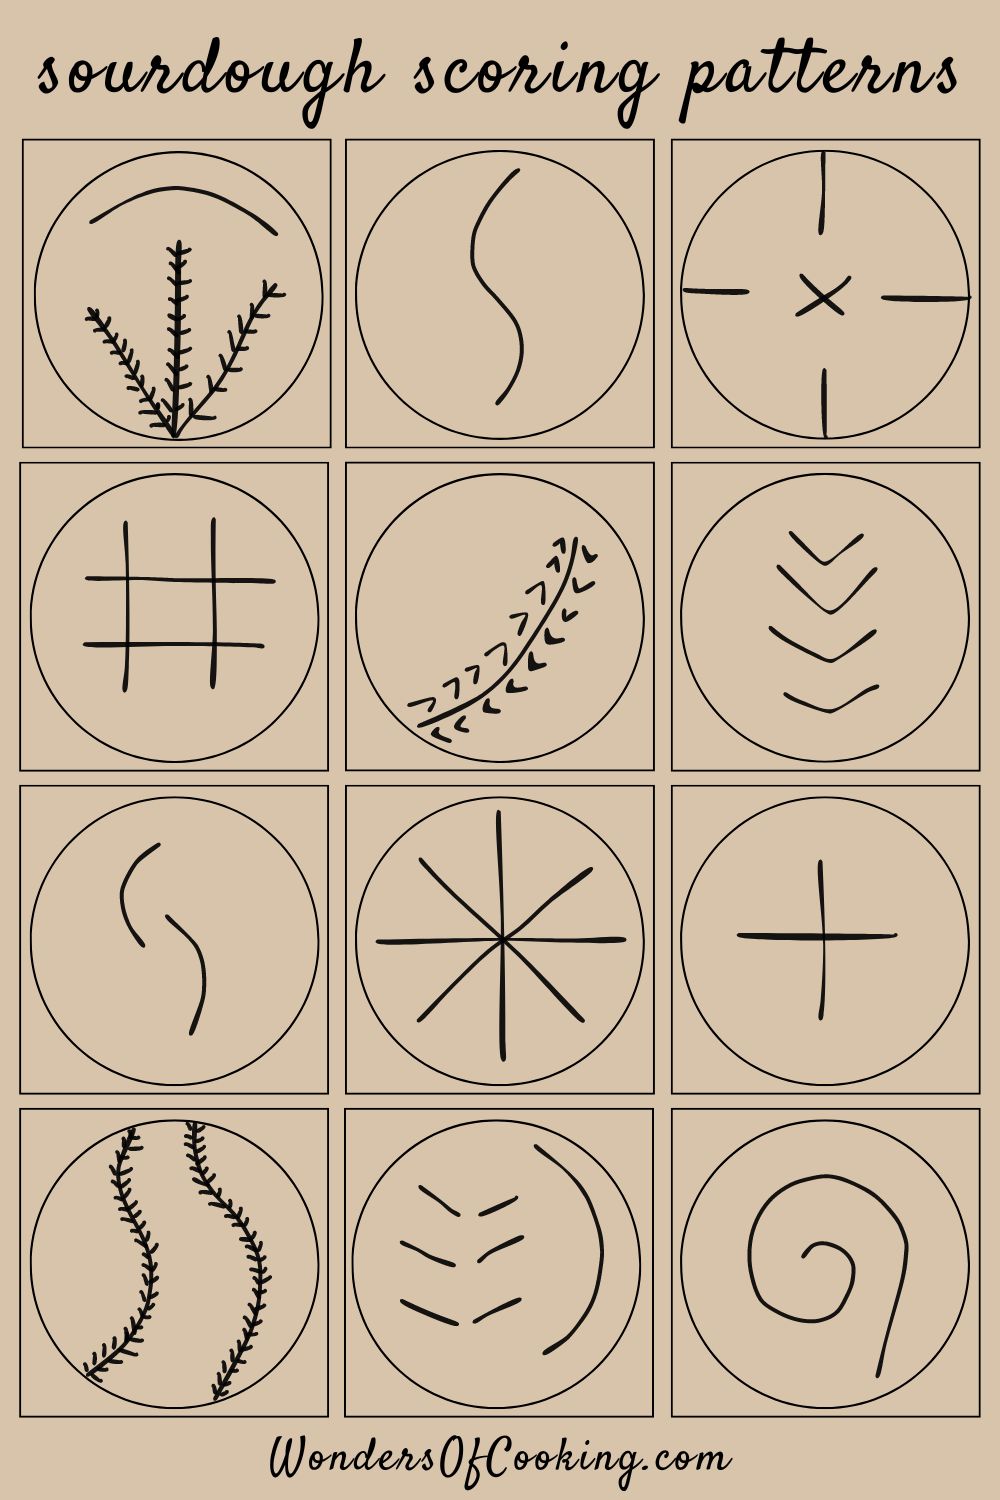
Scoring Patterns
You can find all sorts of bread scoring pattern charts online to get you inspired. They range in complexity from beginner friendly to skilled artisan. I chose a classic crescent-shaped cut with V slits beside it. Don't worry if your cuts aren't perfect—once baked, they always look great!
Uses for Gluten Free Sourdough Bread:
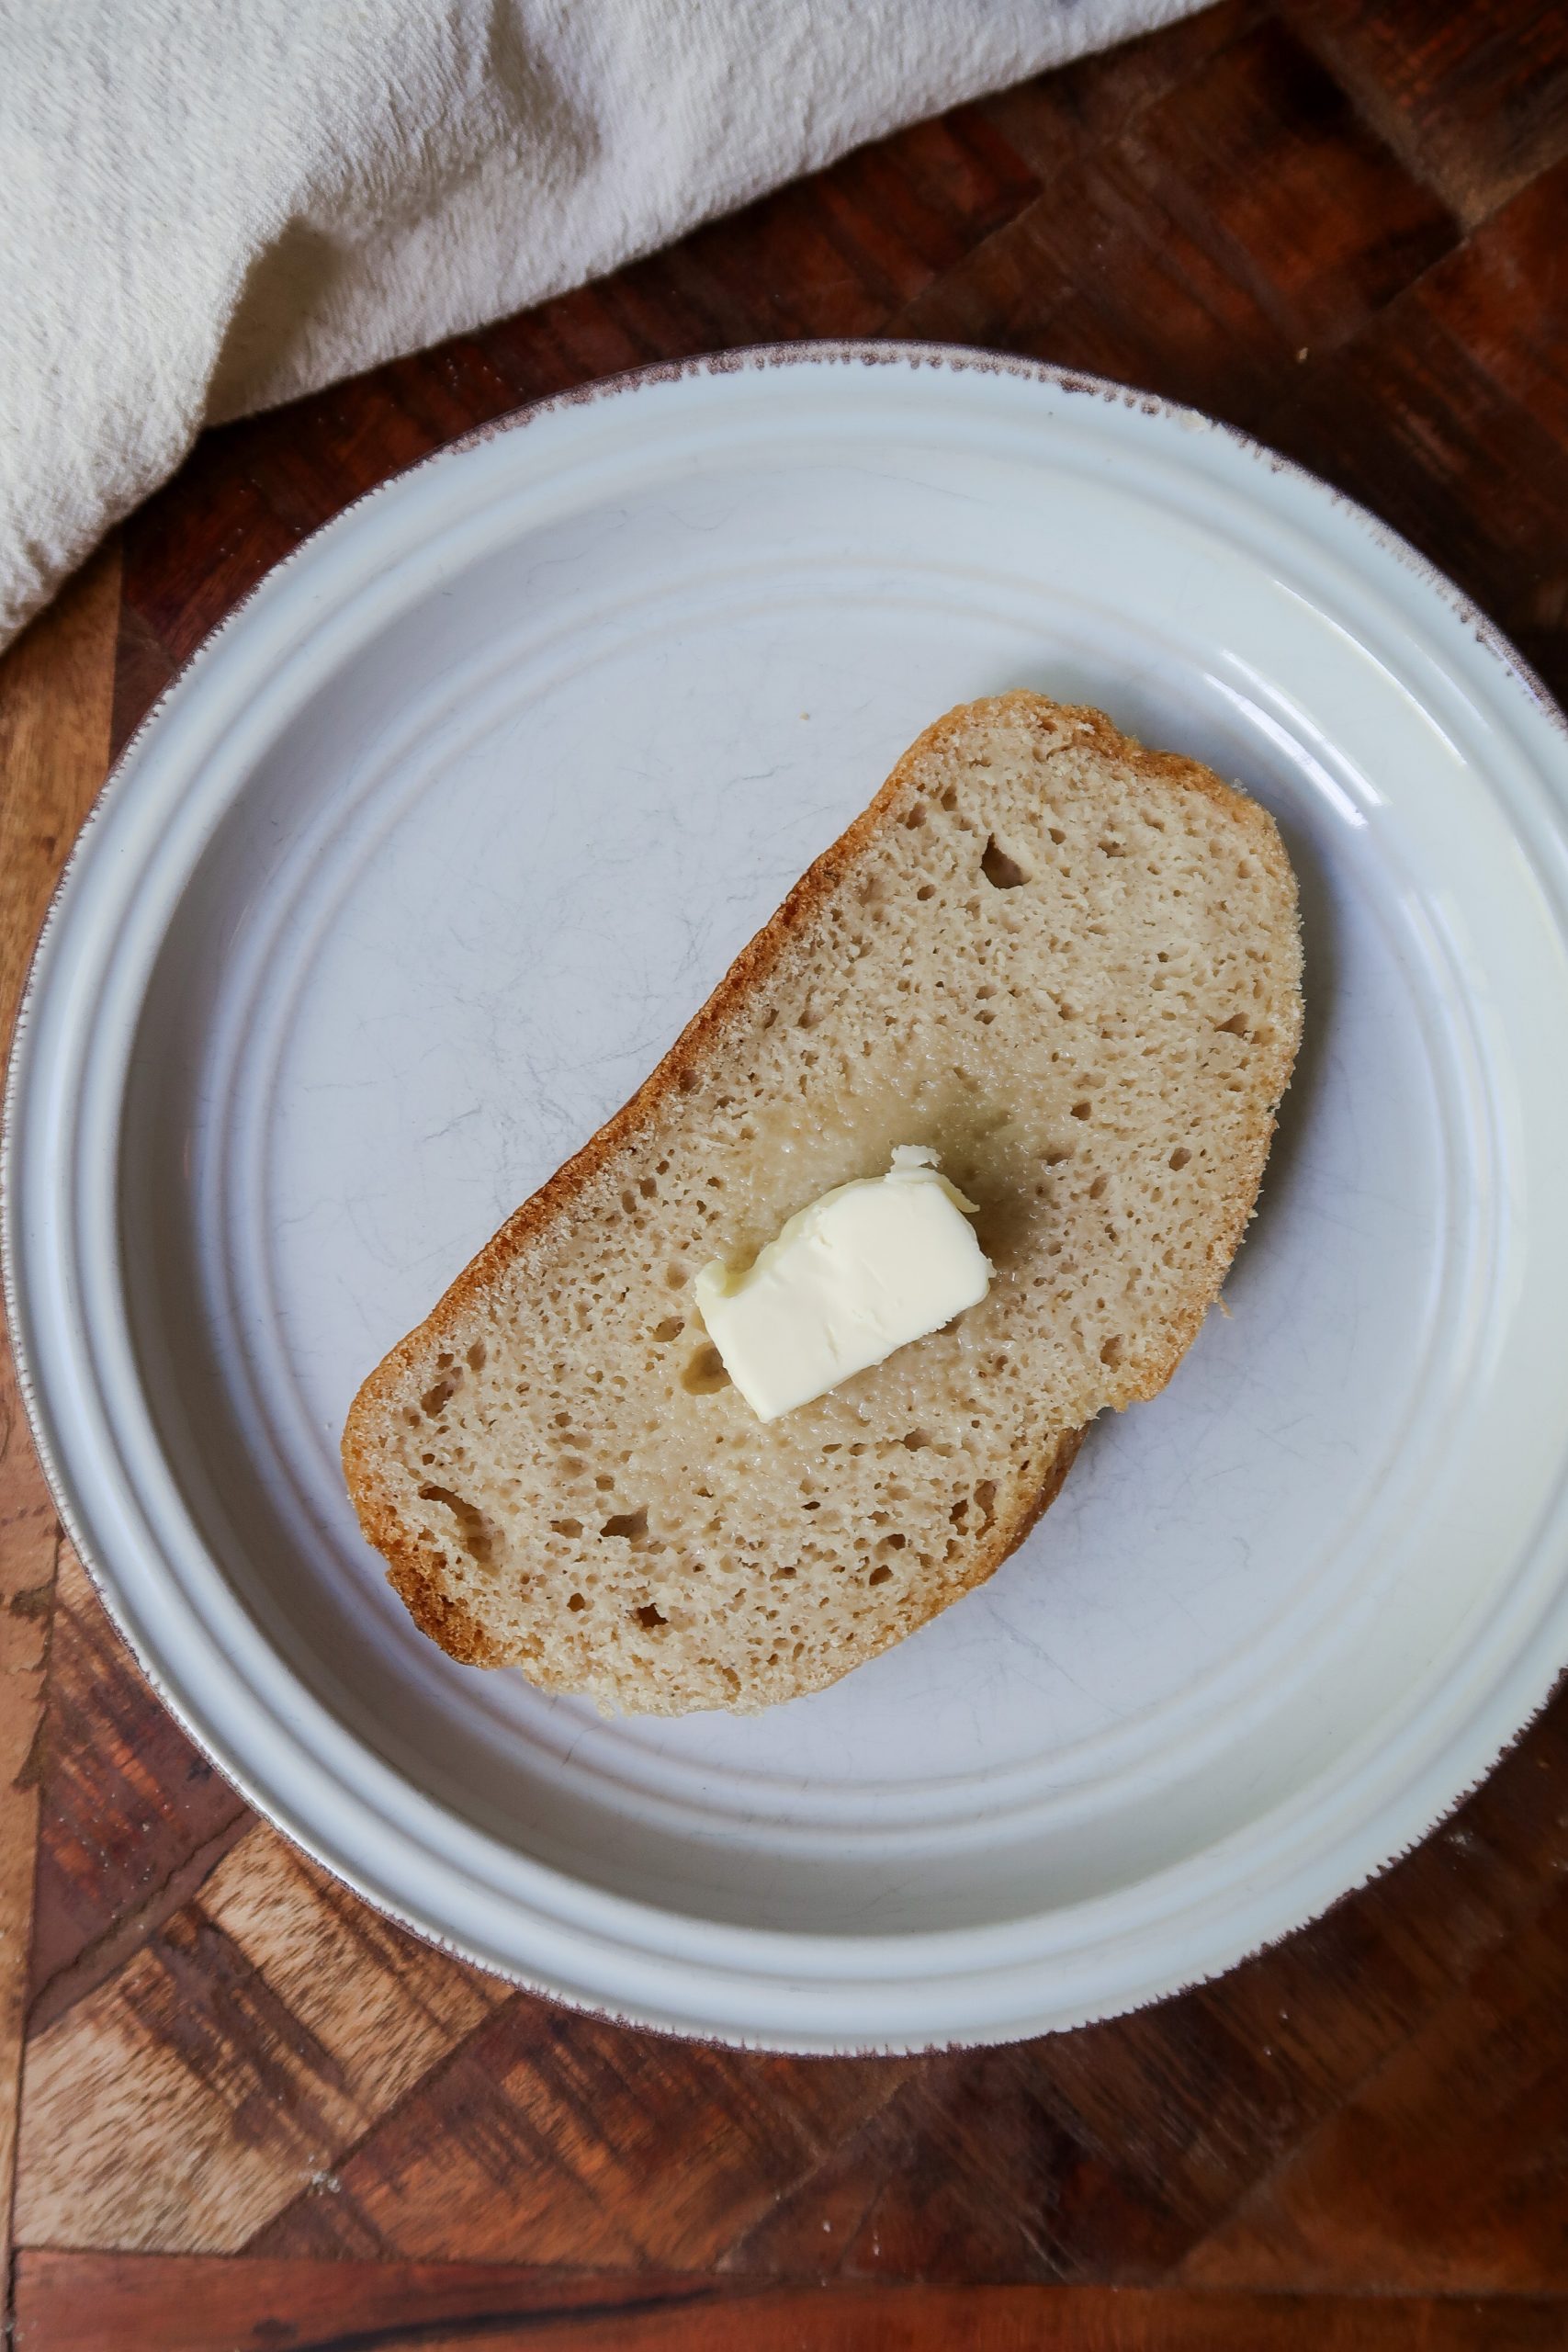
Enjoy this bread just like traditional sourdough! For testing, I ate it plain (untoasted) with butter, and it had the perfect balance of tanginess, a soft, tender crumb, and a chewy crust. I love how the ratio of flours to starches creates a tighter crumb without large air pockets, making it ideal for sandwiches or spreading with jam, butter, Nutella, and more.
- Toast this bread for hot sandwiches like BLTs, turkey clubs, grilled cheese, or chicken salad. For cold sandwiches, it works great untoasted.
- Use slices that are 3-4 days old for French toast or a French toast casserole.
- It also makes the perfect side for homemade soup—I’m thinking Broccoli Cheddar!


Loving this Gluten Free Sourdough Bread Recipe? Leave a 5-Star Rating Below!
Join my Facebook group, Gluten-Free Sourdough Baking Recipes and Advice, to share photos, swap recipes, and get real-time tips from our growing community of 7,000+ members!

Gluten Free Sourdough Bread Recipe | Dutch Oven Method
Your rating helps support the making of more tested, delicious gluten-free recipes.
Equipment
- Dutch oven or ceramic pot with a lid no wider than 1-2 inches more than your sourdough boule (Ex: If using a 7-inch banneton, aim for an 8.5 to 9-inch wide Dutch oven. I also recommend a 6 to 8-inch height.)
Ingredients
To a 150g Gluten-Free Sourdough Starter (preferably brown rice or sorghum):
- 150 g filtered room temperature water
- 150 g superfine brown rice flour
- 1 teaspoon honey
For the Sourdough Bread:
- 330 g slightly warm filtered water (between 78-85 degrees)
- 20 g whole psyllium husk not powder
- 20 g olive oil
- 20 g pure maple syrup or honey
- 8 g apple cider vinegar
- 80 g potato starch
- 80 g oat flour
- 80 g sorghum flour
- 60 g tapioca starch
- 40 g superfine brown rice flour
- 1 - 1 ½ teaspoon (6-12g) sea salt use the lower amount of salt when adding in add-ins such as olives, sun dried tomatoes, Parmesan, etc.
- 265 g active brown rice sourdough starter
Instructions
For the Gluten Free Sourdough Starter:
- The evening before baking, take your starter out of the fridge if needed. Discard down to 150g, then feed equal parts brown rice flour and room-temperature filtered water. If you need to bulk up your starter, then discard less than usual or skip discarding altogether. Smaller starters may also need an extra feeding. Leave it at room temperature overnight.150 g filtered room temperature water, 150 g superfine brown rice flour, 1 teaspoon honey
- In the morning, discard and feed the starter again using the same ratios as the night before. Place it in a slightly warm spot and let it rise until it reaches peak activity, about 2 to 4 hours.
For the Gluten Free Sourdough Bread:
- (Once the starter has reached peak rise) In a large mixing bowl or bowl of a stand mixer, combine the psyllium husk with the wet ingredients. Whisk until fully blended, then let sit for 5 to 10 minutes to "gel".Tip: Always use filtered water. I like to let mine sit out while the starter is rising, then check the temperature with a meat thermometer. If it's too cool, briefly warm it in the microwave in 5- to 10-second intervals.330 g slightly warm filtered water (between 78-85 degrees), 20 g whole psyllium husk, 20 g olive oil, 20 g pure maple syrup or honey, 8 g apple cider vinegar
- Sift the dry ingredients over a medium-sized mixing bowl. Add in the salt, then stir until completely combined.80 g potato starch, 80 g oat flour, 80 g sorghum flour, 60 g tapioca starch, 40 g superfine brown rice flour, 1 - 1 ½ teaspoon (6-12g) sea salt
- Add the dry ingredients to the bowl with the wet mixture, followed by 265g of active sourdough starter. Mix using a spoon, your hands, or an electric mixer until a dough forms, then continue mixing for an additional 30 seconds. The dough should be sticky yet smooth and easy to work with. If it feels too dry or isn't coming together, add 1-2 tablespoons of water as needed.265 g active brown rice sourdough starter
- Dust a 7-inch banneton basket or proofing bowl with brown rice flour to prevent sticking. Shape the dough into a classic ball or "boule" shape, smoothing out any imperfections. Place the dough smooth side down in the basket (when flipped, the bottom will become the top of the loaf).
- Cover the basket with a damp tea towel and set it aside to rise for 3 to 5 hours. Once the boule has risen ½ to 1 inch, it’s ready to bake.Note: The change is very subtle to the naked eye. To be sure, try snapping a before photo to compare how it's changed.
- An hour before the boule reaches peak rise, preheat the oven to 425°F with the Dutch oven inside. Tip: Position the racks so the Dutch oven is centered in the oven.
- Once the boule is ready, carefully remove the Dutch oven from the oven. Flip the boule onto a piece of parchment paper, then score a pattern into it with a lame, about ¼ to ½ inch deep. Dust the top with a little brown rice flour to help the pattern stand out after baking. Carefully lift the parchment paper and place the boule into the Dutch oven. Add 2 to 3 ice cubes behind the parchment paper (away from the bread), then cover with the lid.
- Bake the bread for 40 minutes with the lid on, then bake for an additional 20-40 minutes uncovered. The crust should be golden brown, firm to the touch, and sound hollow when tapped. The internal temperature should reach around 210°F. For a softer crust, bake uncovered for 20 minutes; for a harder crust, bake the full 40 minutes uncovered.
- Remove the bread from the oven and carefully lift the parchment paper, placing the boule on a wire rack to cool. Let it cool for at least 4-6 hours. The crumb will soften as it cools, so avoid cutting into it too soon to prevent it from drying out.
- Enjoy!


Jenny
Do you ever add baking powder to your recipe to help with the rise?
Thanks!
madison
Hi, Jenny, I have not added baking powder to stay true to typical sourdough. I also enjoy the crumb of this bread as is with the sourdough starter as the sole rising agent so haven't felt the need to. A younger starter may benefit by adding 1 tsp of baking powder, however. If you try it, please let me know how you liked it!
Carrie Hall
Could I substitute more of another flour (or a mixture) for the sorghum flour?
madison
You can substitute white teff flour or additional GF oat flour for the sorghum.
Christin
What would be a good substitute for the olive oil? Could we use avocado or coconut oil instead?
madison
Yes, you can use both of those oils as replacements (as long as its refined coconut oil to avoid any coconut flavor). Take the weight of the melted oil. However, I'd recommend avocado over coconut, since it's closer in body to olive oil. The EVOO does add a richness to the bread, so if you find the avocado oil lacking, you could try adding in a little more salt next time.
Michele
This is the best recipe. Easy
Liana
This is by far my favourite GF sourdough bread! i keep tagging you in my facebook posts 🙂 Question: I fed my GF starter 3 days ago, it doubled, i put in fridge. Can i take out and use it tonight or do i have to do another feeding?
madison
Awh, I'm so happy to hear this, Liana! So glad you're enjoying the bread. I recommend feeding the starter again before preparing the recipe and using at peak rise, that way you will be guaranteed a good rise.
Kristy
This bread is absolutely perfect!! I’ve made several GF sourdough breads using different recipes & this is by far our favorite!! Thank you so much!!!
Erica
Great recipe! But I wonder if 1/2tsp for an entire loaf is correct?
My bread tastes unsalted, and not in a good way. I normally put in 10-12g for a loaf that size
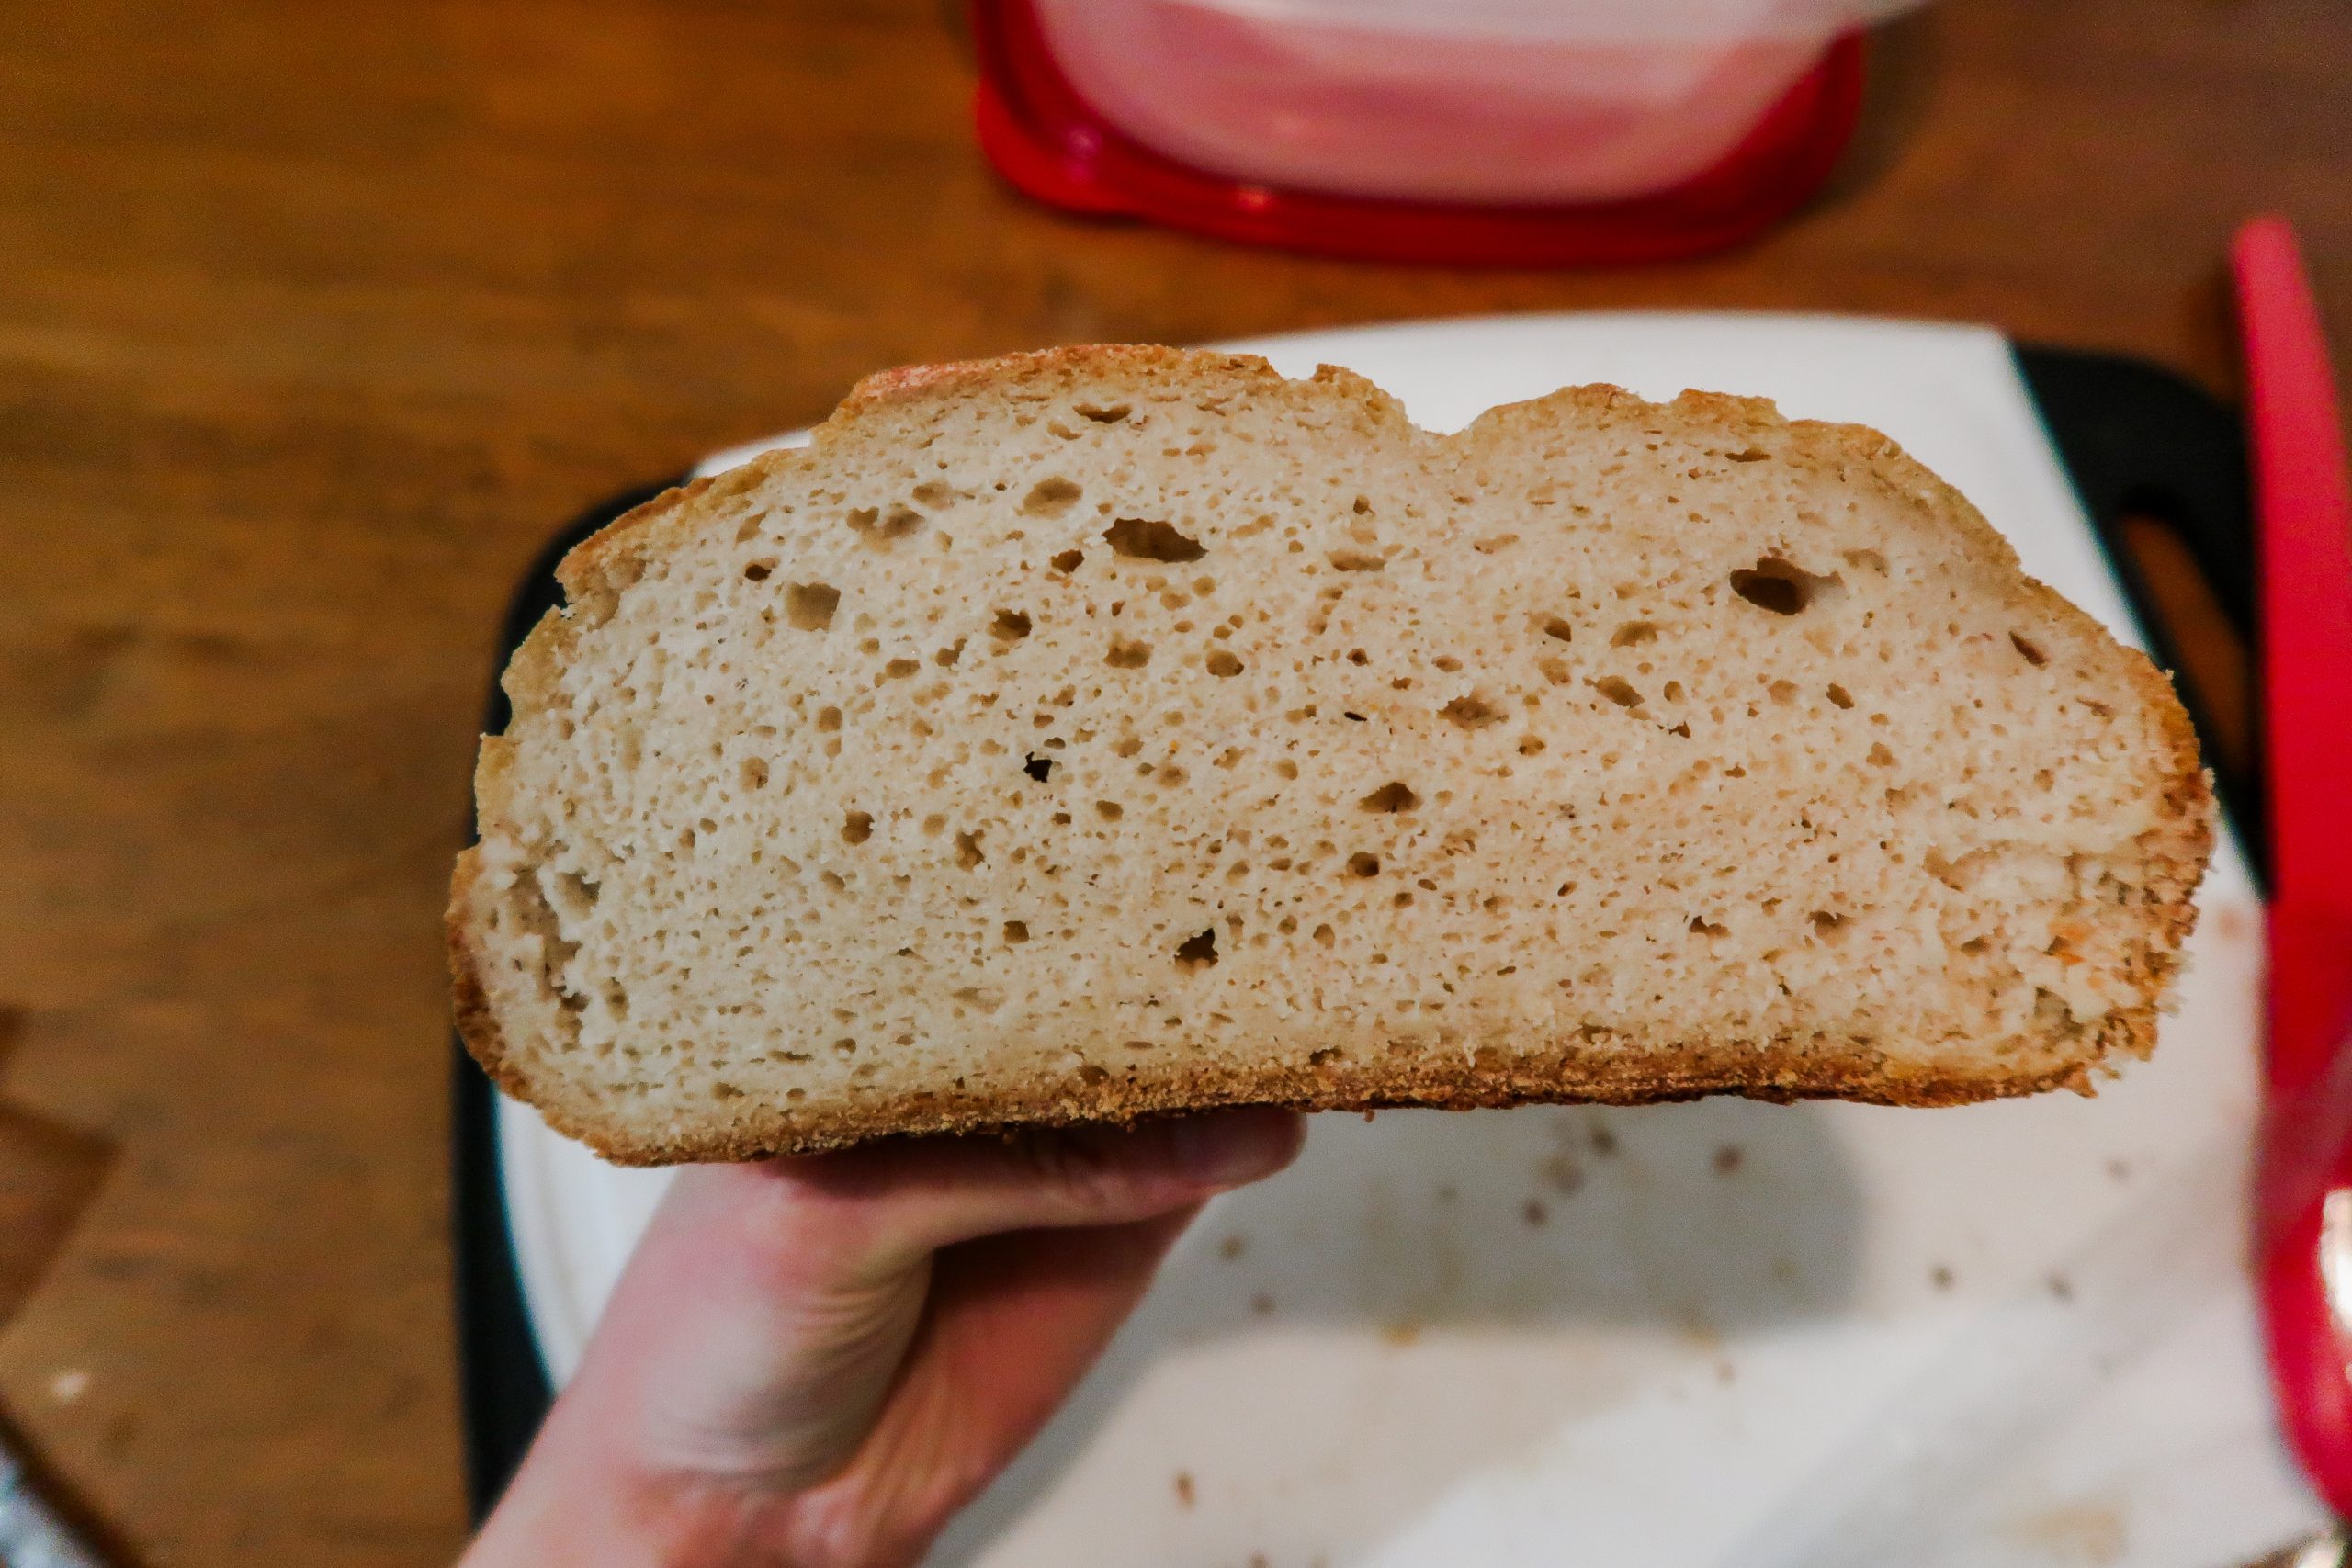
Also, do you have any tips on how to look for being overproofed? My top collapsed in from the crust, which usually indicates it's overproofed, but I definitely couldn't tell when I put it in
Thank you so much
madison
Hi Erica, I'm so glad you love the bread! I and many readers thought the bread was perfect at 1/2 tsp of salt (it might depend a little on age and sourness of the starter) but a few have mentioned wanting a little more salt. I added a note with an option to increase it up to 10g, but I recommend keeping low if adding in salty additions like everything bagel seasoning, olives, etc. As for when to tell when its ready, the dough should rise about 1/2-inch to 1-inch within 3 to 5 hours (may be less if in a warm or humid environment) and have a slightly domed look to it. It should feel soft and airy and spring back when poked. I hope that helps!