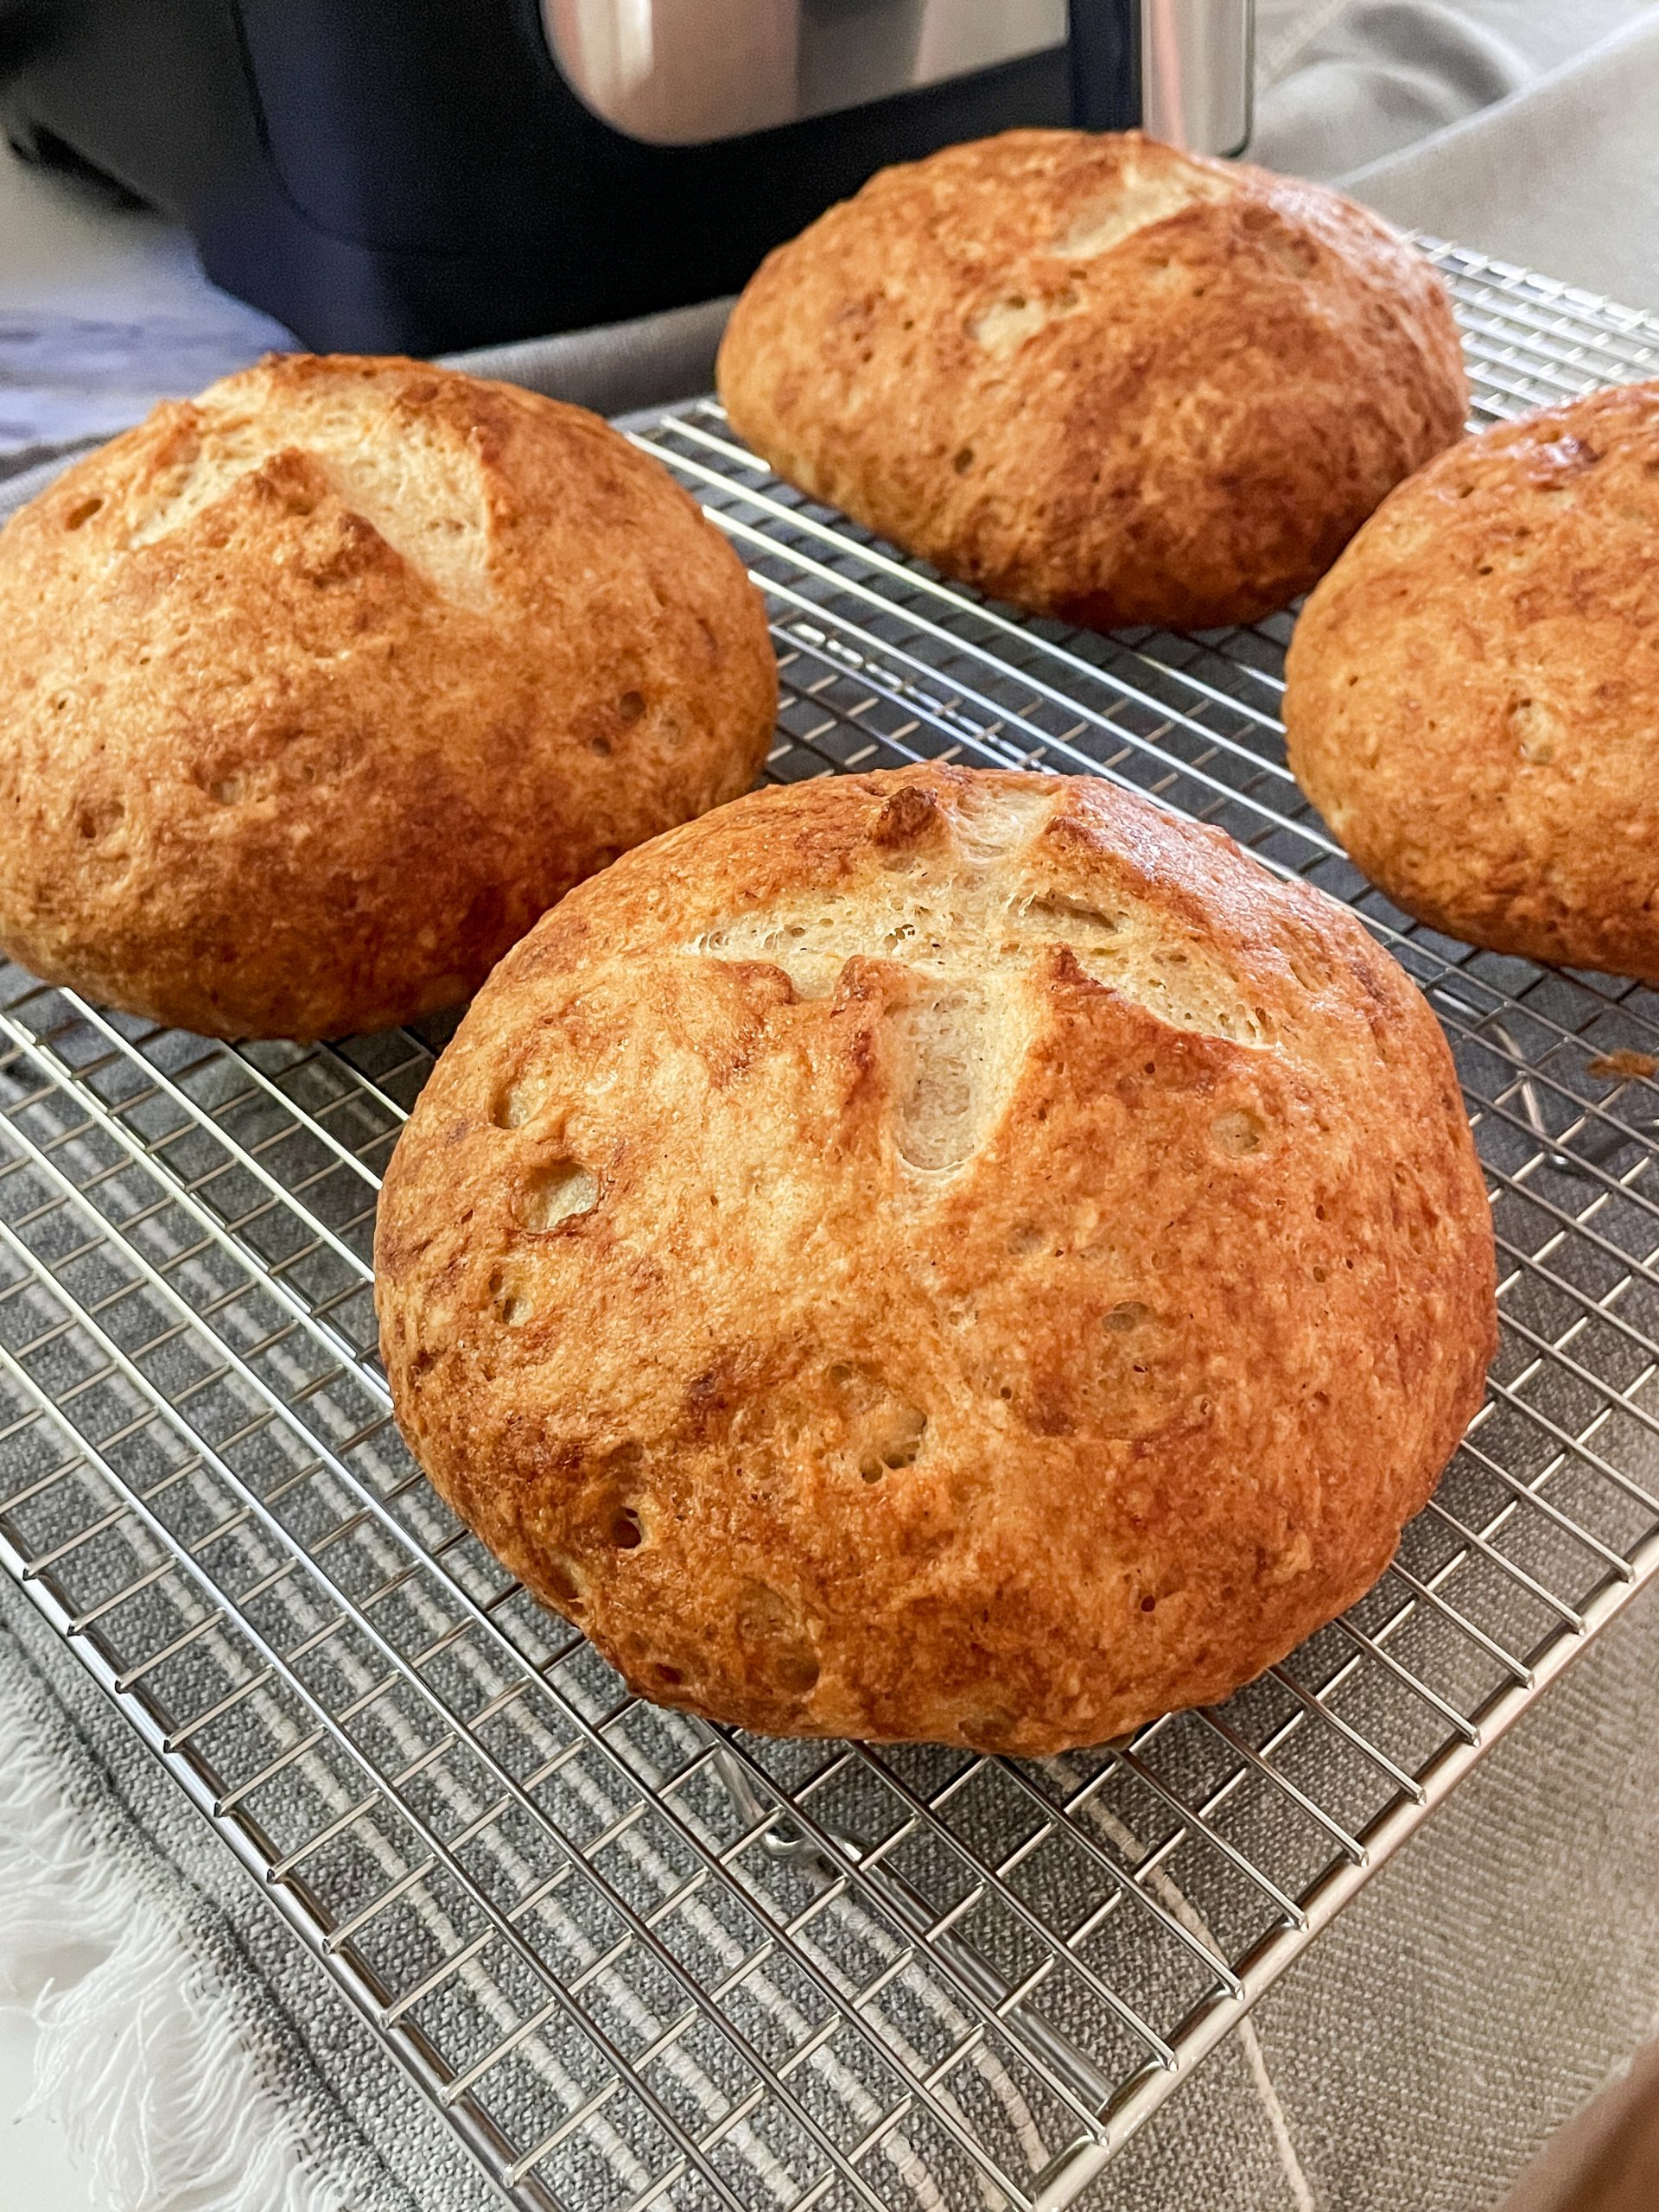
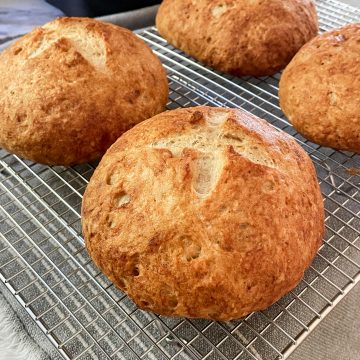
This Gluten Free Bread Bowl recipe delivers all the cozy, rustic charm of the classic version you might remember, making it the ultimate comfort food.
Unlike many gluten-free breads, the dough is forgiving and easy to work with, meaning little frustration. The finished bread bowls have a beautiful crusty and chewy exterior with a pillowy soft interior. This gluten free artisan bread is also dairy-free and vegan (apart from an egg wash, which you can replace with oil.)
Ladle in your favorite soup or hearty chili, and you’ve got a perfect pairing that feels like home in every bite. Or the Renaissance fair, if you're like me and always got the soup-in-a-bread-bowl!

As an Amazon Associate, I earn from qualifying purchases. You can read my full disclosure here. All thoughts and opinions expressed are my own. Thank you for supporting Wonders of Cooking so that I can continue to provide you with free gluten-free recipes.
These bread bowls also can easily be turned into Gluten Free Sourdough Bread Bowls, using gluten-free sourdough discard in place of some of the brown rice flour and water.
Looking for More Bread Recipes?
- Gluten Free Bread Recipe - Soft Sandwich Bread that Rises
- Honey Oat Bread - Best Gluten Free Baking
- Gluten Free Sourdough Bread Recipe | Dutch Oven Method
- Gluten Free Sourdough Sandwich Bread | Sourdough Discard Recipes
- Chocolate Banana Bread - Gluten Free Banana Bread Recipe
- Best Gluten Free Peach Bread | Gluten Free Peach Recipes
- Gluten Free Banana Bread Muffins - Banana Nut Muffins (One Bowl)
- Gluten Free Rolls Recipe (that rise!) - Great Value Recipe
Tips for Making the Best Gluten Free Bread Bowls:
- Knead the dough until it's completely smooth before shaping. You can't overwork it—the smoother the dough, the nicer the bread bowls will be.
- Lightly flour your hands (or use oiled hands) when shaping. Smooth, round balls will bake more evenly and make better bowls. I also recommend shaping into "tall" balls. This just means to make sure the balls have height to them and aren't discs, as the dough will naturally settle some as it rises.
- Do not replace the whole psyllium husk flake with psyllium powder. This recipe has been tested only with the whole husks and requires it to gel up in order for it to produce a structured, elastic dough.
- Give the dough time to rise in a warm, draft-free spot until noticeably puffy, about one hour. This ensures the bread bowls aren’t too dense.
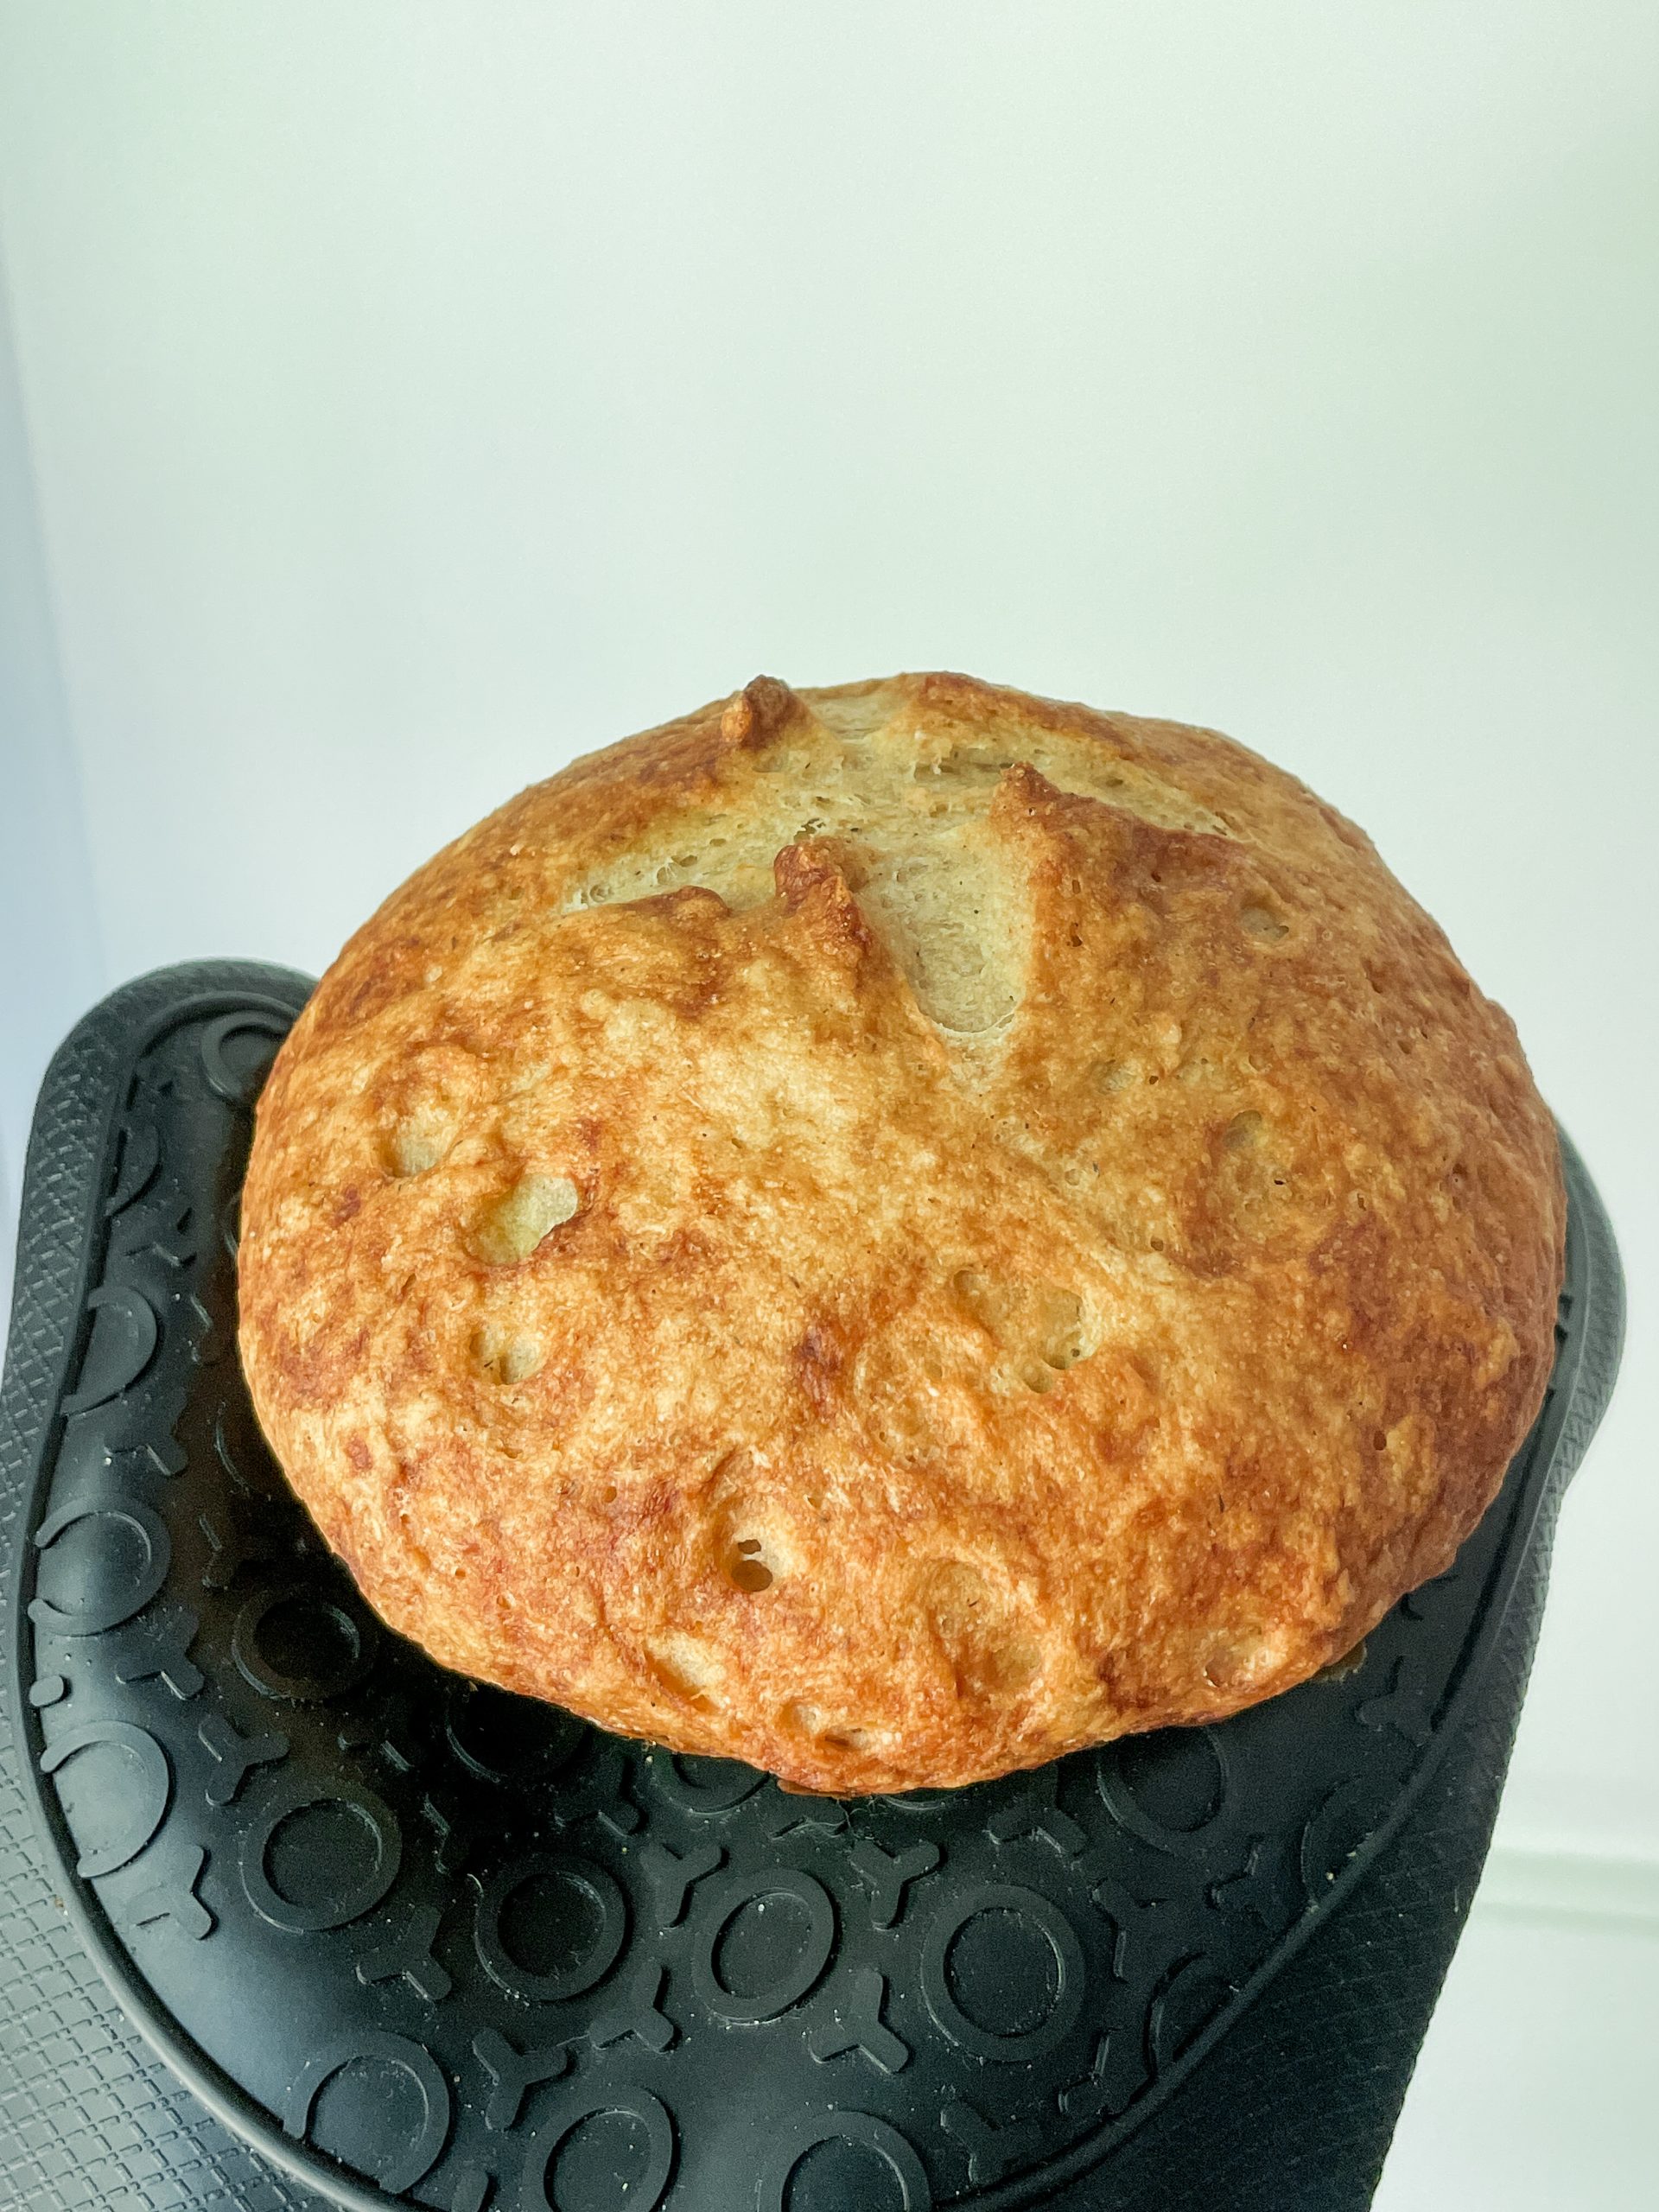
- Score the tops of each bread bowl with an X before baking to allow the steam to escape.
- These bread bowls cook with an open bake method. (The instructions tell you exactly what to do to achieve this.) You will need a cast iron skillet below a large sheet pan. You place a couple of ice cubes in the skillet for the first 15 minutes of baking to create a chewy, hard crust.
- Let the bread bowls cool at least 30 minutes before cutting and scooping out the centers for soup. You may want to make these the morning before your dinner. (That's what I did.)
- To cut the top off your bread bowl, use a serrated knife and angle it slightly inward as you cut a circle about 1 to 2 inches in from the edge—think of carving the lid of a pumpkin. (You can always widen the opening later if needed.) Gently lift off the top and set it aside to serve alongside the bread bowl for dipping. Then, use your fingers or a spoon to carefully hollow out the inside, leaving about a ¾-inch wall around the bottom and sides. This keeps the bread bowl sturdy and prevents any soup from leaking through.
- Don't overfill the bread bowls. While sturdy, gluten free bread bowls can soften quickly if overloaded with hot liquid. Choose thicker soups or chili, and serve immediately after filling.

Ingredients to Make this Gluten Free Bread Bowl Recipe:
(Psyllium gel)
- Whole psyllium husk, not powder
- Warm water
(Dry Ingredients)
- Tapioca starch, or arrowroot or cornstarch
- Potato starch, or arrowroot or cornstarch
- Brown rice flour
- Sorghum flour, or light buckwheat, white teff, or oat flour
- Instant yeast
- Granulated sugar
- Salt
(Wet Ingredients)
- Olive oil
- Apple cider vinegar
- One egg, for the egg wash. If egg-free or vegan: You can brush the bread with oil instead.

Gluten Free Bread Bowl Recipe:
- Prepare a large cookie sheet by greasing with nonstick cooking spray, or lining with parchment paper. Set aside.
- Make the psyllium gel: In a medium bowl, combine the psyllium husk and warm water. Stir well, then set aside to thicken into a gel.
- In a large mixing bowl, whisk together the tapioca starch, potato starch, brown rice flour, sorghum flour, sugar, instant yeast, and salt until fully combined. Use the back of a measuring cup to create a well in the center of the mixture, then set aside.
- Stir the apple cider vinegar and olive oil into the psyllium gel, then pour the mixture into the well of the dry ingredients.
- Gradually work the dry ingredients into the wet, kneading until the dough is smooth, about 5 to 6 minutes. The dough should be slightly sticky to the touch but easy to handle and able to hold its shape. Avoid adding extra flour unless absolutely necessary. Once kneaded, shape the dough into a ball.
- Lightly flour a clean work surface and place the dough ball on top. Use a dough cutter to divide it into four wedges. For accuracy, weigh each portion to ensure they’re about 380 grams each.
- Working with one wedge at a time, knead and shape the dough into a ball, pinching and smoothing any seams closed at the bottom. Gently squeeze the dough upward as you shape to create a taller, rounded form—this extra height helps maintain structure as the dough settles during rising, resulting in better-shaped bowls.
- Repeat with remaining dough. Then, transfer the shaped dough balls to the prepared baking sheet, spacing them a few inches apart from each other and the edges of the pan.
- Cover the dough with plastic wrap or a warm, slightly damp tea towel, and set it in a warm spot to rise until noticeably puffy and about doubled in size, about 1 hour.

- About 30 minutes before the dough has finished proofing, preheat the oven to 425°F. Position the oven rack in the middle, and place a cast iron skillet or heavy-duty baking tray (avoid ceramic or glass) on the lowest rack.
- For the egg wash: Whisk an egg in a small bowl. When the dough is puffy, brush the egg wash evenly over the surface.
- Using a bread lame or a sharp knife, score an X into the center of each bread bowl to let steam escape.

- Put the bread bowls in the oven, add 5 ice cubes to the cast iron skillet, then quickly close the oven door and reduce the temperature to 400°F. Bake for 15 minutes.
- After 15 minutes, open the oven door to release the steam and carefully remove the bottom skillet. Continue baking for another 25-30 minutes, until the bread turns golden brown. *Keep an eye on the bottoms after the 25-minute mark, so they don't start to burn.
- Remove from the oven and transfer to a wire cooling rack. Allow to cool at least 30 minutes before cutting the tops of the bread bowls.
- To cut the top off your bread bowl, use a serrated knife and angle it slightly inward as you cut a circle about 1 to 2 inches in from the edge—think of carving the lid of a pumpkin. (You can always widen the opening later if needed.) Gently lift off the top and set it aside to serve alongside the bread bowl for dipping. Then, use your fingers or a spoon to carefully hollow out the inside, leaving about a ¾-inch wall around the bottom and sides. This keeps the bread bowl sturdy and prevents any soup from leaking through.
- Ladle your thick soup or chili inside.
- Enjoy!
Equipment
You only need basic tools to make this Gluten Free Bread Bowl recipe. I recommend:
- A large cast iron skillet
- A large cookie sheet
- A kitchen scale
- A stand-mixer, optional
- A dough cutter
- A bread knife
- Silicone spatulas
- A digital thermometer
How to Store Gluten Free Bread Bowls:
You can store gluten free artisan bread bowls wrapped tightly in an airtight container at room temperature for three to four days. I recommend cutting the tops off as you use them, rather than all at once.
To soften: Toast or broil the bread bowls for a few minutes in the oven just before serving.
Tried this Gluten Free Bread Bowl Recipe? Leave a 5-Star Rating Below!
Gluten Free Bread Bowl Recipe | Gluten Free Artisan Bread
Your rating helps support the making of more tested, delicious gluten-free recipes.
Equipment
- stand mixer optional
Ingredients
Psyllium Gel:
- 40 g whole psyllium husk not powder
- 720 g warm water, between 100 to 110 ℉
Dry Ingredients:
- 144 g tapioca starch or cornstarch or arrowroot
- 144 g potato starch or cornstarch or arrowroot
- 290 g brown rice flour
- 100 g sorghum flour or oat flour, light buckwheat, or white teff
- 30 g granulated sugar
- 12 g instant yeast I use Fleischmann's RapidRise
- 16 g salt
Wet Ingredients:
- 30 g olive oil
- 16 g apple cider vinegar
- 1 large egg for the egg wash
Instructions
- Prepare a large cookie sheet by greasing with nonstick cooking spray, or lining with parchment paper. Set aside.
- Make the psyllium gel: In a medium bowl, combine the psyllium husk and warm water. Stir well, then set aside to thicken into a gel.40 g whole psyllium husk, 720 g warm water, between 100 to 110 ℉
- In a large mixing bowl, whisk together the dry ingredients. Use the back of a measuring cup to create a well in the center of the mixture, then set aside.144 g tapioca starch, 144 g potato starch, 290 g brown rice flour, 100 g sorghum flour, 30 g granulated sugar, 12 g instant yeast, 16 g salt
- Stir the vinegar and oil into the psyllium gel, then pour the mixture into the well of the dry ingredients.30 g olive oil, 16 g apple cider vinegar
- Gradually work the dry ingredients into the wet, kneading until the dough is smooth, about 5 to 6 minutes. The dough should be slightly sticky to the touch but easy to handle and able to hold its shape. Avoid adding extra flour unless absolutely necessary. Once kneaded, shape the dough into a ball.
- Lightly flour a clean work surface and place the dough ball on top. Use a dough cutter to divide it into four wedges. For accuracy, weigh each portion to ensure they’re about 380 grams each.
- Working with one wedge at a time, knead and shape the dough into a ball, pinching and smoothing any seams closed at the bottom. Gently squeeze the dough upward as you shape to create a taller, rounded form—this extra height helps maintain structure as the dough settles during rising, resulting in better-shaped bowls.
- Repeat with remaining dough. Then, transfer the shaped dough balls to the prepared baking sheet, spacing them a few inches apart from each other and the edges of the pan.
- Cover the dough with plastic wrap or a warm, slightly damp tea towel, and set it in a warm spot to rise until noticeably puffy and about doubled in size, about 1 hour.
- About 30 minutes before the dough has finished proofing, preheat the oven to 425°F. Position the oven rack in the middle, and place a cast iron skillet or heavy-duty baking tray (avoid ceramic or glass) on the lowest rack.
- For the egg wash: Whisk an egg in a small bowl. When the dough is puffy, brush the egg wash evenly over the surface.1 large egg
- Using a bread lame or a sharp knife, score an X into the center of each bread bowl to let steam escape.
- Put the bread bowls in the oven, add 5 ice cubes to the cast iron skillet, then quickly close the oven door and reduce the temperature to 400°F. Bake for 15 minutes.
- After 15 minutes, open the oven door to release the steam and carefully remove the bottom skillet. Continue baking for another 25-30 minutes, until the bread turns golden brown. *Keep an eye on the bottoms after the 25-minute mark, so they don't start to burn.
- Remove from the oven and transfer to a wire cooling rack. Allow to cool at least 30 minutes before cutting the tops of the bread bowls. To cut the top off your bread bowl: Use a serrated knife and angle it slightly inward as you cut a circle about 1 to 2 inches in from the edge—think of carving the lid of a pumpkin. (You can always widen the opening later if needed.) Gently lift off the top and set it aside to serve alongside the bread bowl for dipping. Then, use your fingers or a spoon to carefully hollow out the inside, leaving about a ¾-inch wall around the bottom and sides. This keeps the bread bowl sturdy and prevents any soup from leaking through.
- Ladle your thick soup or chili inside. Enjoy!


madison
I want to know: What soup do you NEED to put in a bread bowl?